Everything, Leather, Tutorials
Making a Whip (part 1)

Nov
 Well, sometime about a year ago I decided I wanted to pick up a new skill in leatherwork. I bought some books, looked around the internet and after a bit of research landed on the art of whip-making. It may sound a bit odd, but hey it’s also a bit interesting. Kind of a dying art really. Way back in the day when cattle ranching was the way of the West there were all types of specialty trades in existence, one of them included the whipmaker. Before I go any further I should explain that whips in the West were never intended to hurt the cattle. In fact hurting any cow on a ranch or in the range would be considered good reason for expulsion from all work duties.
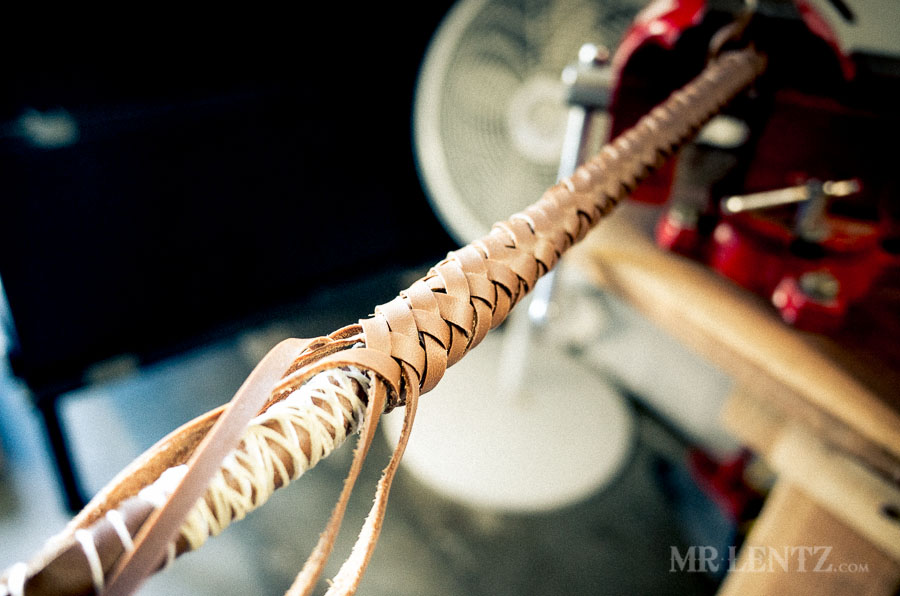
In fact the whip was created to be cracked, a sound made when the the loop created on the whip when flicked by the wrist exceeds the speed of sound as it travels down the length of the whip itself. Here’s a quick little reference from Scientific American . Kind of like a mini sonic boom. This noise would be used to startle the cattle and help herd them in the direction the Cowboys needed them to go.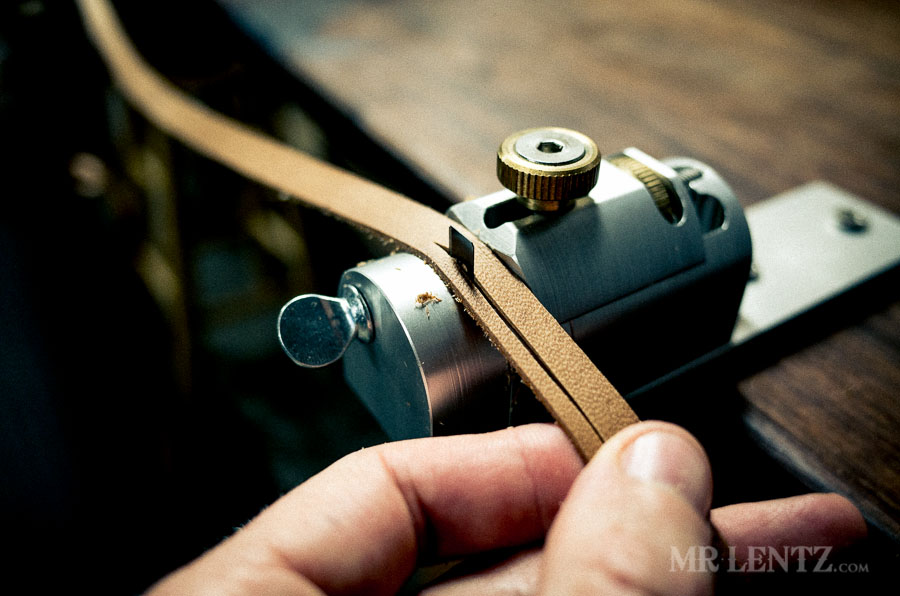
Well, now as things began to change for most in the West – cattle herding and whip use began to die down quite a bit. They are still used today, but only a fraction of a percent of what it used to be. It’s quite hard to find good information on whip making – the traditional way, beyond a book by Ron Edwards called How to Make a Whip. And one more source, the youtube videos by an Australian whipmaker named Bernie – you can find it here. To make a short story even shorter, I read the book and am following the youtube videos…and it ain’t easy!
Like this post so far?
I spend most of my free time creating tutorials like this to help those like yourself get into leatherwork and woodworking, or get better at it. If you'd like to support my efforts, consider checking out my handmade leather goods shop and purchasing a gift for yourself or a loved one. It's readers like you that help keep a small U.S. business like mine going strong, so -thank you!
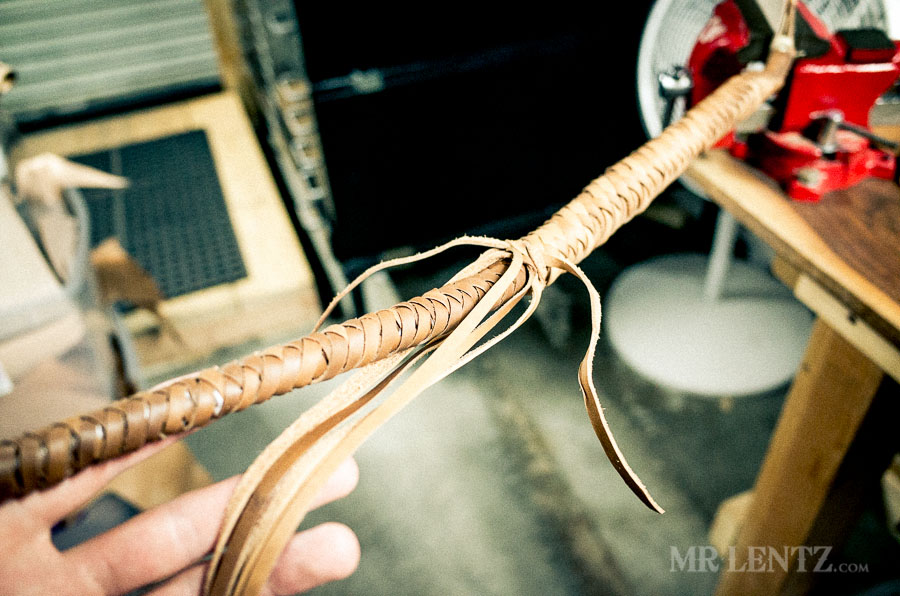
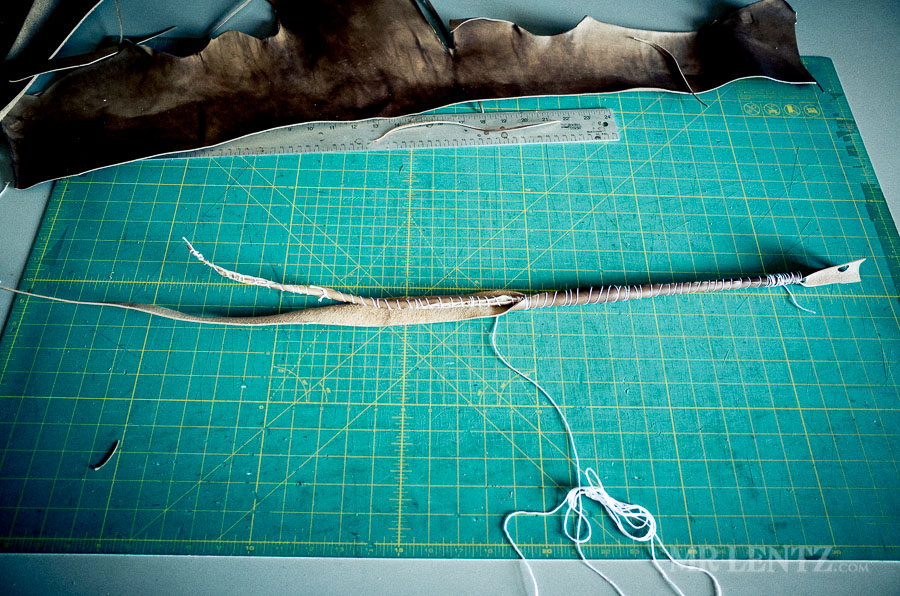
 The base of my whip is called the belly and in this case I am using several things to beef it up. The handle is actually a steel tent stake. One of those big ones that look like a huge nail. This gives the handle some weight and keeps it stiff. The insides of the whip are several layers of cowhide wrapped around thin strands of lace. I used a waxed thread to help hold the first layer in place. Then I started the plaiting. I may have two or three plaited bellies in the interior of my whip to build up girth and slowly increase the length. Since this is my first…it will undoubtedly look like a frankenstein inspired whip, but it’s a learning experience and my next one will prove to be better.
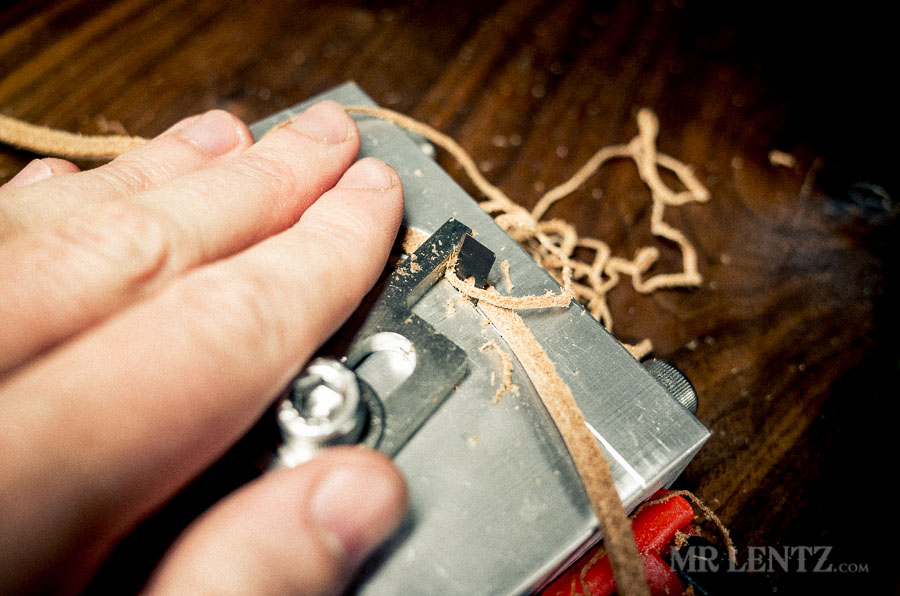
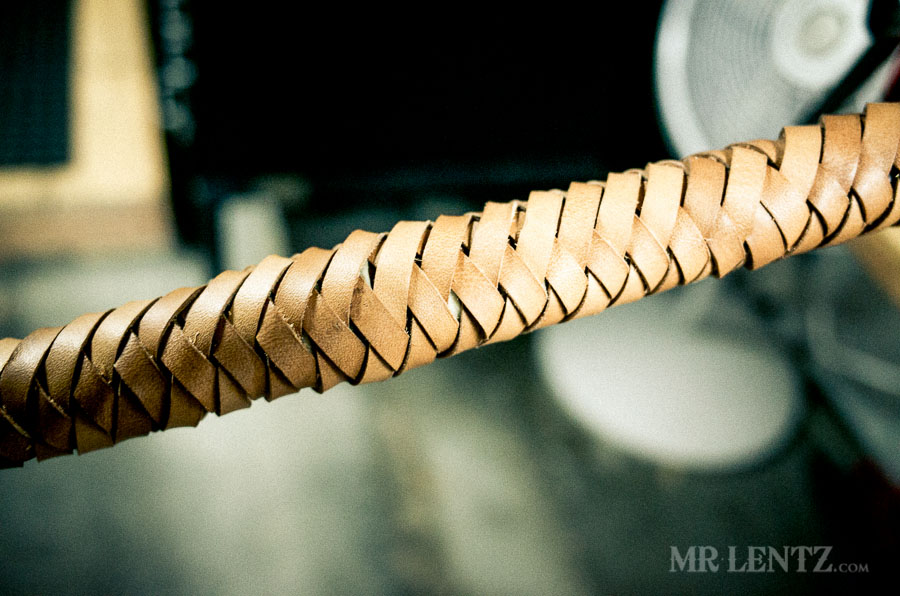 I cut the lace from a side of cowhide using a australian strand cutter and going in circles around the hide. Then I ran the strand through a lace cutter to get the width down to 6mm. The lace needs to taper all the way to the end so using one of the tools shown above I crept the razor closer with each pass and narrowed down to 3mm at the tip.
Then I pulled the lace through a beveler on each side to cut a 45 degree angle into the lace. This helps it lay smoother when plaiting. I have made more mistakes so far on this whip than I can keep track of with all my fingers and toes, but it doesn’t bother me. It’s a fun experience and I am sure that even if my whip ends up looking like a bloated pregnant boa constrictor…it’ll probably still crack just fine – and my next one will be even better! Have a great Thanks Giving meal to all my U.S. readers out there!