
Everything, Photography, Travel, Tutorials
How to Photograph Stars in the Night Sky
Oct
Every few months or so I walk out into the desert with nothing but a backpack and the bare essentials for camping it alone. It’s an essential part of balancing out my days as a leatherworker. The desert is a great place to find solitude, the kind you need when you are looking to recharge a little. There are many many places you can go in the Southwestern U.S. where you will not see another soul for your entire pack trip. I usually head off-trail after a few miles to get to more interesting features in the landscape and find a nice quiet setting to make camp.
This trip out into the desert I decided to bring along my better camera and some simple gear to help take decent night shots. If you want to learn how to take some great star shots, you can follow my simple advice by reading on below. There really ain’t much to it, 75% of the work is just finding a good spot with low light pollution. I found this handy light pollution map so you can get a good idea of where you need to head: Dark Sky Map. From my use it seems fairly accurate.
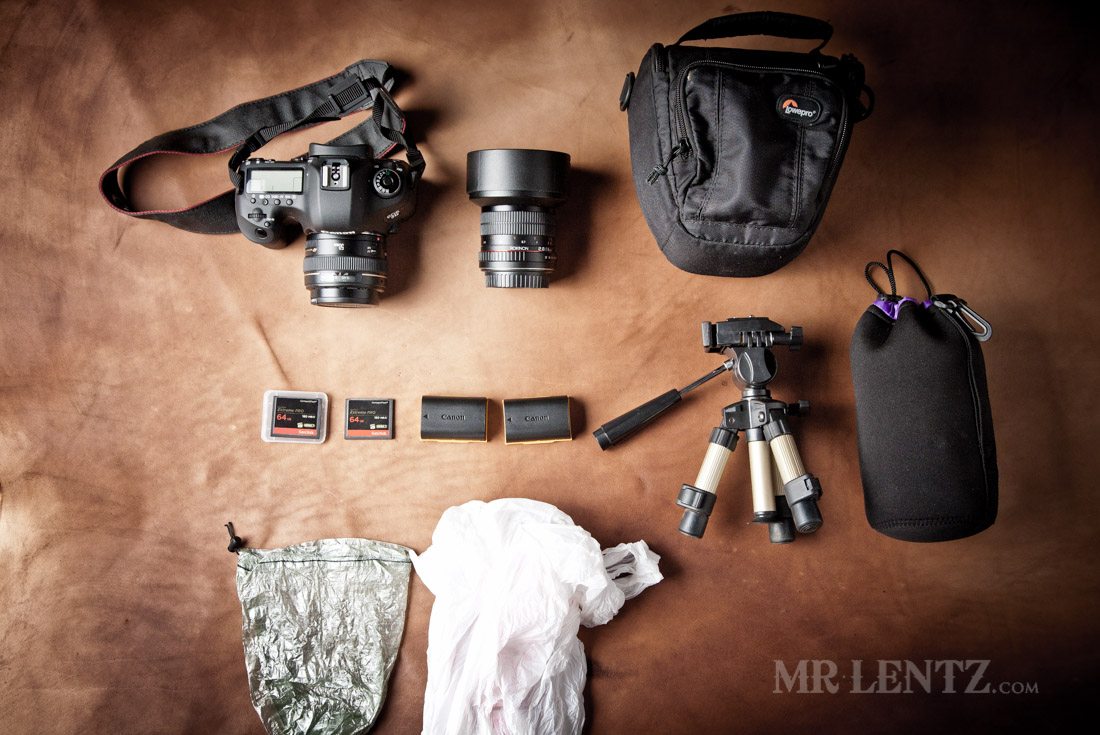
Above is the camera gear I packed into my backpack for this trip. It’s an attempt at sticking with a minimal amount of gear without sacrificing my options when shooting. From left to right starting at the top: Canon 5D Mark iii with a Canon 50mm 1.4 prime lens attached, a Rokinon 14mm 2.8 prime lens (a great hobbyist lens for wide night shots), a Lowepro case that’s just big enough to fit the 5D with 50mm lens attached, two 64GB compact flash cards, two Canon batteries, a mini tripod from Cowboy Studio, a neoprene padded lens sack to carry whichever lens was off the camera, a small cuben fiber stuff sack to hold rocks if I wanted to weigh down the tripod against the wind, a plastic bag in case a sand storm or rain whipped up and I needed to protect the camera. It’s a simple setup and really, it’s all you need to get started.
Quick Tips
- Find a comfy spot as far from cities and towns as possible
- Use a decent tripod that can lock firmly in position
- Weigh your tripod down with weights or rocks
- Keep out of the wind
- Use the feature on your camera called ‘Mirror Lockup’
- Use a camera trigger, or set the timer on your camera for a 2 second delay
- Try a lens with a nice wide aperture allowing for lower ISO shots
- Try to keep ISO at or below 3200
- Pick a cloudless night
- Pick a moonless night (or not, depending on your shot)
- Experiment with all types of exposure settings
- Take a few shots in each exposure/position – then pick the best later on
- Use manual focus and take a few shots adjusting around the infinity setting.
- You’d better be a patient person
How To Photograph Stars… or How I Shoot:
Here’s how I typically set up a star shot while out in the desert. First I usually forget to check whether there is a full moon or not and by the time I get out there I realize there’s still a half moon in the sky until 11pm. That means the best time for a good dark sky is a few hours past 11pm on that day. As I am hiking out in the day time I also realize I forgot to check the weather…and there’s a haze of thin clouds above me. Basically the first night of shooting didn’t go so well, so I had to scrap most of the shots, except the one at the end of this post.
On night 2 I waited until about an hour after sunset and placed my camera on the mini tripod (see all camera gear below). I set it in the sand, but a solid platform would be better, like a rock! Luckily for me there was no wind, but this is a big factor to consider when taking longer exposures as the slightest bit can shake the camera/tripod and result in blurry shots. If there’s a breeze, try to put the tripod in a spot out of the wind.
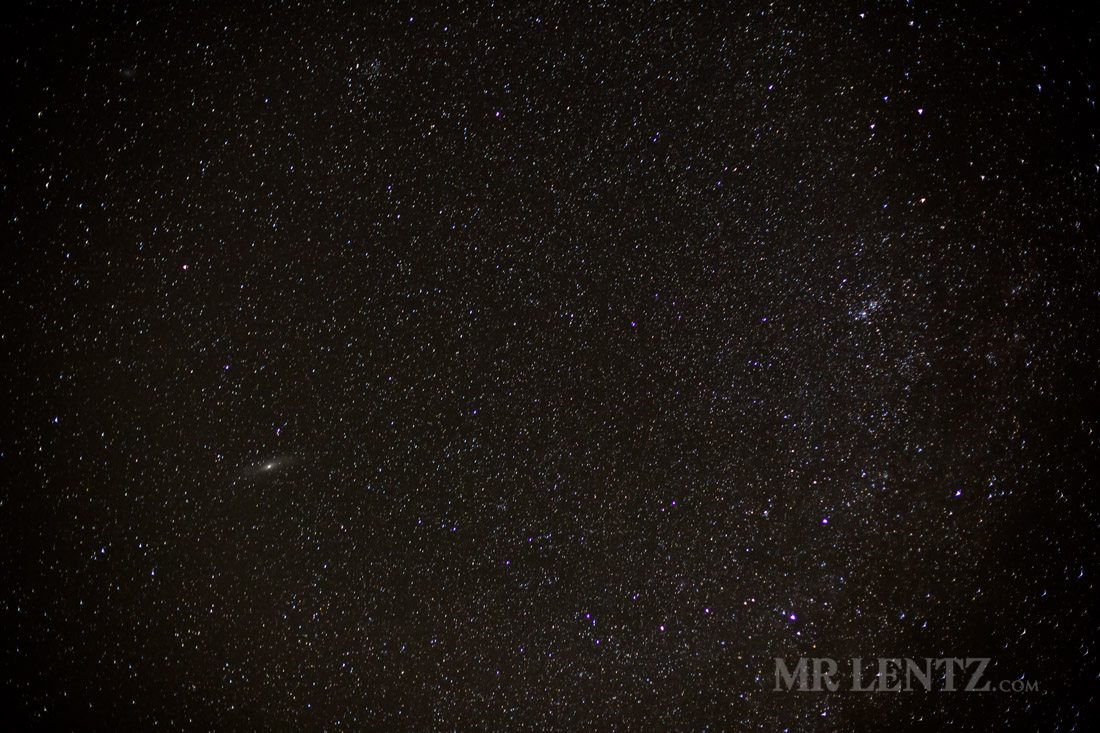
If you look close at the shot above you can see another galaxy 2/3 the way down on the left hand side. I am no astronomer so I can’t tell you what it is, but if you happen to have your iPhone with you while shooting – you can download all kinds of star map apps that make it easy to figure out the night sky. Of course if you are camping you should definitely leave the phone at home!
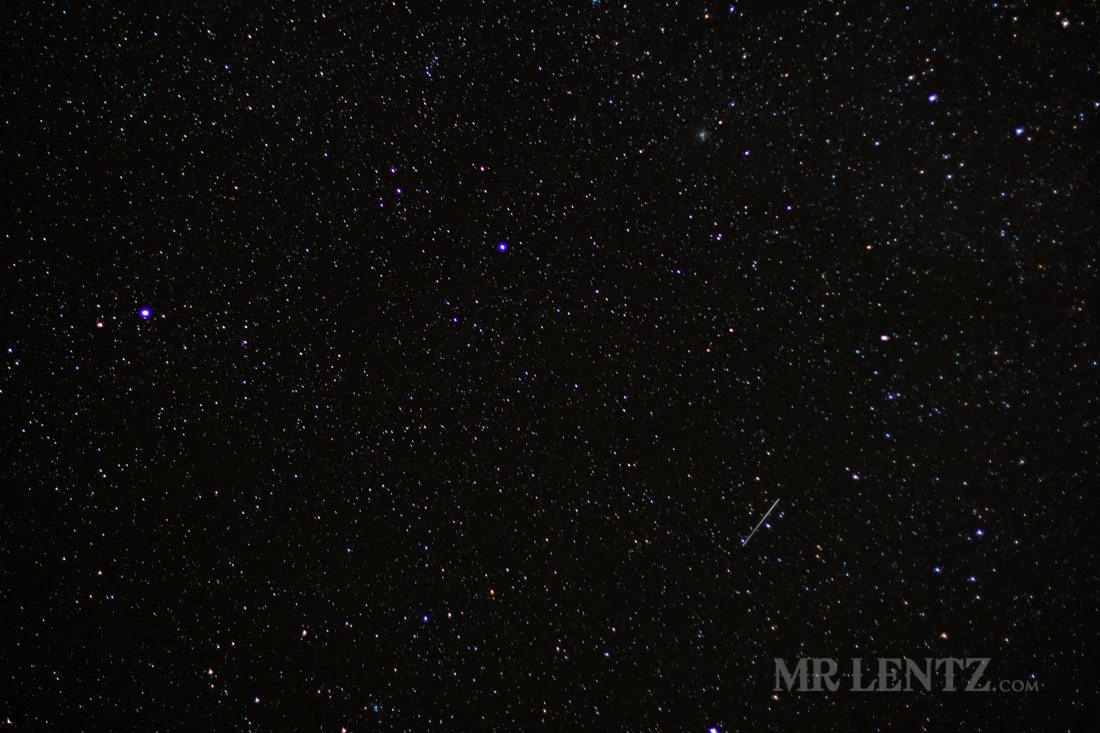
Certain things are only noticed after you bring the images home and process them. Above I captured a glimpse of a meteor. Don’t be confused by every line in your shots though – a lot of the night sky has planes passing through. You can identify those easily as the flashing lights will leave a trail with dots across it.
I used the Rokinon 14mm lens first as it is a very wide angle and I wanted to experiment with a bit of the ground in the shot. The moon was still fairly high, so I started taking shots of it in the frame as well. I set my aperture to 2.0 – which is a decent aperture to avoid lens blur I have found. I set the ISO to about 3200 or one stop below, and the exposure length to about 13 seconds. On my camera there is an option in the menu to use Mirror Lockup, in layman’s terms – you need to use this to get a sharper image. Google it if you want to know why!
I then set my camera to use the timer, and set the timer to 2 seconds. This helps if you don’t have a trigger, it allows for 2 seconds after you push the button for the camera shake to settle down, resulting in a sharper image. On the Canon 5D Mark iii, you can use the live view screen and zoom in 10x to help with manual focusing. This is a huge help since the Rokinon lens will not autofocus (and you wouldn’t want to use autofocus anyways for stars). I found that a hair back from infinity worked the best for a sharp photo of the stars.
In my case I had the camera set up right next to my camp chair and cooking gear. This way I could keep setting up the shot and retaking the photos while I was waiting for my dinner to cook. Of course this also meant I could not use my headlamp as it would ruin the shot, but with a half moon – things were pretty visible and I narrowly avoided several burns. The shots were looking ok, but I knew I could get better if I waited for that moon to set. So at some point I gave up and went to sleep, waking at 3 am to use nature’s toilet and set up another hour’s worth of shooting.
One benefit of being up at 3 am to photograph the stars… there’s a lot fewer red-eye flights in the sky to ruin your shot! Of course shooting at 3 am will cause the user themselves to get red-eye. At some point I switched lenses to the 50mm just to see the difference. What you get is a bit more detail in the shot and you may be able to spot a galaxy or other phenomena. Try out different lenses to get the feel of what works for ya.
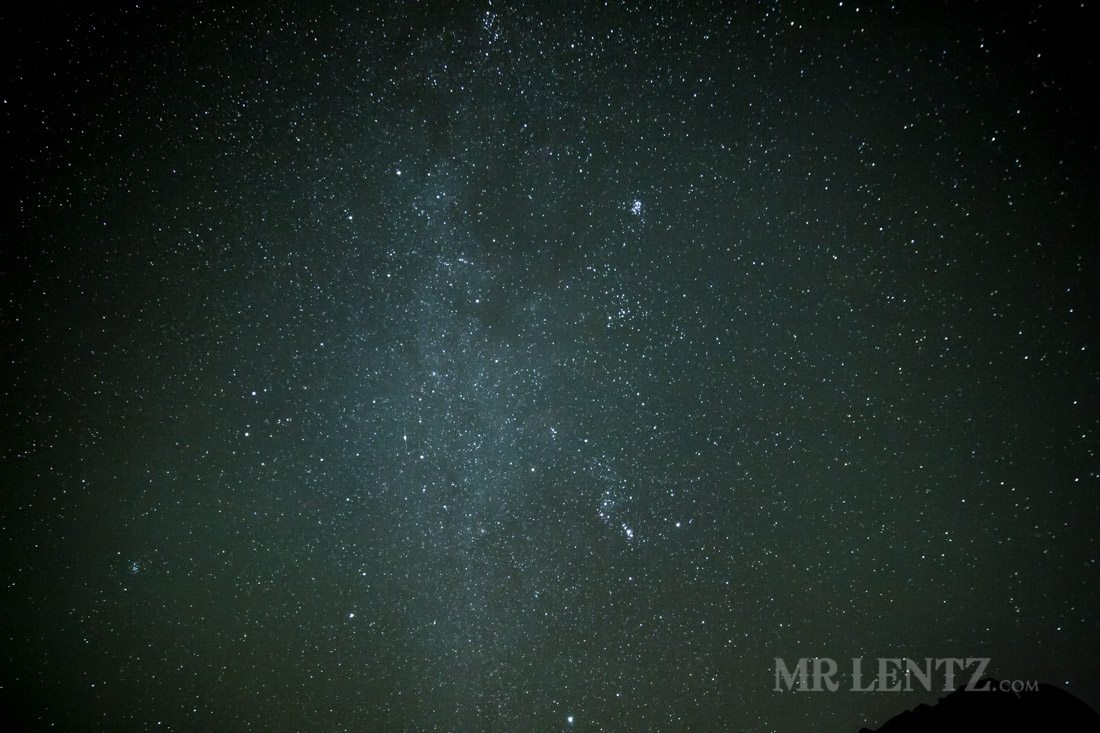
Different parts of the sky tend to have different densities of stars. It’s not always easy to identify with the naked eye, so just point your camera in different directions and see what you can get as a first pass. I do know that if you are shooting the Milky Way, that cloudy mass of stars in a lot of these shots, your best bet for brightness and density occurs early spring to early summer. This is because the Earth at night is facing what they call the galactic core, or center of the galaxy. Astronomy sites will have more detailed info on that subject though.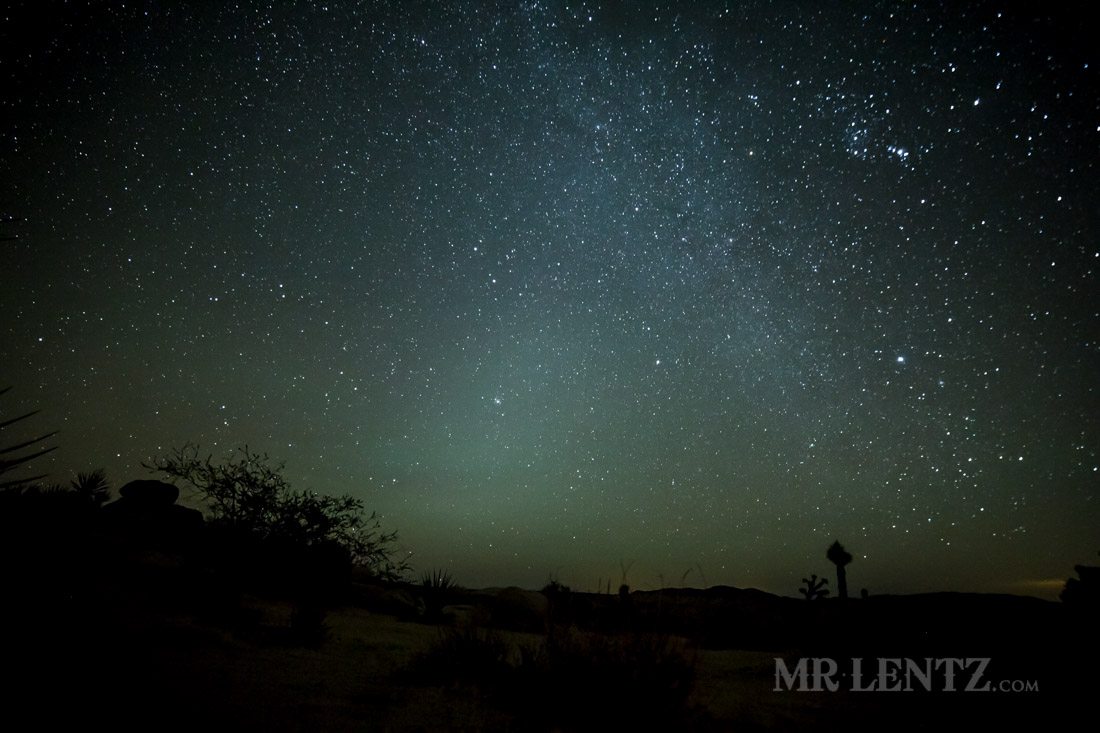
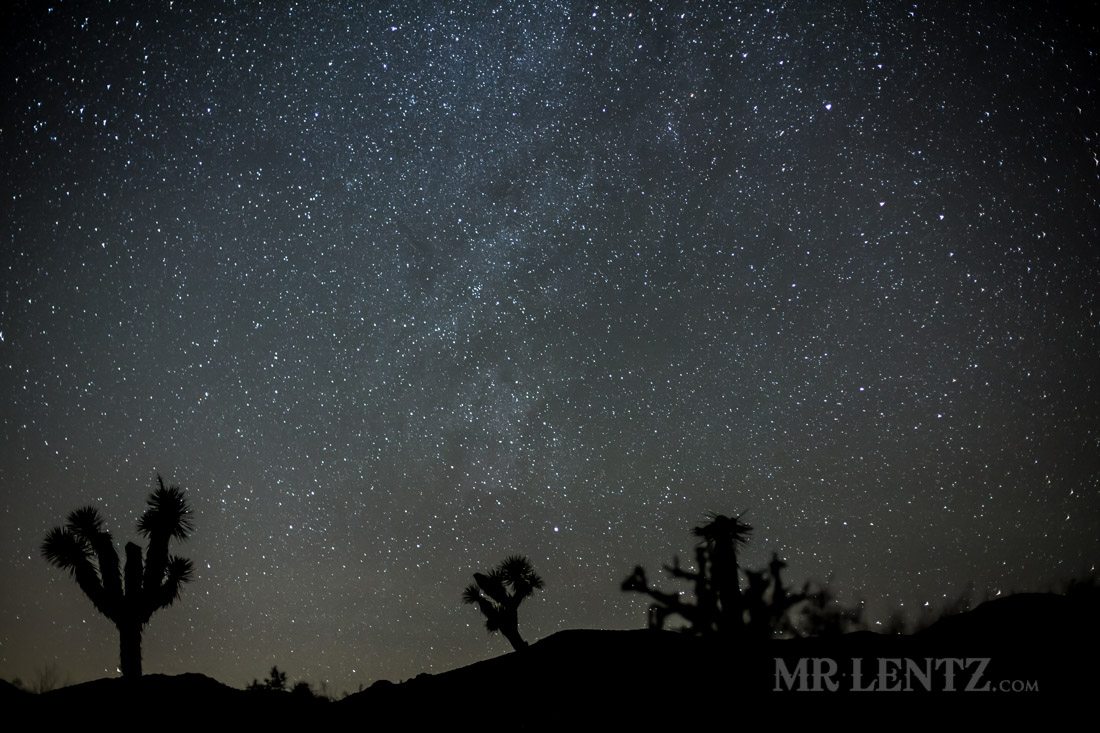
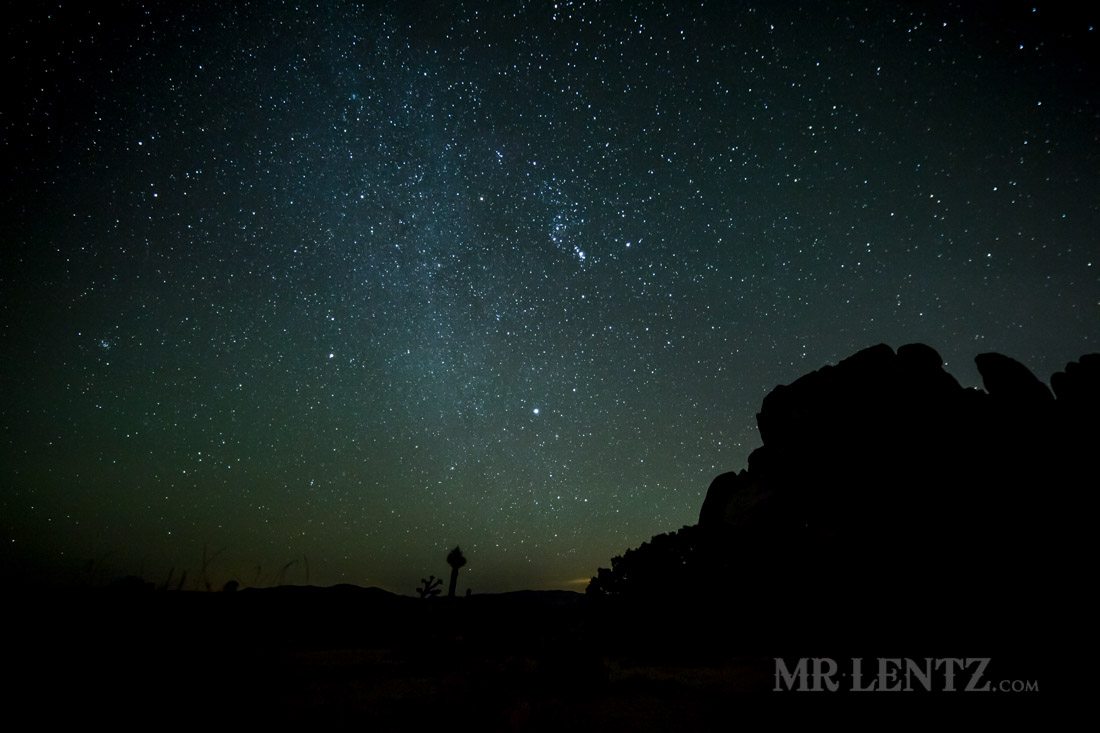
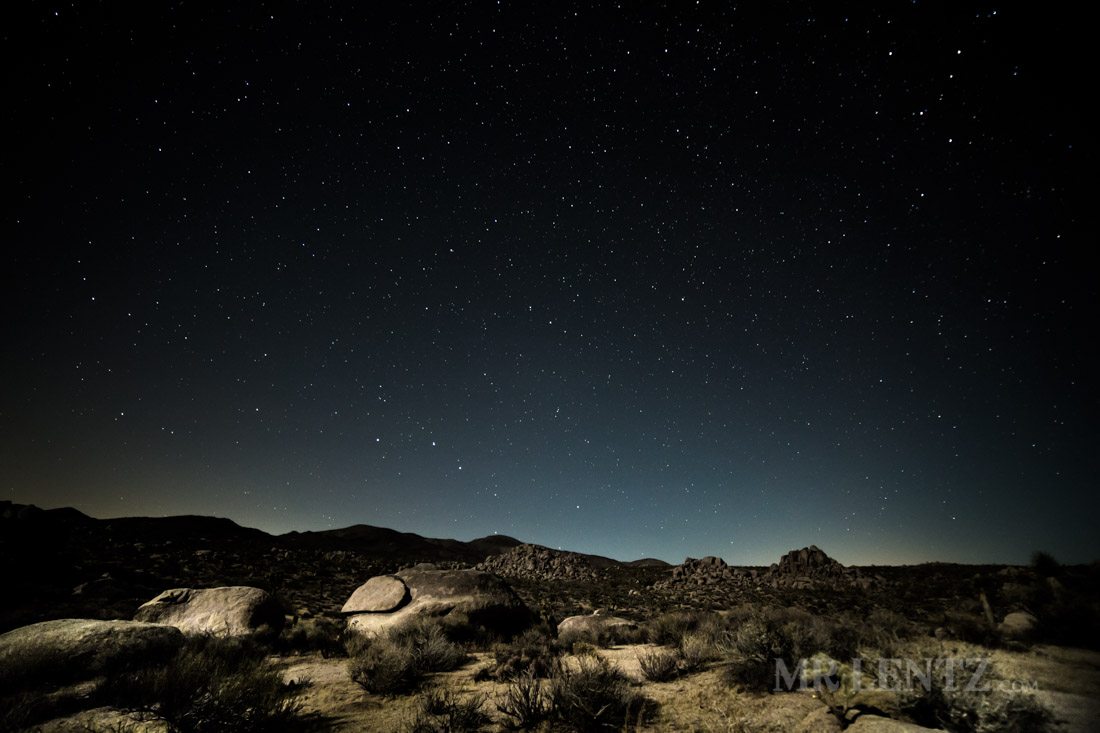
For me when I am taking a star shot, I tend to like to include some of the ground for scale. The shot above had to be taken around 3 am, several hours after the moon had set, so I could get a nice silhouette. You’ll notice that if you try and shoot with a moon in the sky – it can tend to light up the ground almost as if it were daylight, depending on how long your exposure is.
Time-lapse night star photography can make for some very interesting pieces to watch. I only made a few this trip as they can take quite a while to capture. The way I did it with the Canon 5D Mark iii is to load a program called Magic Lantern on to an SD card and insert it into the camera. The program allows for all kinds of extra camera shooting features, and automated time lapse shooting is one of the benefits. Here’s a (very) short clip I made from some time-lapse photography, above.
The first star time-lapse shot was taken with Rokinon 14mm lens at f2.0, 3.2 second exposures, 12 seconds apart, ISO 3200, and there are 120 shots there – meaning it took about 30 minutes to capture. The second star time-lapse shot was also taken with the Rokinon 14mm lens at f2.0, 15 second exposures, 2 seconds apart, ISO 3200, and there are about 53 shots to make that part – so it took around 15 minutes to make.
One trick I learned to help with the monotony of time-lapse shooting, is to wait until you are ready to start your shot before beginning to cook dinner. Seriously. I set up the first star shot, then went about 10 yards away and heated up my meal in the dark. Careful not to use your headlamp unless you know it wont make it into the shot!
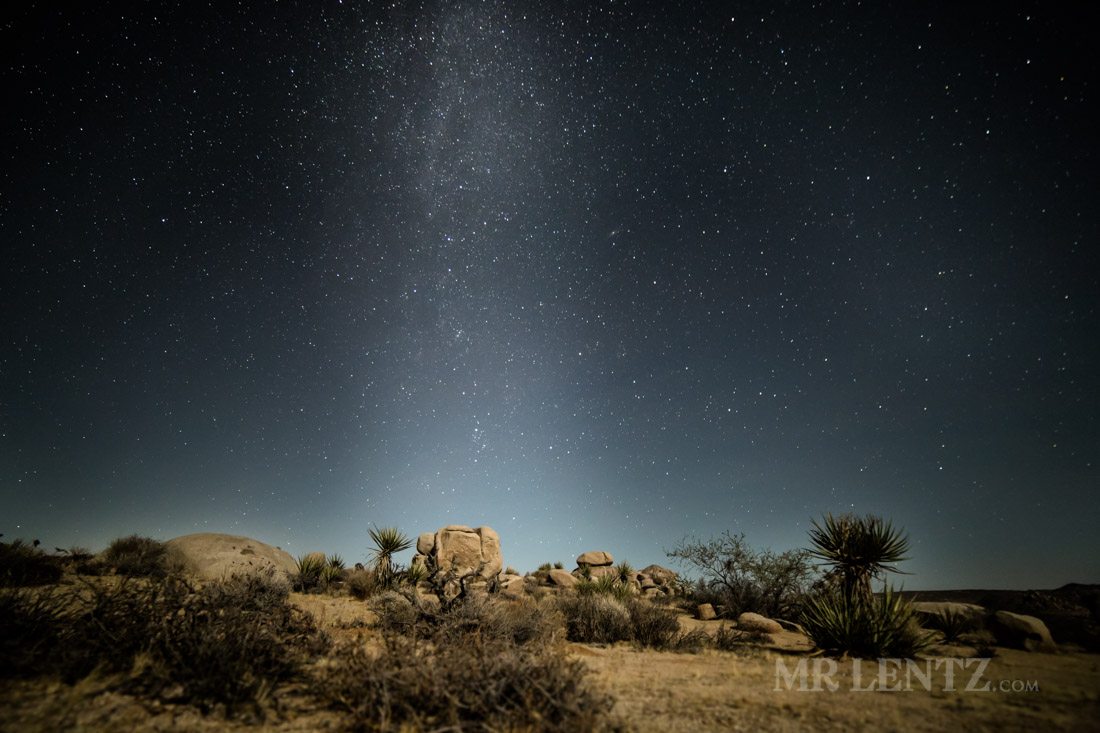
Light pollution is pretty much everywhere these days. Above you can see it on the horizon, as the small orange area. Below it lights up the backdrop of the rocky hill.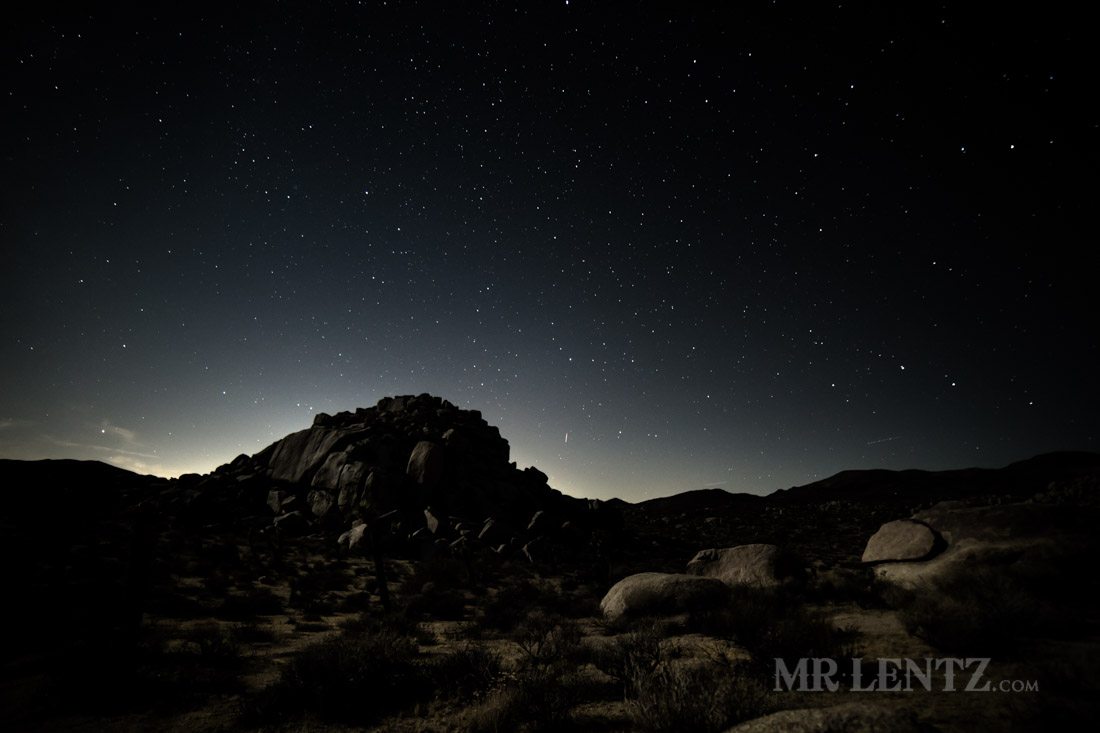
Even after waiting for the moon to fully set (I went to sleep until 3 am) the night sky was still partially aglow in certain directions. This is due to towns and cities on the horizon.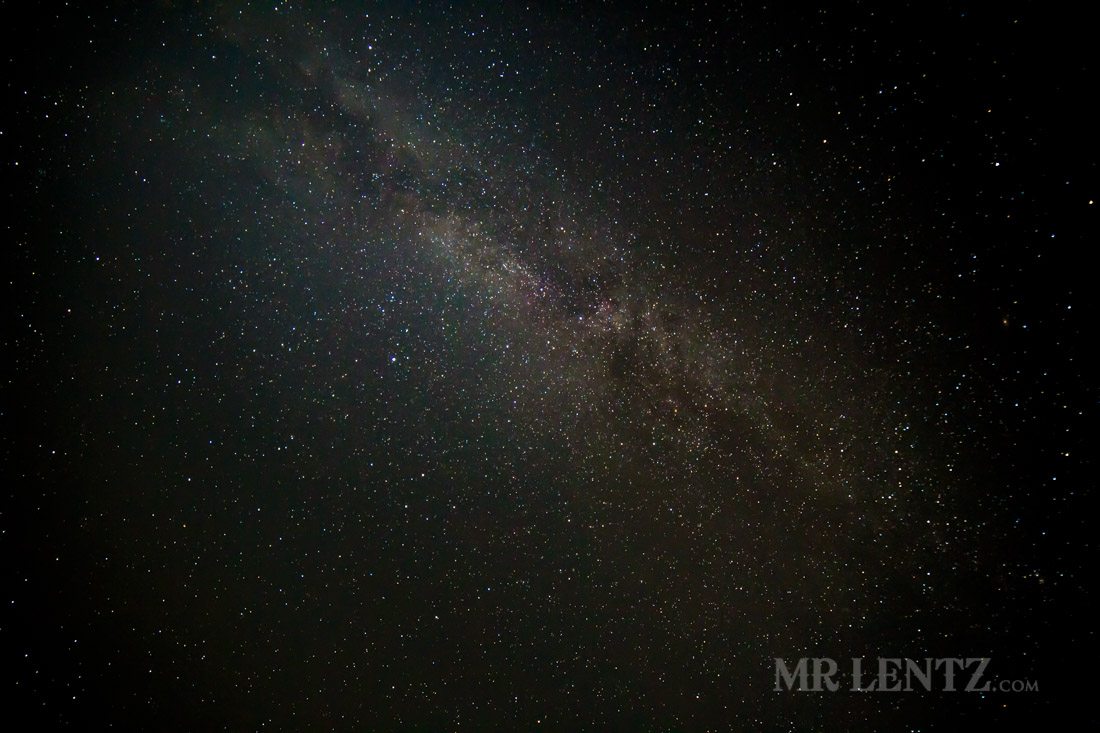
To really see the Milky Way in your photos, you will need to do a bit of processing after the fact. I use Adobe Lightroom and will say that that is by far the best choice. I wont go into detail about the processing part, but I will point you in the right direction. You just need to know that the camera is not a perfect instrument, so it will not necessarily be able to get an image looking just like how your eye may have seen it. You will need to adjust the contrast, black levels, and give the right spectrum of light a little help in popping out a bit. Here’s one perspective on the editing side (and believe me there are many more).
The shot above was taken with the moon still in the sky, thus lighting up the ground. I was lucky enough not to capture any planes in this photo – are rare occurrence in today’s world! Rokinon lens, ISO 3200, 15 seconds.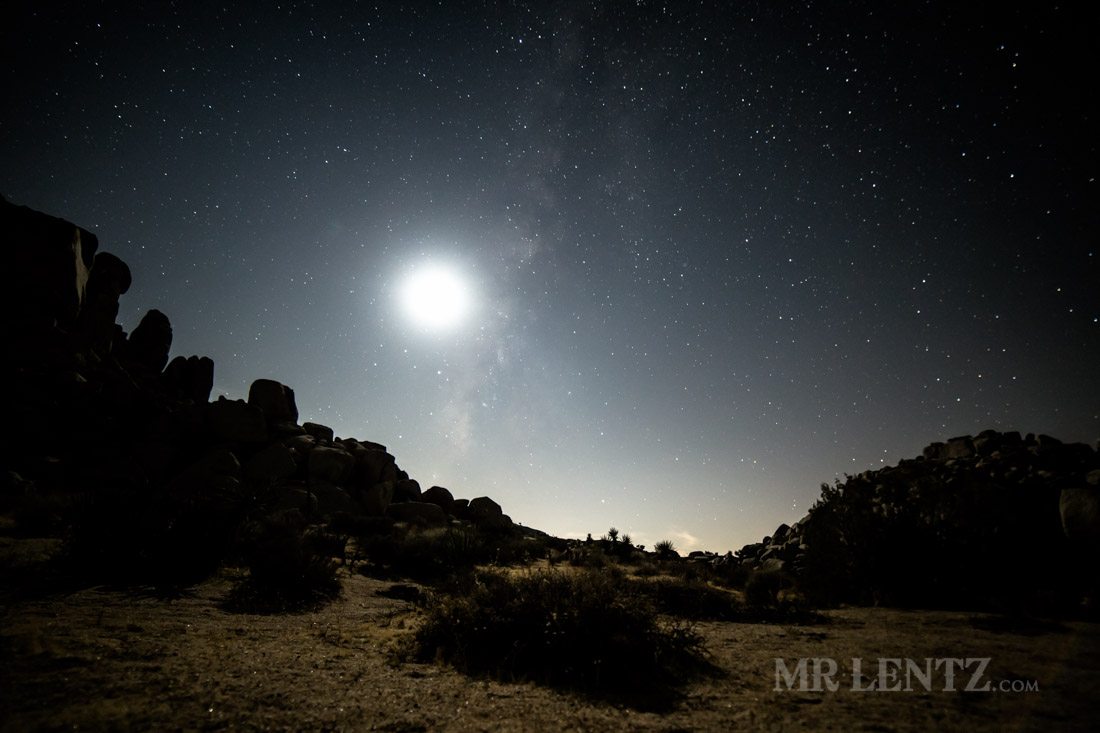
This is the moon setting, right next to the Milky Way. I had to overexpose the moon in order to get more detail in the sky. This shot did need a bit of processing before the right look came to. Some photographers will take this shot as two exposures, one to get detail in the moon, and one to get the stars to show up. Then they edit the two shots together in photoshop. For me at this point I feel that’s going a bit too much into creating a ‘fabricated’ shot, though in their defense – that is typically how the eye would see it, so it’s not that far from what it naturally looks like.

Make sure to get out into the night for some of your own shots, it certainly is a peaceful way to spend the evening! Feel free to share your star shooting experience in the comments below.