
Everything, Photography, Tutorials, Wood
How To Make a Small Drawer

Sep
It’s back into the woodshop for the annual ‘Make My Girlfriend Something By Hand for Her Birthday’ extravaganza. It has been a while since I have been able to do this – in the past year I had to move twice. Twice, yes both the home and the workshop. It drained the energy from my lifeblood and contributed to a period of inactivity here on the blog…but then again – I always have an excuse!
Well, this time I am going to be making a small desktop drawer that will also function as a stand to hold up her computer screen at an ergonomic height. I am by no means a well-trained woodworker, so most of my projects inevitably end up being large lessons in redoing everything from scratch. I am still learning proper wood joinery techniques, so this project will focus on a few different applications – the rabbet joint and groove, and possibly a mortise and tenon as icing on the cake.
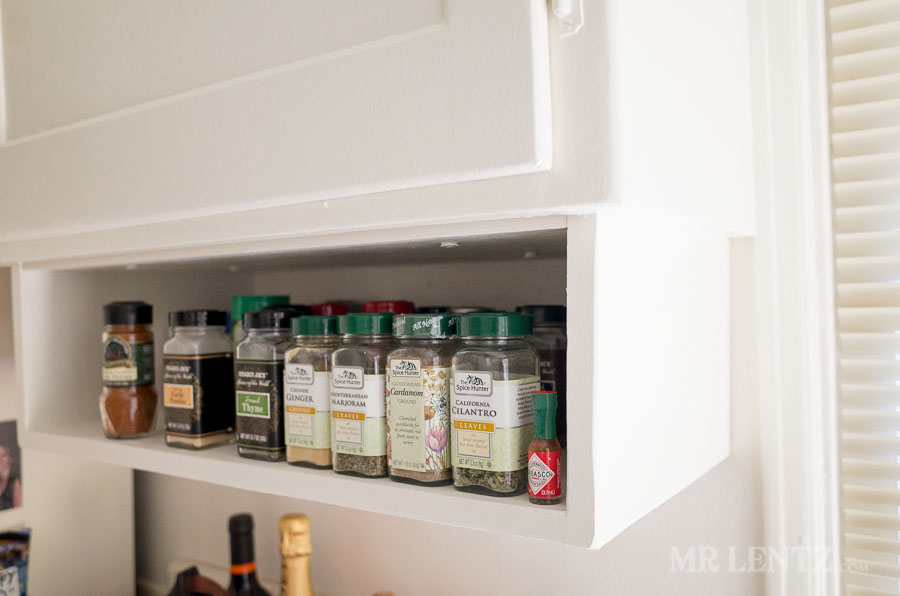
Here’s a photo of my first mortise and tenon joint project – a small cabinet extension to make grabbing those spices nice and easy:
The first step? Measure what’s already there to get an idea of the size this drawer needs to be. Here’s what is being used as the screen stand right now:

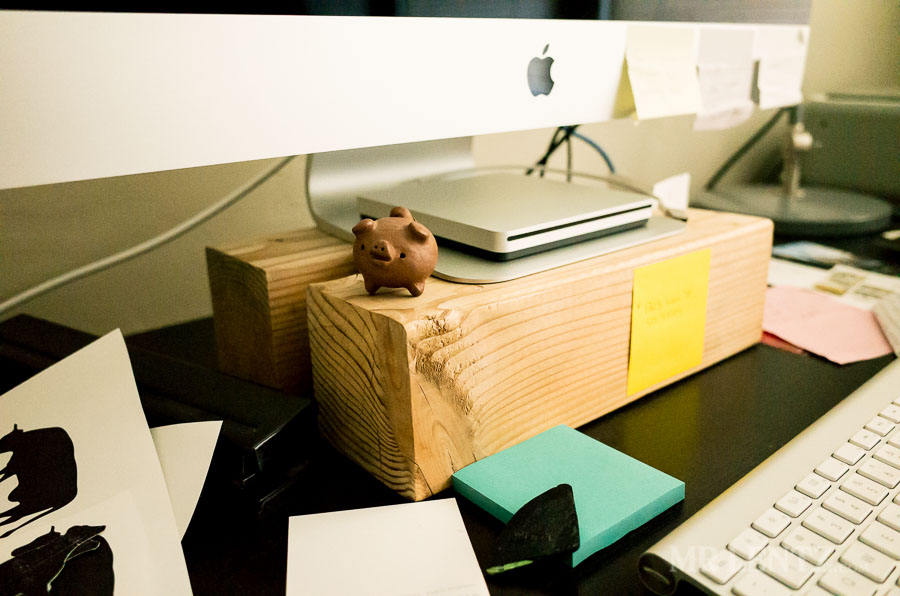 Yes, that’s a clay pig.
Measuring out the minimum size needed tells me that I need a base of 9 inches x 9 inches and height of 3.5 inches. This partially affects the size of wood I will use, since I want a functional drawer, but also need this thing to be sturdy enough to hold 20 + pounds of Apple.
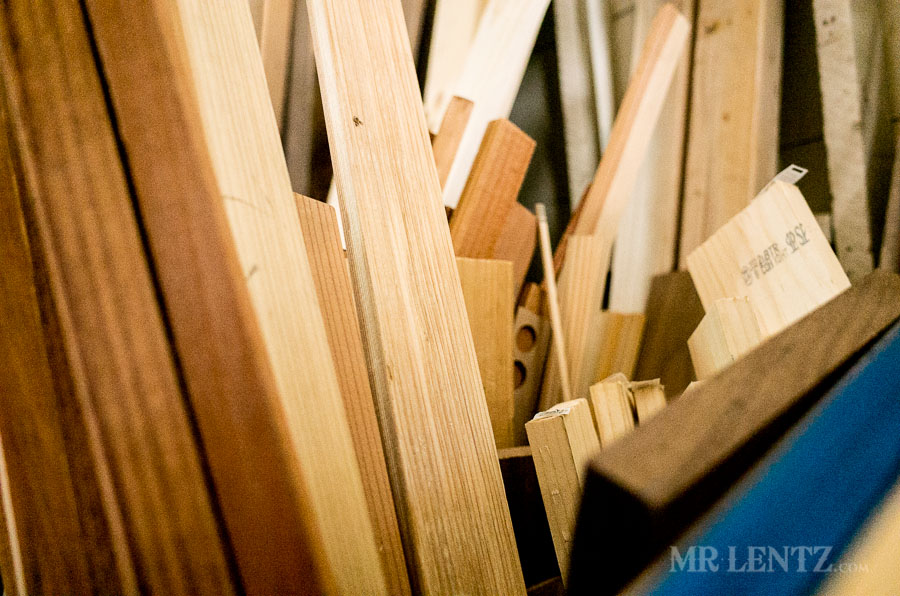
Checking my vast reserves of wood inventory – lots of scraps from the past, I found two sheets of dimensionally cut walnut a .5 x 6.75 x 69 incher for the outer box/frame, and a .25 x 5 x 48 inch for the drawer itself. Since the bigger piece doesn’t reach the full 9 inches needed for the base, I will need to add in another wood joint to connect two pieces and maintain the strength. Here goes!
Proper footwear first! Don’t want that drill bit falling on your toe.
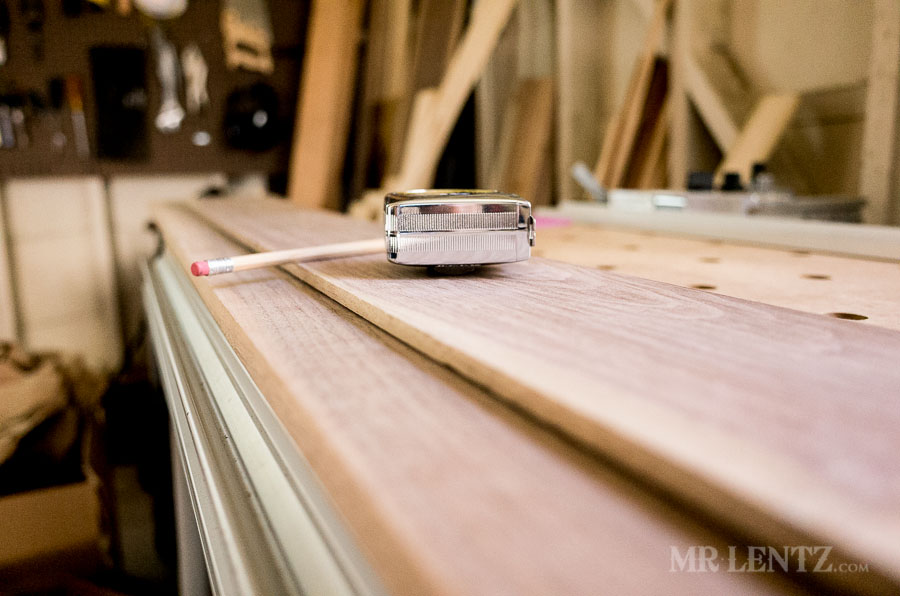
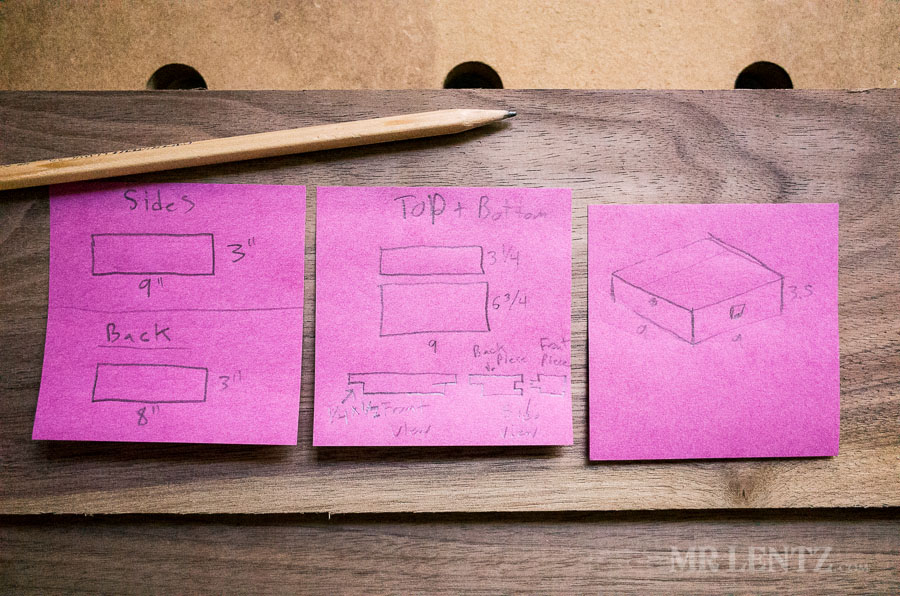
Of course, before I make any cuts I sketched out an overview of the piece and rudimentary measurements of the different parts including an idea of how the joints will work…all on tiny purple sticky notes. Probably not the best idea, but I am trying to get this project movin’!
Like this post so far?
I spend most of my free time creating tutorials like this to help those like yourself get into leatherwork and woodworking, or get better at it. If you'd like to support my efforts, consider checking out my handmade leather goods shop and purchasing a gift for yourself or a loved one. It's readers like you that help keep a small U.S. business like mine going strong, so -thank you!
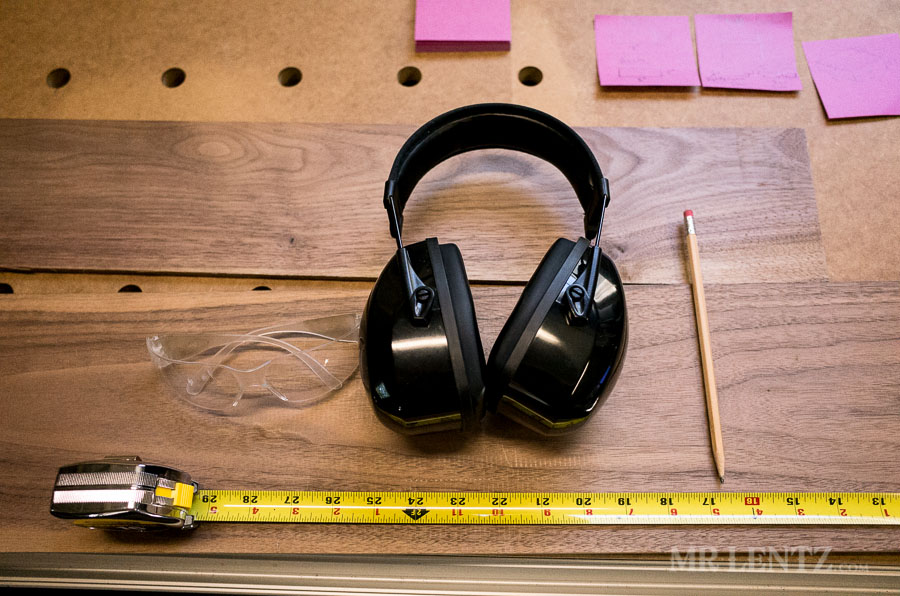
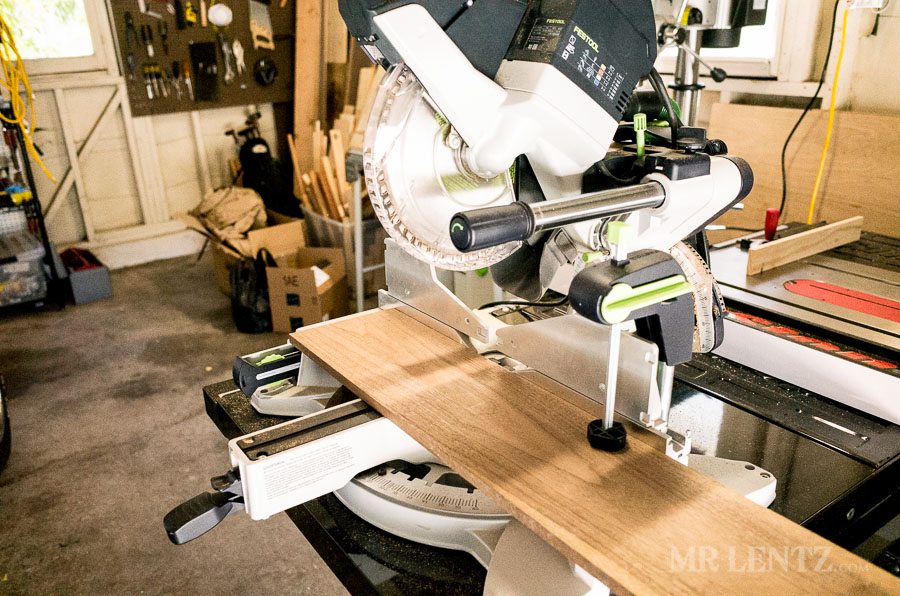
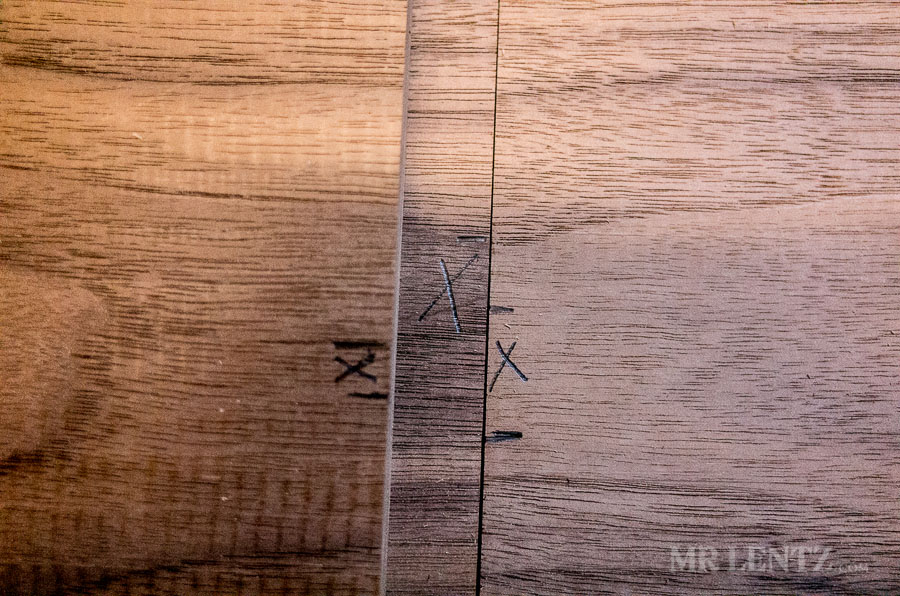
I marked my cuts, adding in about 1/8 inch between for the kerf (amount of wood removed by the blade). Got my eye protection, hearing protection (some Howard Leight ear muffs) and off to the miter saw for the first round of cross cuts.
 Click the link below to read the entire post…
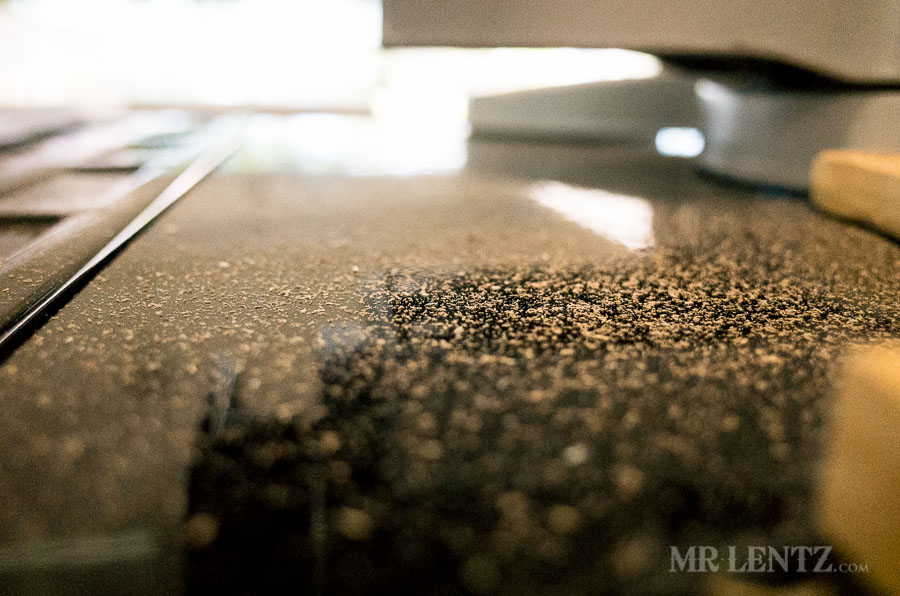
Unfortunately on the first cut I forgot to attach the vacuum hose and a nice little snowshower of sawdust spread across the land.
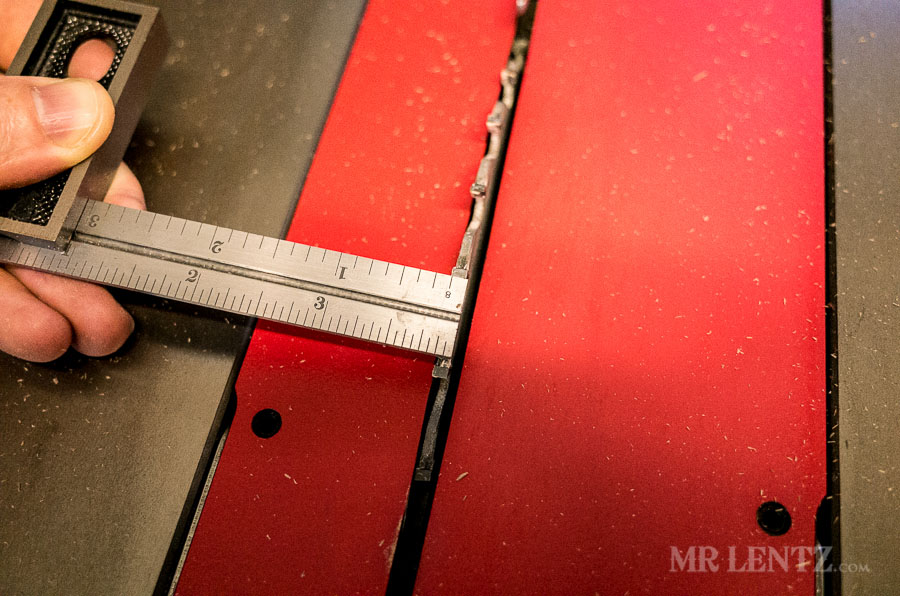
Now that my main crosscuts are done on the frame, I am marking out the rip cuts to get everything down to size. Then I will feed these through the tablesaw.
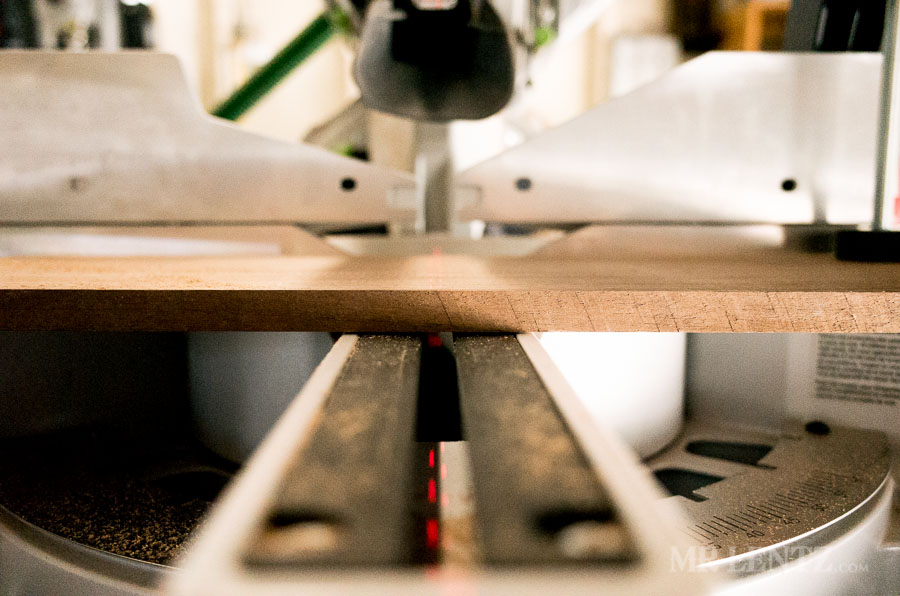
Measuring the kerf on my tablesaw blade, I make sure to measure the actual tooth – the widest part of the blade. It’s right at 1/8 inch. This means I can account for a kerf of 1/8 inch between cuts.
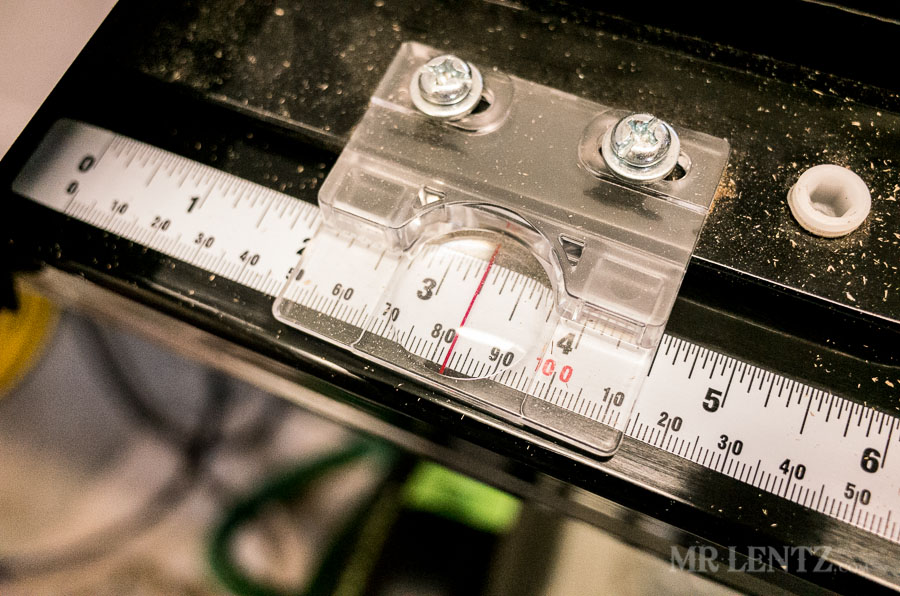
If you have properly fine tuned your tablesaw – you can probably just use the measurements indicated on the saw itself rather that measuring and drawing a line on each piece, though I would still doublecheck the spacing from your fence to the blade with a nice ruler (Starrett makes a good one).
Now before I fired up the tablesaw I remembered that another snowstorm was forecast for the near future. Specifically originating at the base of my tablesaw. In the past I had not had the time to hook up a dust system, and right now I don’t feel like making anything permanent. However – after a quick look through my ‘handy box of random useful things that I tend to save forever because while they weren’t handy then, they sure are now’, I found an idea worth exploring.
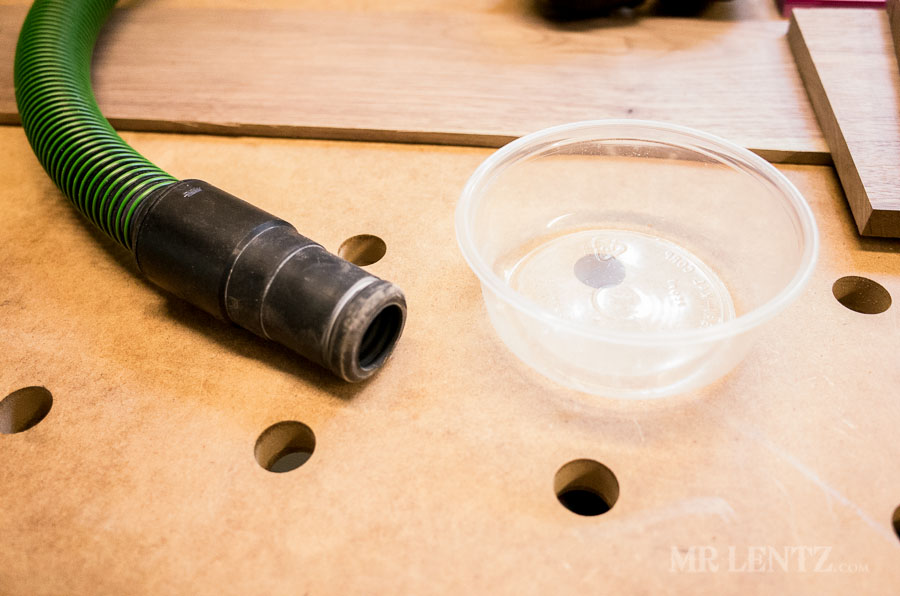
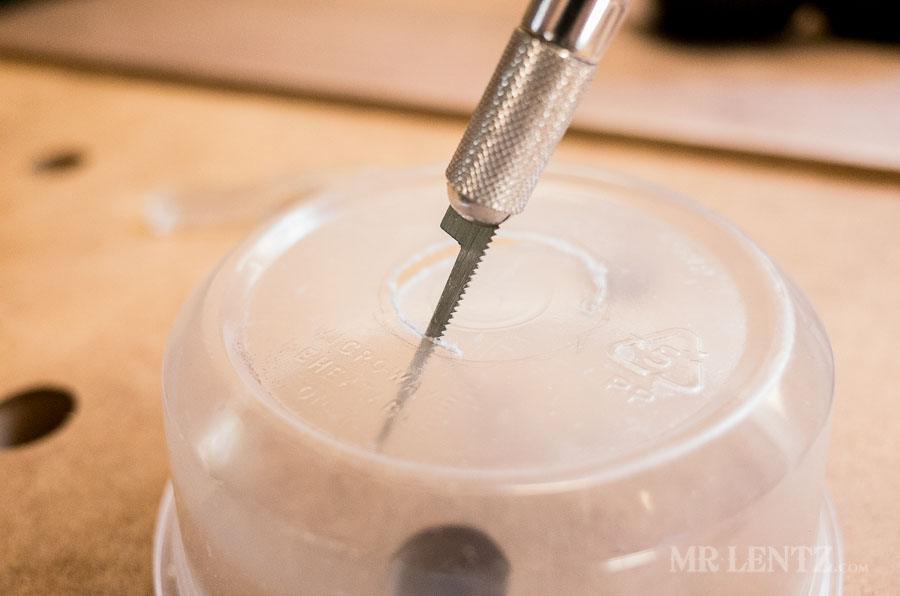
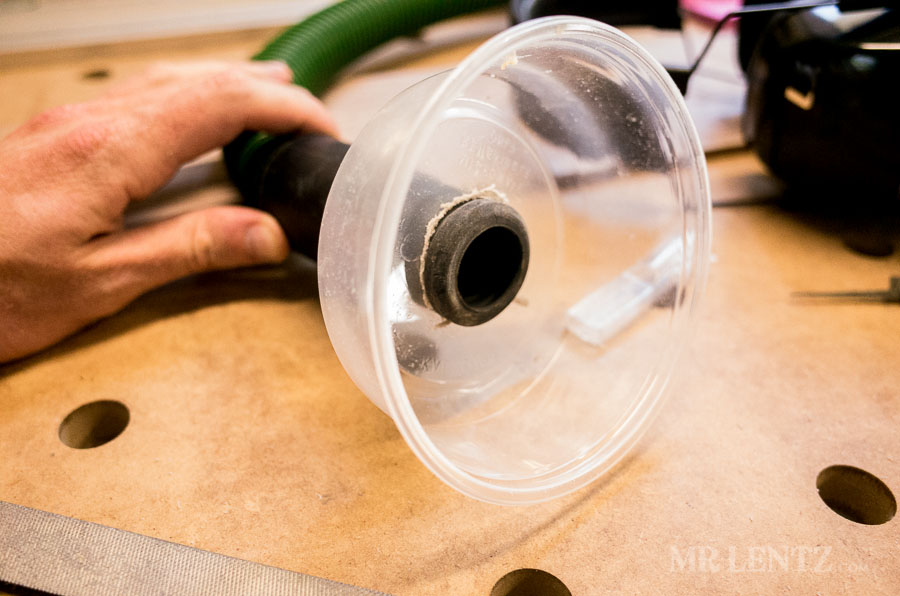
A plastic to-go bowl from a treasured night of Indian food. With a quick hole cut in one end to fit my vacuum hose, and the other end duct-taped to the tablesaw’s bottom dust port…we might have a nice quick solution.

Next I adjusted the blade height to be about 1/4 inch above my workpiece ensuring a cut all the way through.
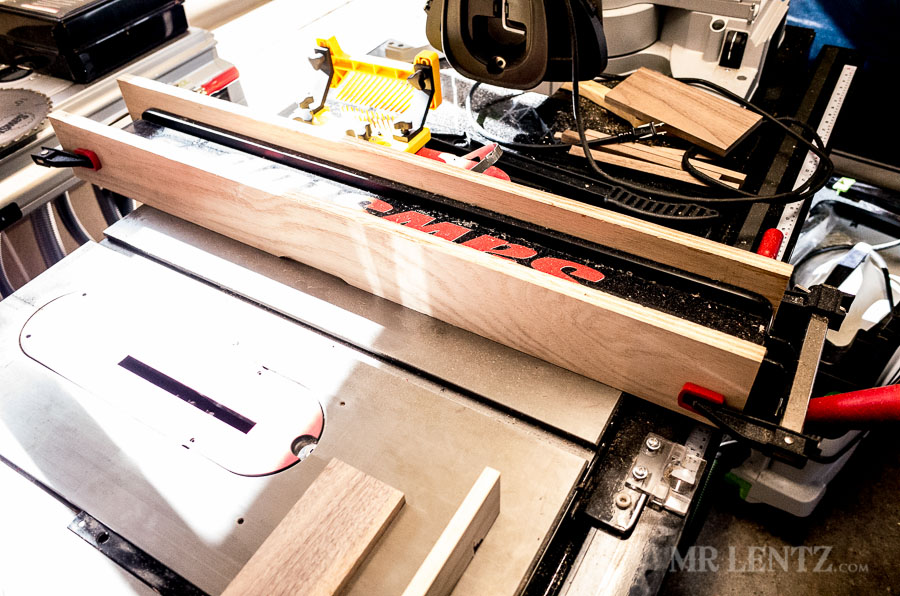
I installed a horizontal and vertical featherboard to aid in keeping the piece stable during the cut. Making sure to place the featherboards behind the beginning of the blade so they don’t force the offcut onto the blade – potentially leading to the famed gnarly kickback.
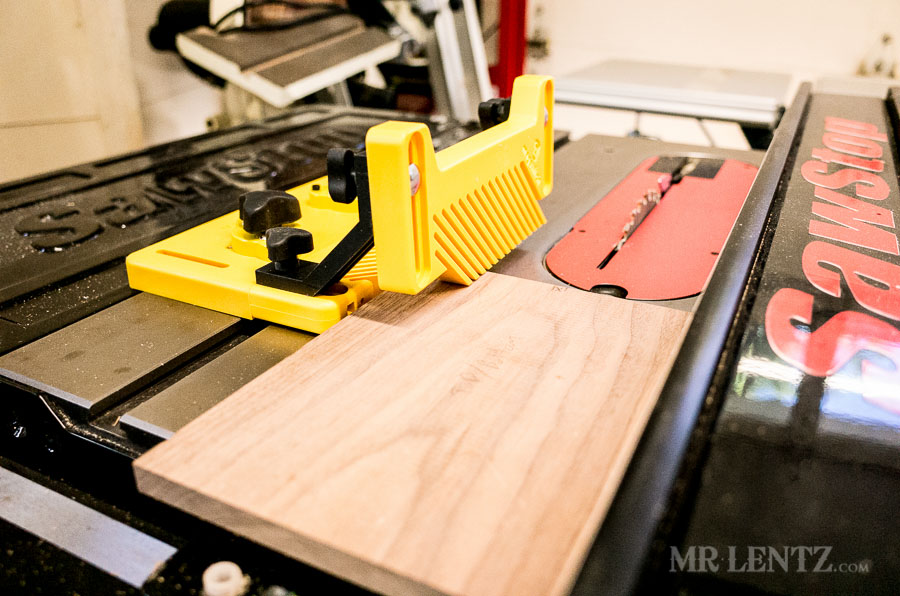
As I am cutting, I also start to realize that some measurements are off. I had to re-measure the top and bottom pieces to account for the 1/4 inch groove I will cut into them to fit together.
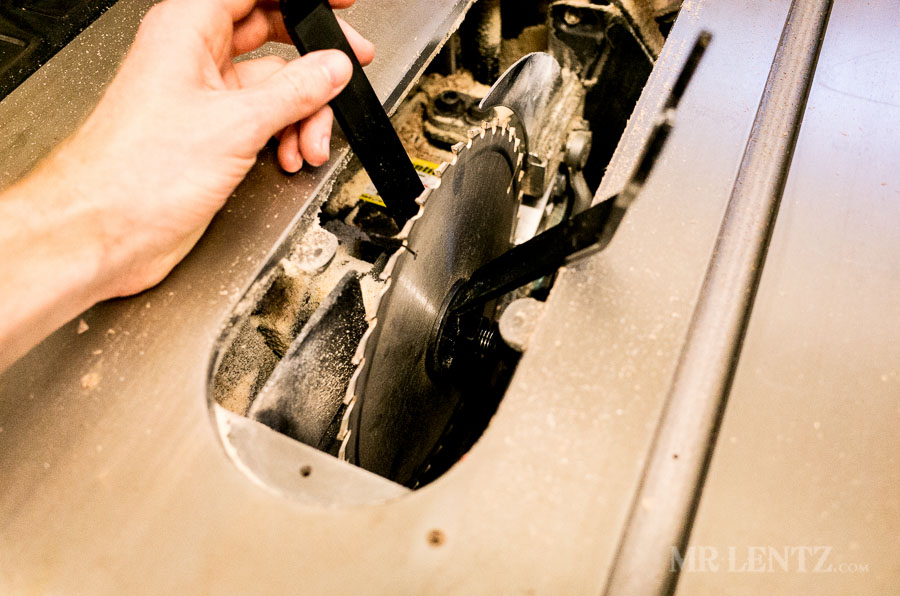
For the rabbet grove I am cutting into the top piece and bottom piece I installed a dado blade into the tablesaw that makes the rabbet in one cut. The below shot is not the dado blade, but me taking out the multi-function blade I regularly use.
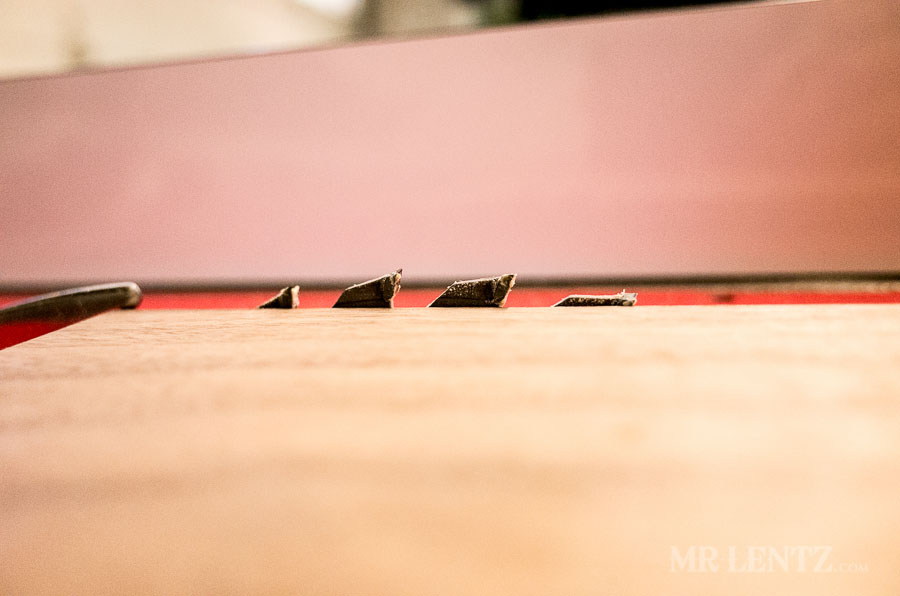
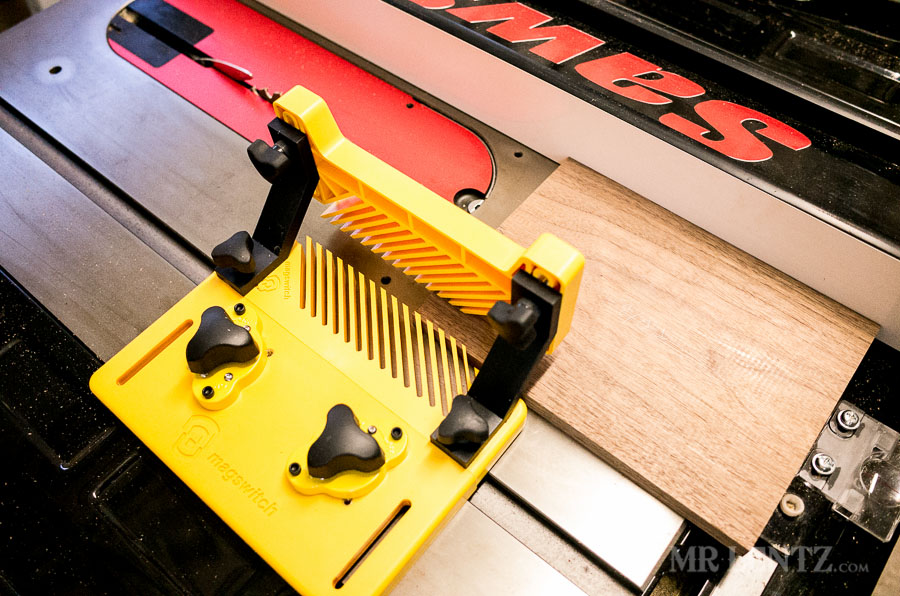
Then, at about this point I ran into some trouble. I used my handy magswitch featherboards to help aid in the rabbet cut, but as the piece was being fed through I noticed it started to peel away from the fence. I reacted quickly by shutting down the saw with my knee, but not quick enough before the wood slammed back into the featherboard and tore off a few pieces. That led me to go back online and see if I was actually making this cut correctly…apparently not!
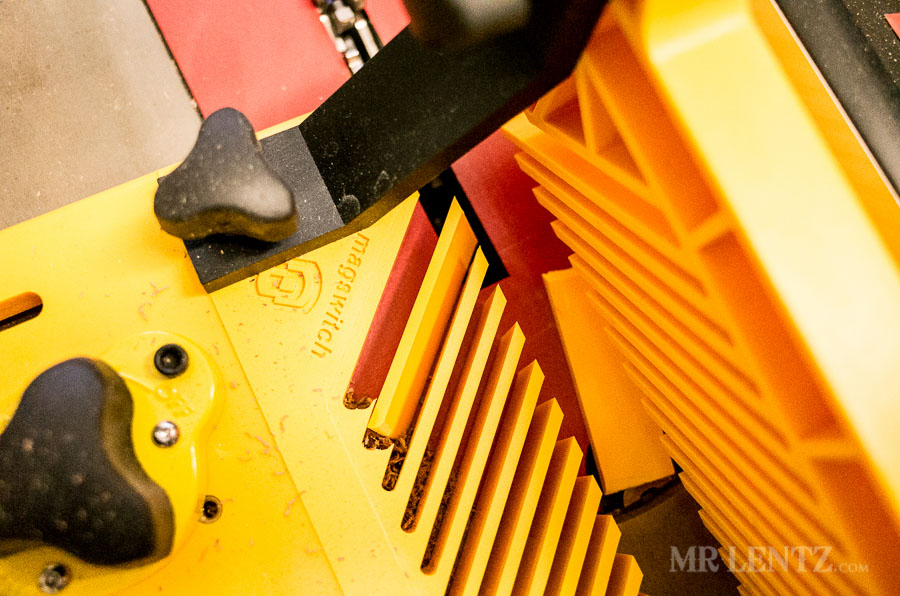
Here’s the solution I found to better rabbet cuts. I used a scrap piece of good quality hardwood – plywood and made a sacrificial fence that gets clamped onto my regular fence. Then, I positioned only the plywood part over the blade by about 1/4 inch, clamped both far ends down to the table, and turned the saw on – slowly raising it to cut into the plywood a bit. Now I have a nice clean edge to make my rabbet cut against and be able to apply pressure further away from the blade.
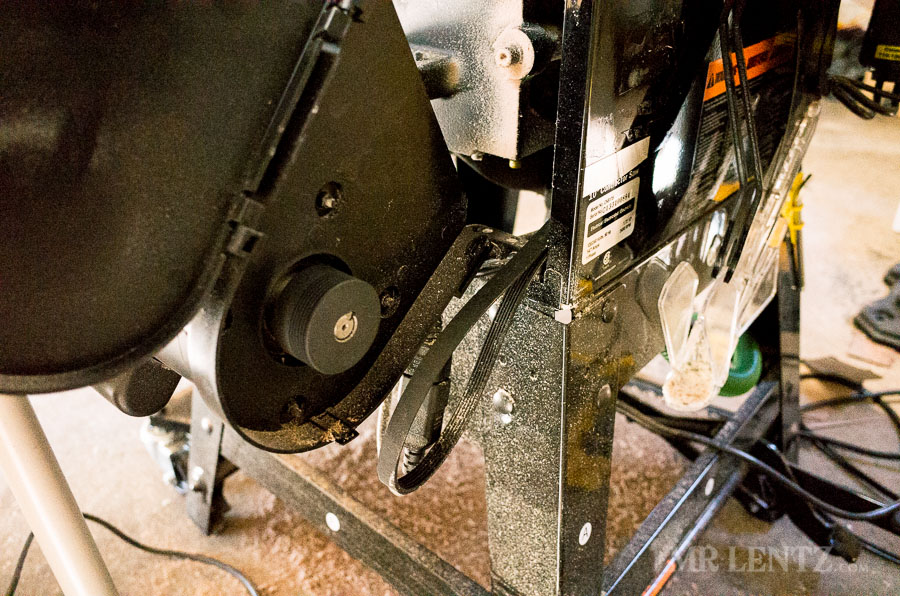
And then, of course the belt to the tablesaw motor came flying off – that’s usually never a good sign. On handmade projects, if it can go wrong…it will go wrong. Might need a little tune up while I am at it- this saw hasn’t gotten much use over the last year.
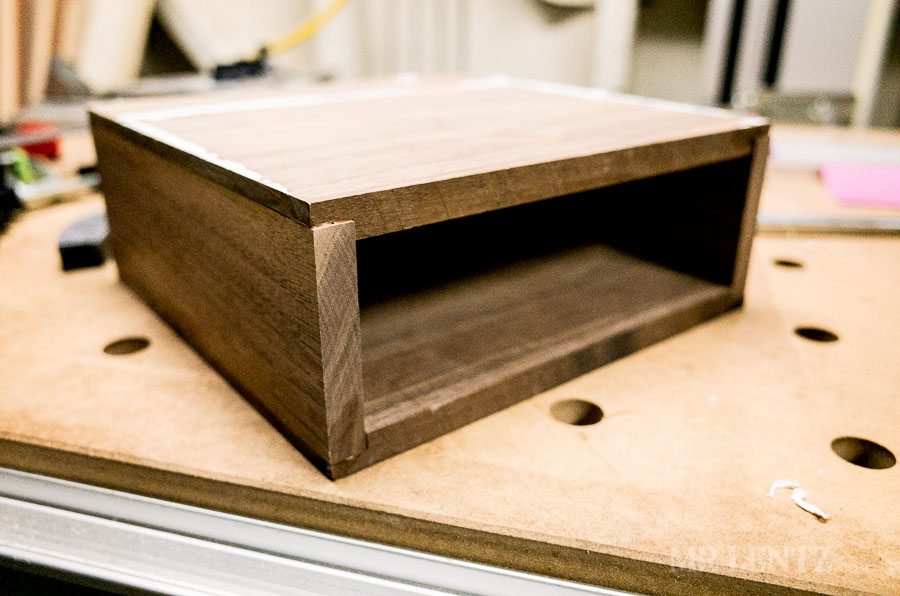
After making all of the rabbet cuts you can see where this project is heading.
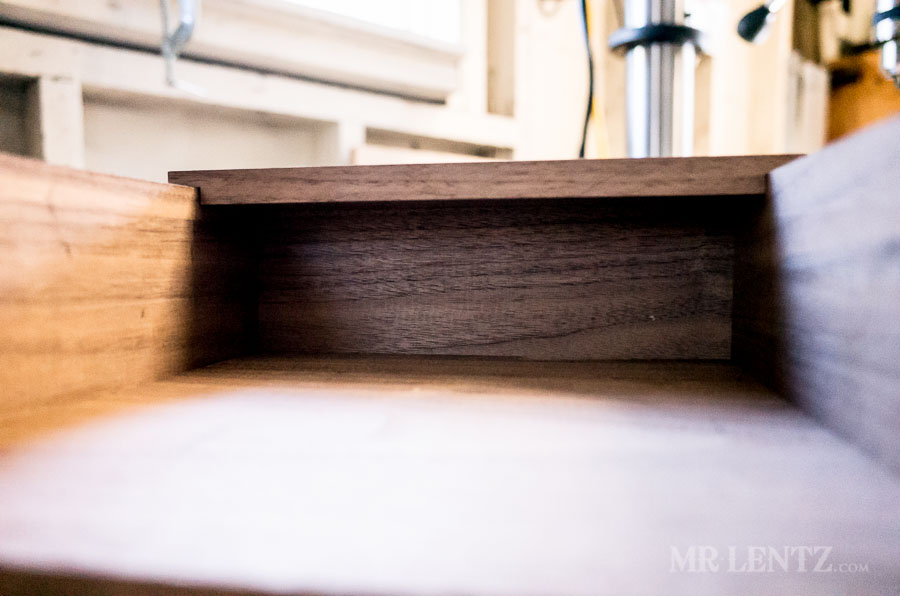
Now it’s time to create a dado cut for the top two pieces to fit together as well as the bottom ones. This will help to add strength in the middle of the piece where it will be bearing most of the weight of the screen.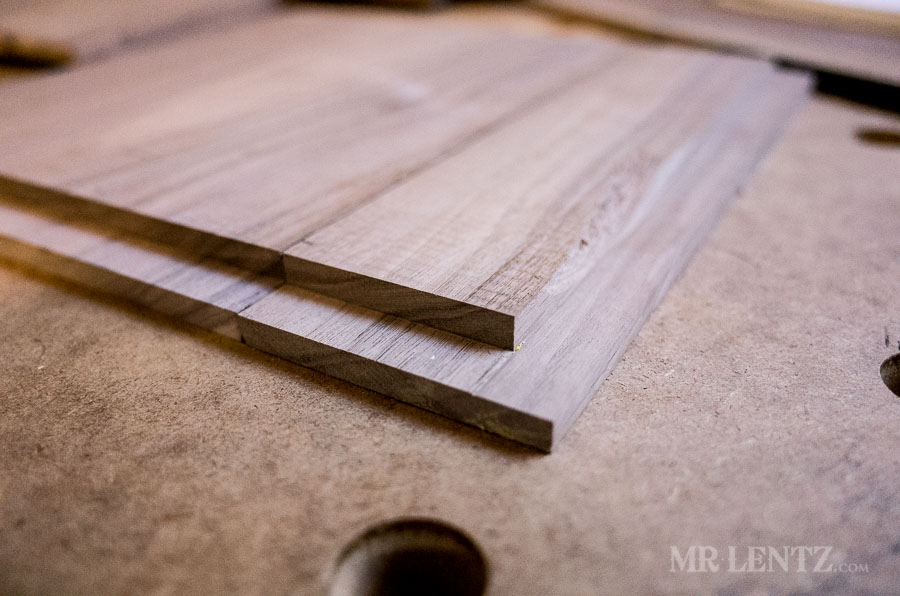
Multiple layers of Rabbet cuts.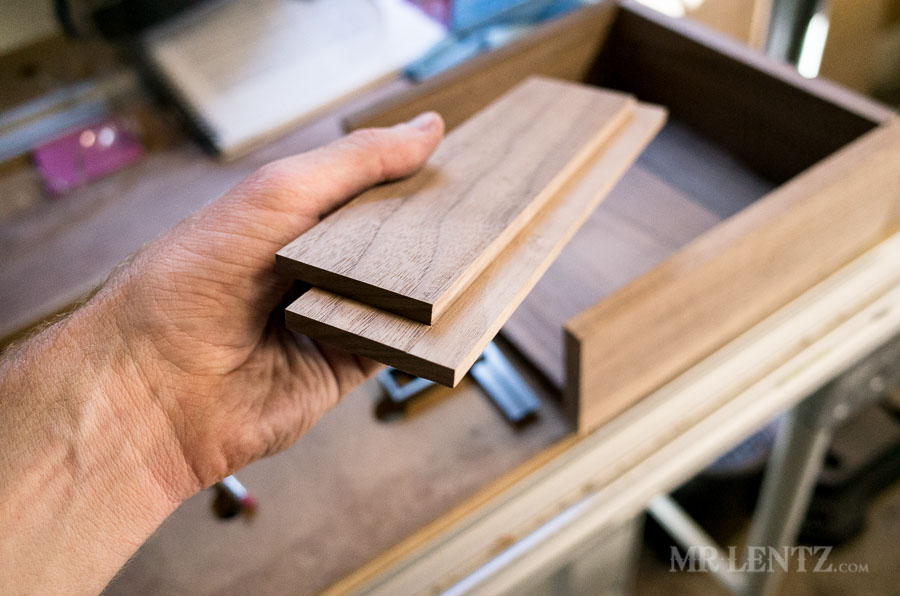
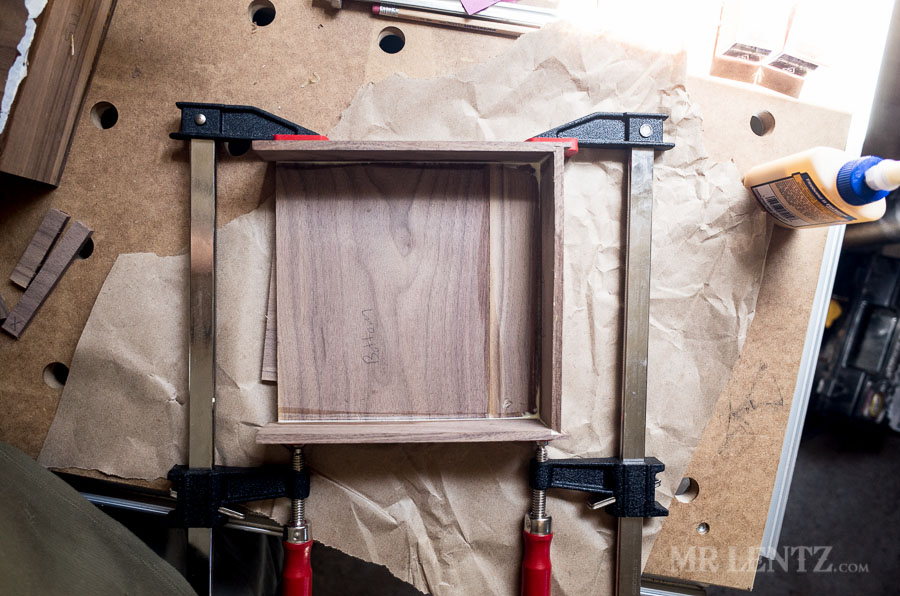
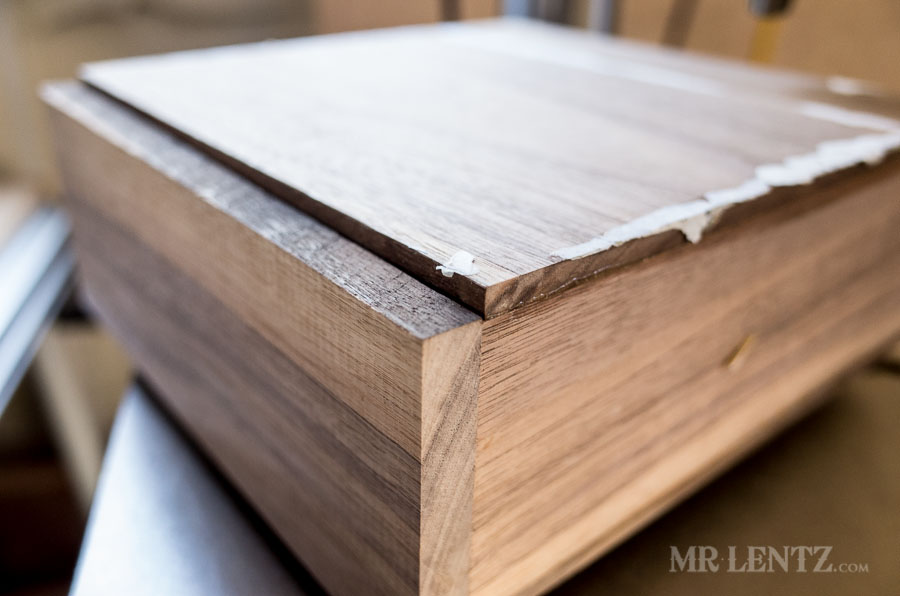
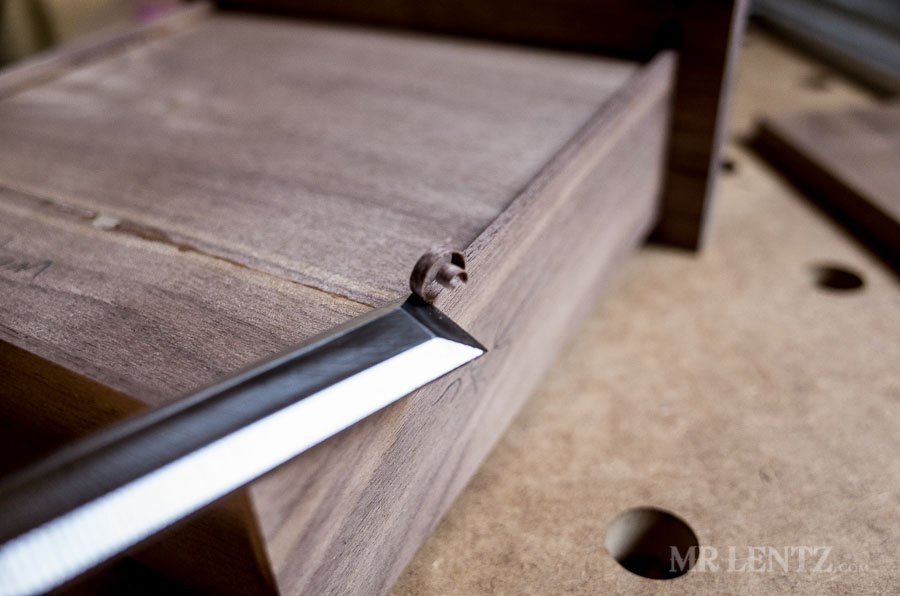
Here’s the assembled frame after the Titebond Premium glue was applied and dried…to the paper it was on as well. I shaved off a bit of the dried glue with a chisel and will sand the rest down later.

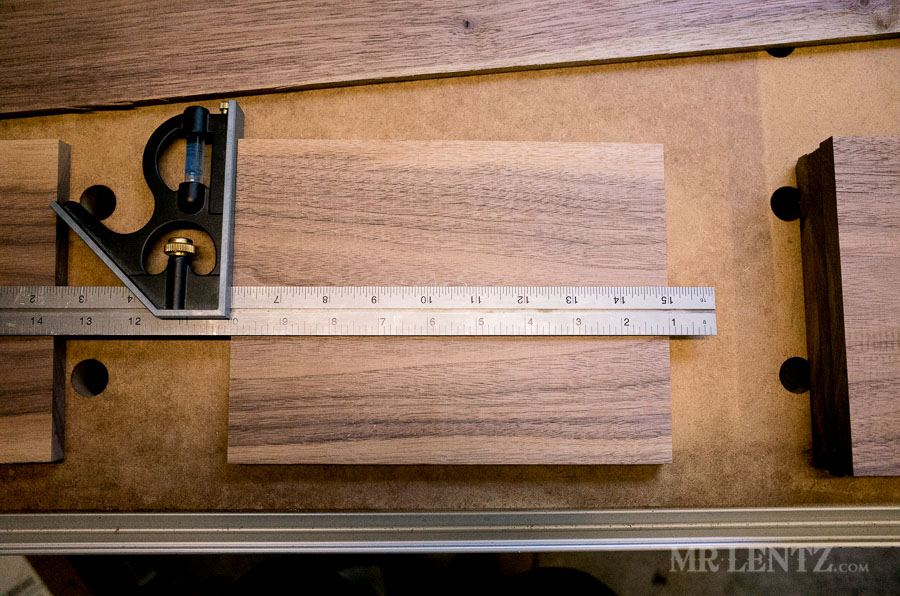
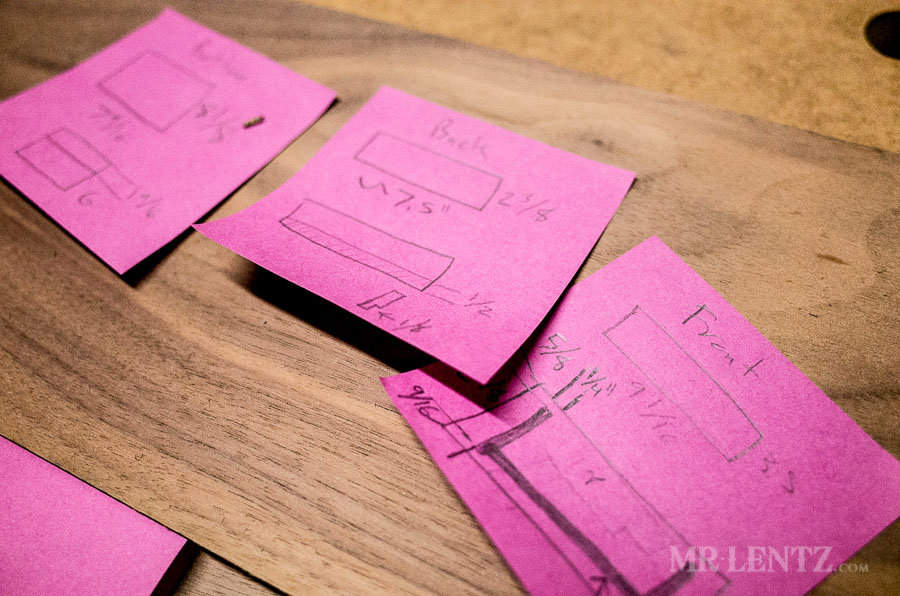
Now I just need to measure the front of it to get the dimensions for the drawer front, and measure the inside for an idea of the drawer base, sides and back.
Nothin’ like a few more sticky notes to flush out the design! I need a better method for the future though – I have heard google sketchup is a good one for complex projects, but at this point I would rather spend less time in front of the computer!
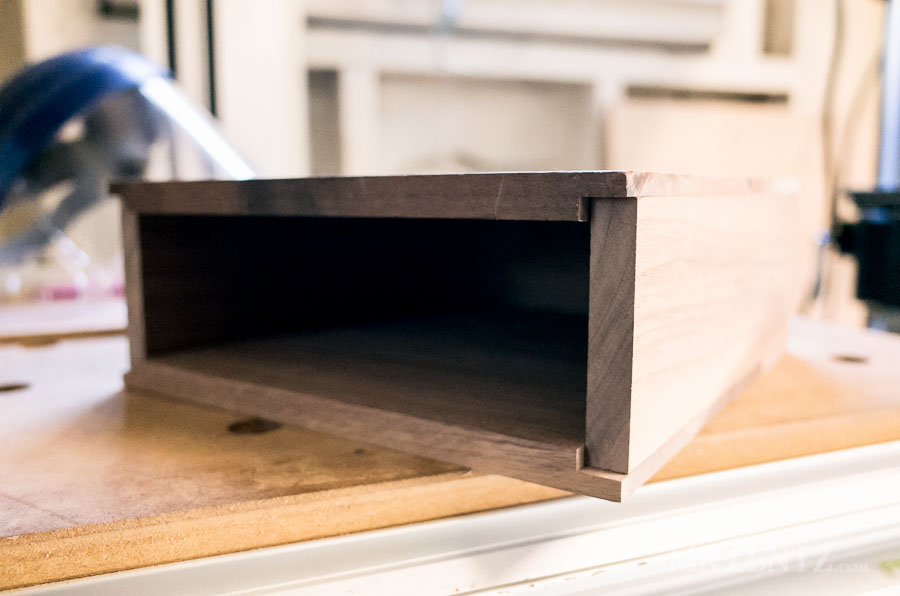
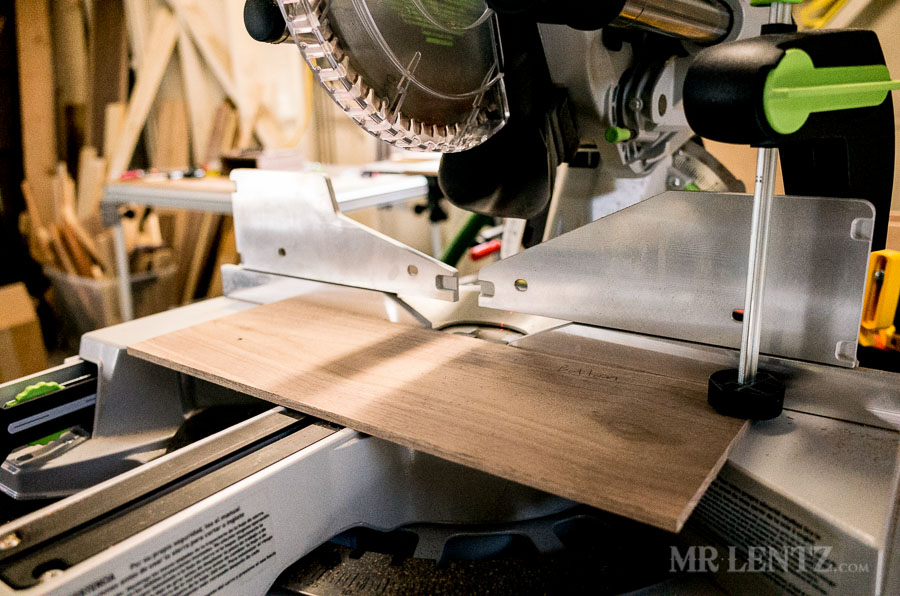
After measuring out the heights and lengths I make the cuts on the miter saw and table saw. The front of the drawer is the same 1/2 inch thick walnut while the interior drawer is a 1/4 inch walnut stock. It’s not entirely necessary to make the interior out of walnut, but I had the pieces, so decided to make it consistent.
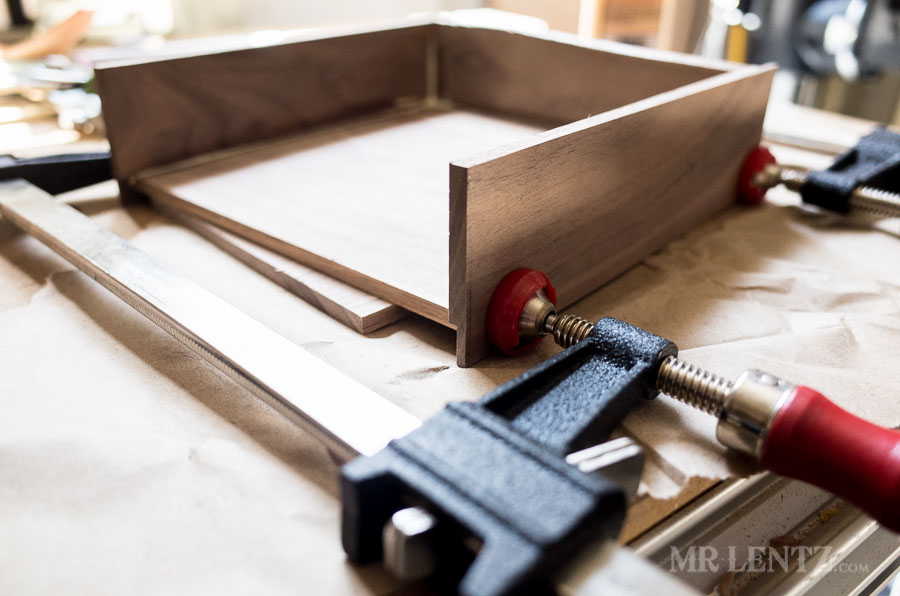
In order to start assembling the drawer I decided to glue the two bottom pieces together first, using a flat surface and weighted down. The joint is weak, but that’s ok for now because I will be gluing it to the sides and back pieces, providing more structural rigidity.
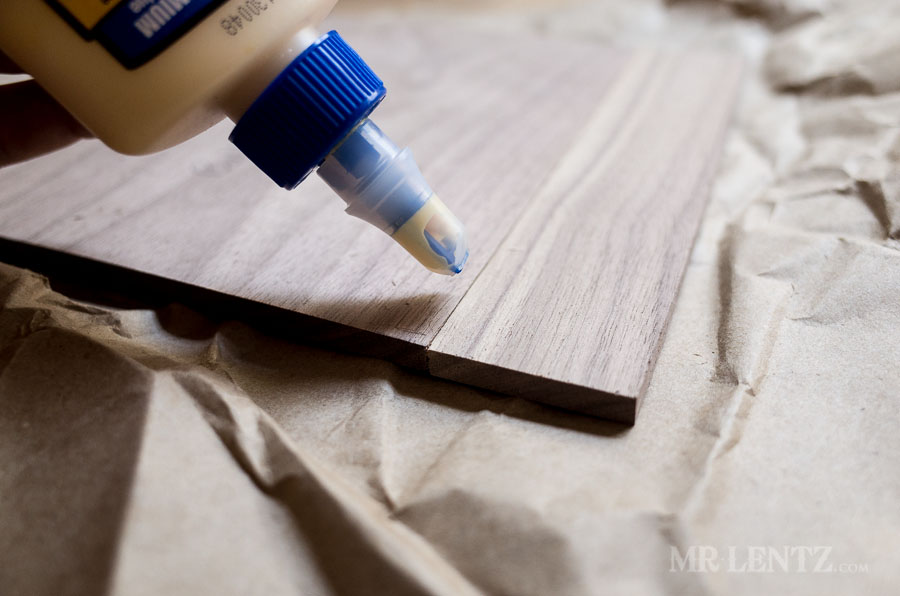
Here shows the aftermath of about 10 minutes of wrestling with the pieces, glue, and paper towels to get everything in place. It takes a bit of patience as things move around, glue spreads etc.. Just keep your cool. I clamped it all down for the 30 minute set period.
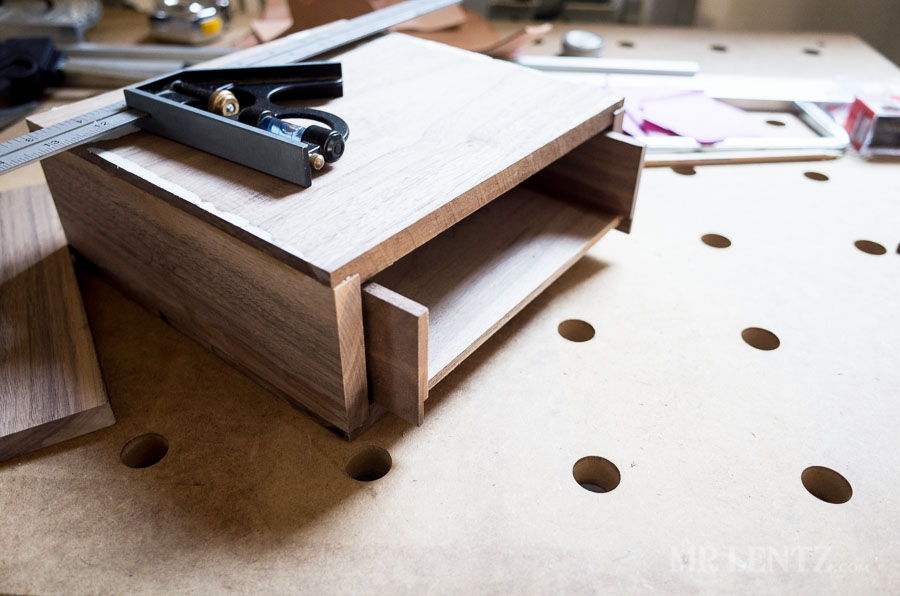
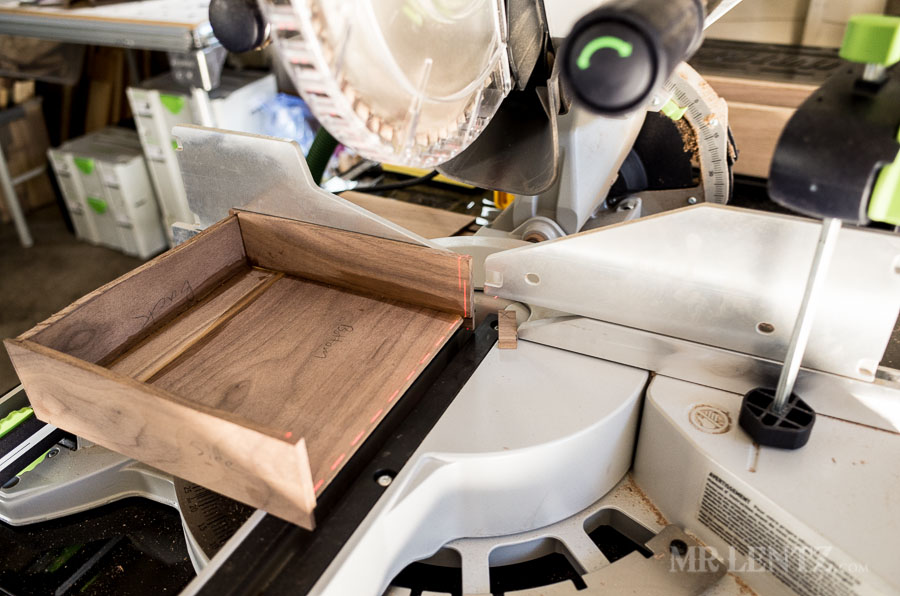
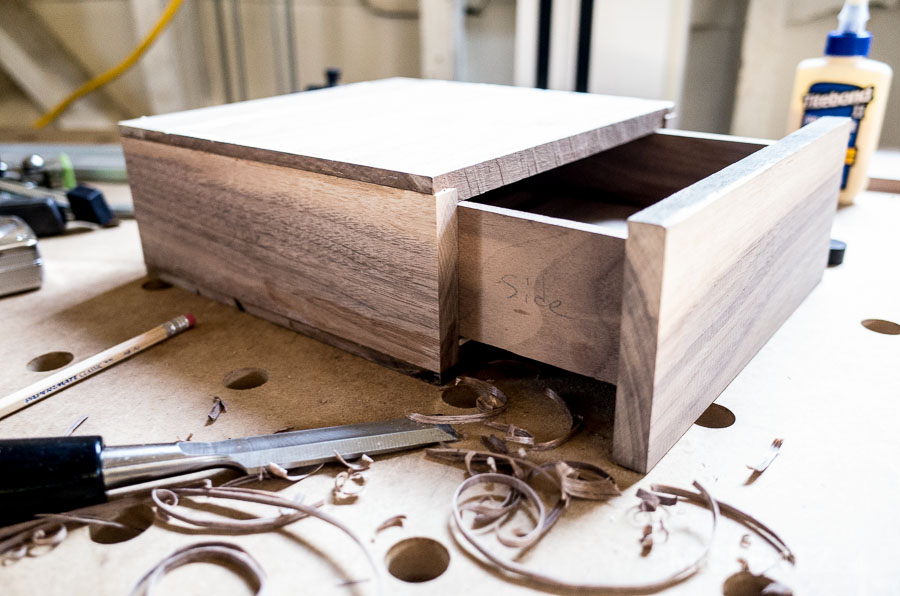
It’s starting to come together now. Here you can see the drawer fitting in the cabinet. The sides are a bit too long so I am attempting a slightly non-traditional approach to correcting that… using the miter saw. I don’t recommend this, but it’s a quick and dirty cut that is still technically a cross cut so should work on this machine.
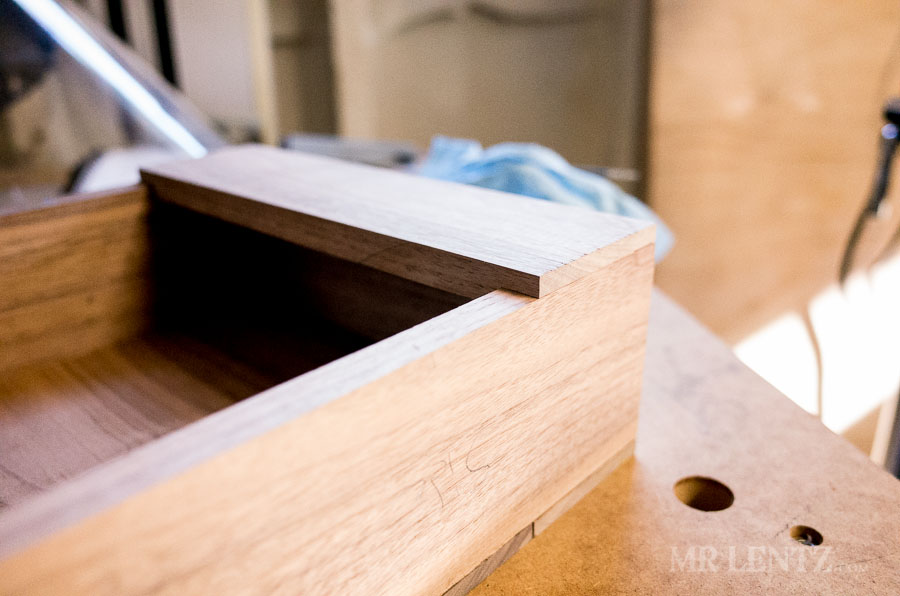
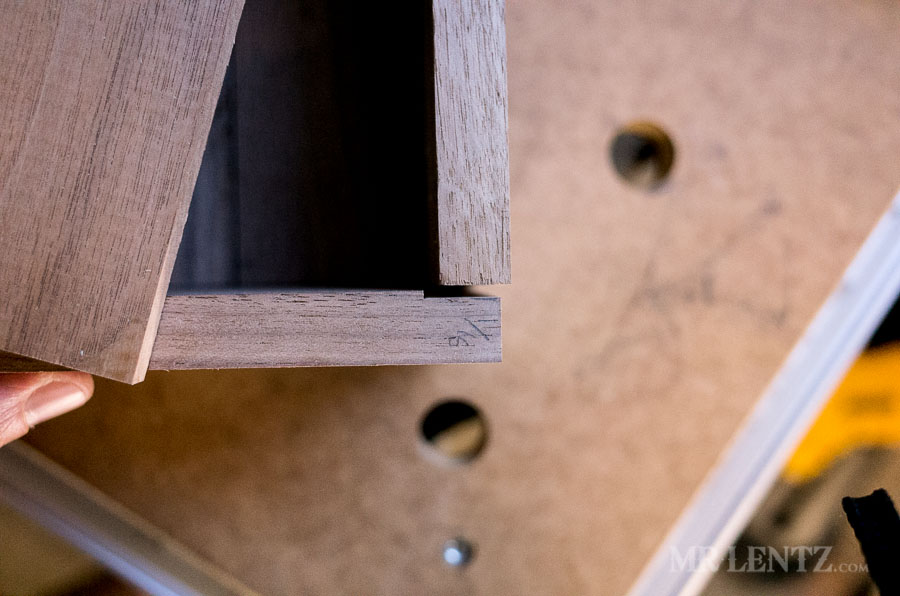
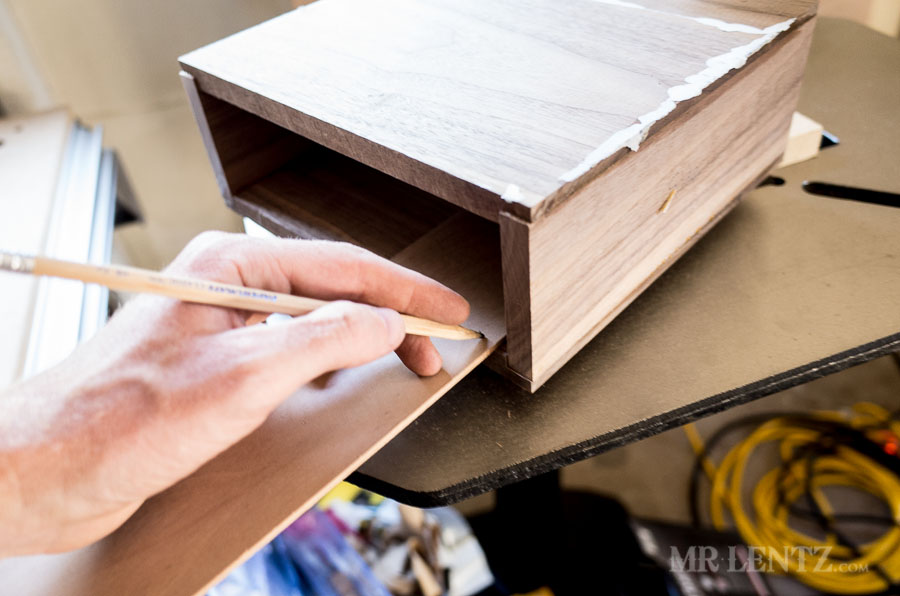
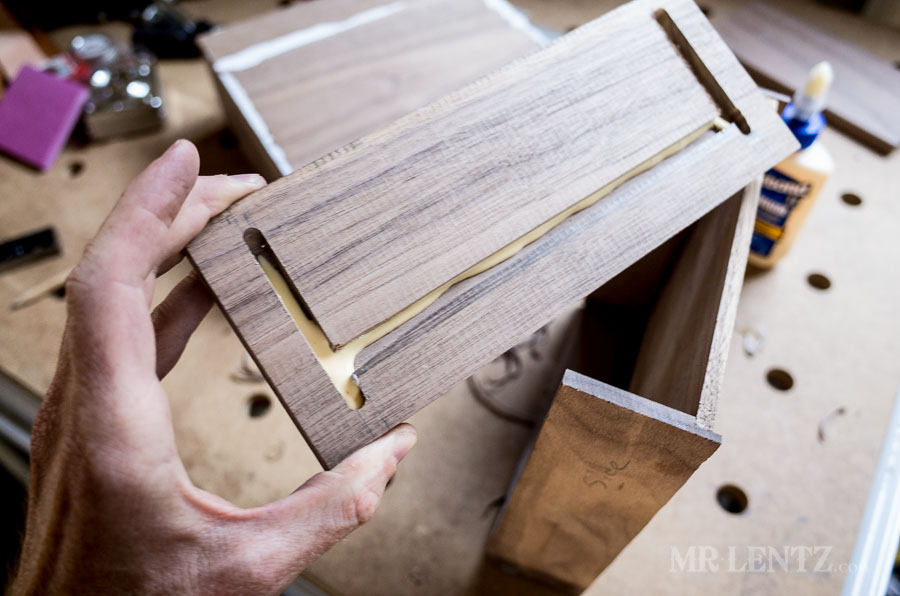
On the front piece I measure out the outline of the other drawer pieces. This is where I will make a 1/4 inch router cut to fit the front piece onto the inside drawer pieces, making a fairly sturdy joint for a part of the drawer that will receive the most stress.
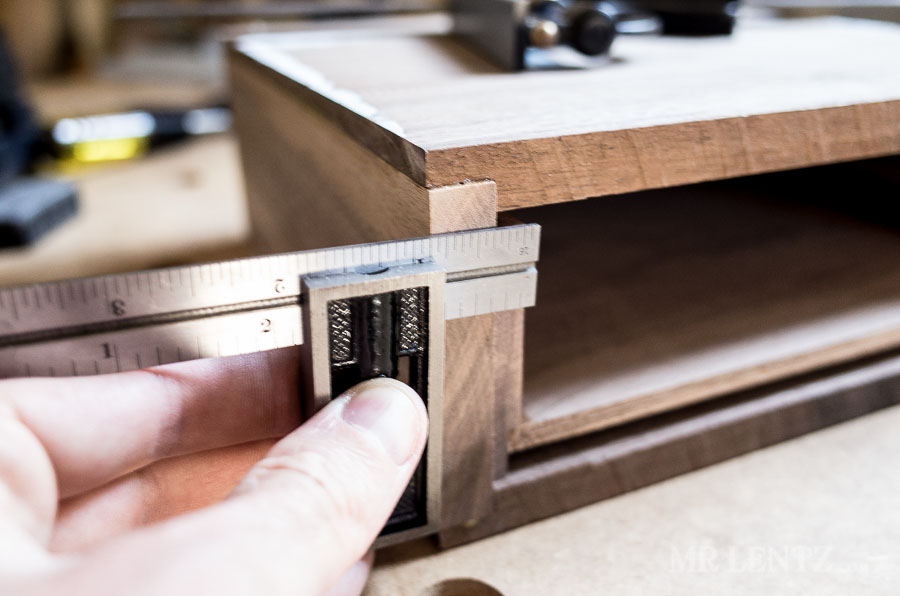
I tried to measure as close as possible, this is what I ended up with.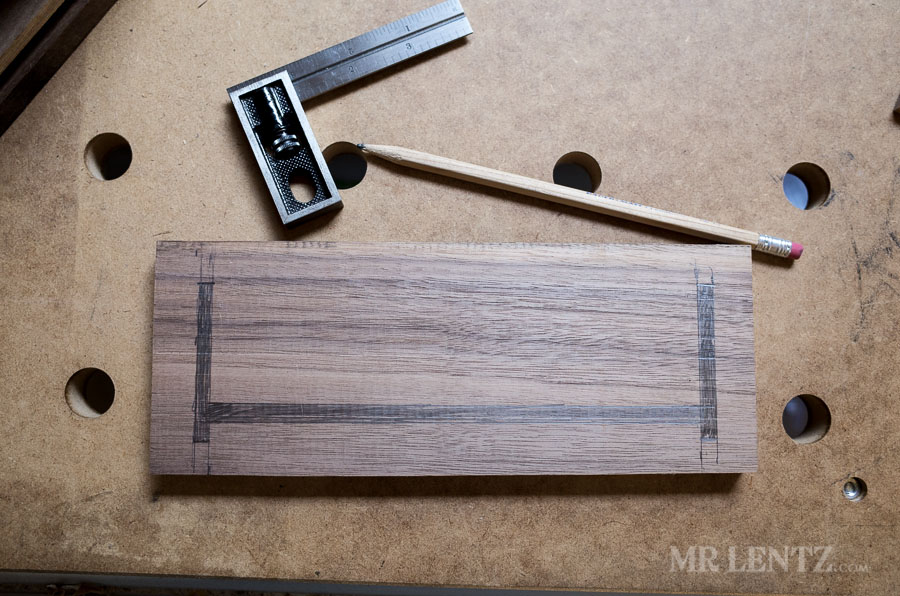
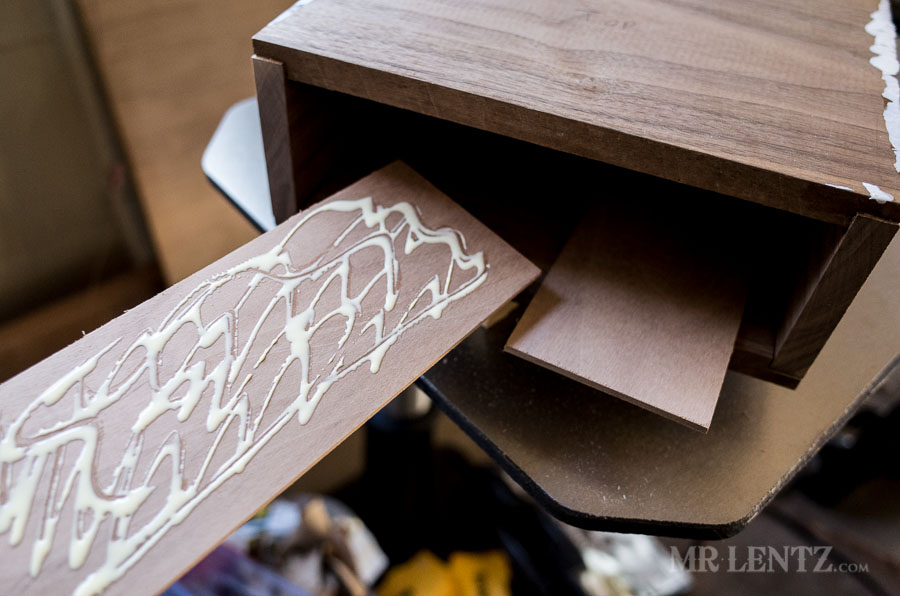
Then off to setting up the plunge router for a 1/4 inch deep cut along the traced path. Hopefully it turns out close!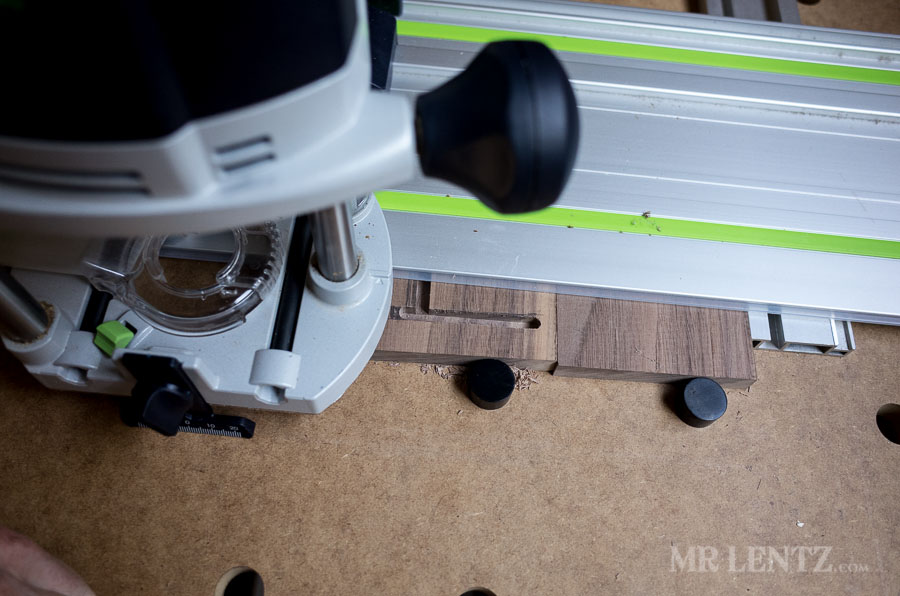
A little test fitting with a mallet put it in the groove nice and tight, but once I slid the drawer in it sat about 1/8 inch too low, oops.

Not surprisingly I actually have 1/8 inch walnut stock. Leftovers from my ring making days. The solution in this case is simple – cut two pieces of 1/8 inch walnut stock and glue to the inside of the cabinet. The drawer will run on top of it and boost the height.
The only problem with this solution is that my drawer is about 1/32 too big to fit into the cabinet now…so I shave a little off with some very sharp chisels. After a bit of carving, things start to come together again and all peace is made with wood.
The front piece then gets glued and left to dry for a few hours. As you can see my router cut is, ahem, way off. I had unfortunately not fully tightened one of the guide clamps and the darn thing jiggled around a bit. Luckily for me it magically worked in my favor – still providing a tight fit where a tight fit was needed.
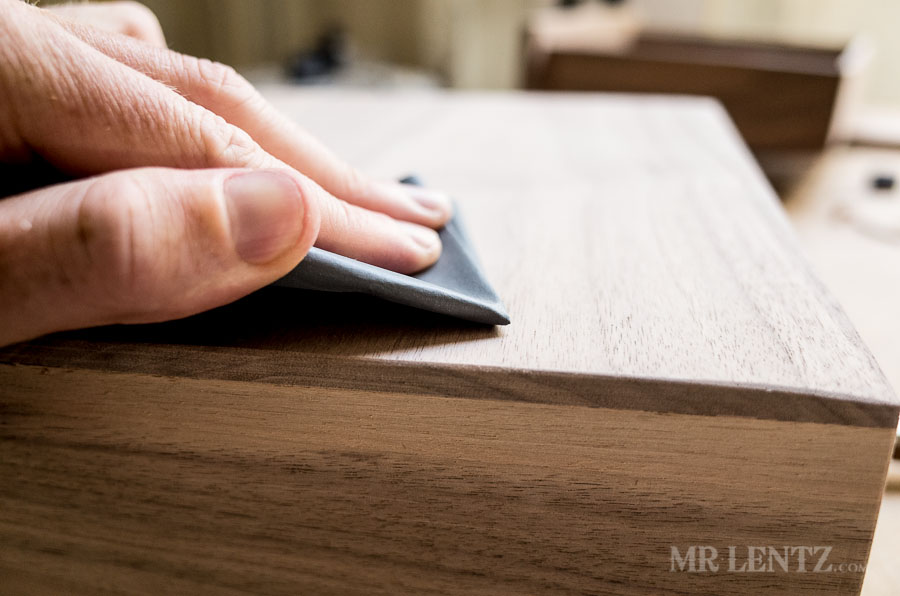
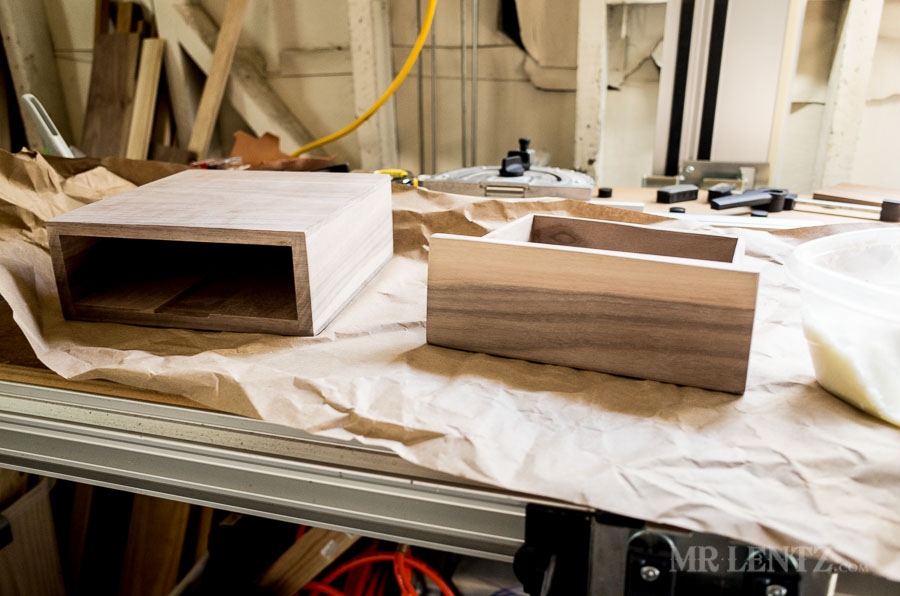
Now it is time to sand it all down, roughly into shape. For this purpose I use a high-powered sander capable of removing a lot of wood quickly. You gotta be careful though – it can remove a bit too much and there ain’t no going back. For some reason my camera decided it was better that I delete that photo than share it with y’all, so I guess I will take its advice on this one.
Next I move to the orbital hand sander and use a finer grain sandpaper to smooth up the box and give a very subtle rounding to the edges. Then, I dampen the box to raise the grain, let dry and sand down once again.
On the last stage of sanding I switched to a 600 grit paper and just used my hands to get a nice smooth finish on it.
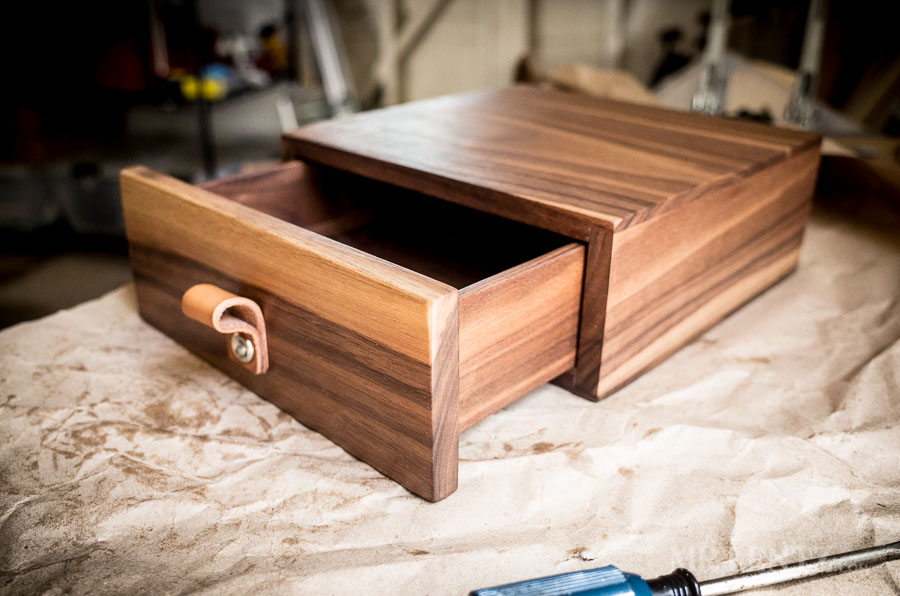
And finally, my favorite part – oh wait, actually I forgot one step! The drawer needs a pull. So I decided to grab some spare leather, full-grain vegetable tanned of course. I will screw it into the front to give the cabinet a bit more character.
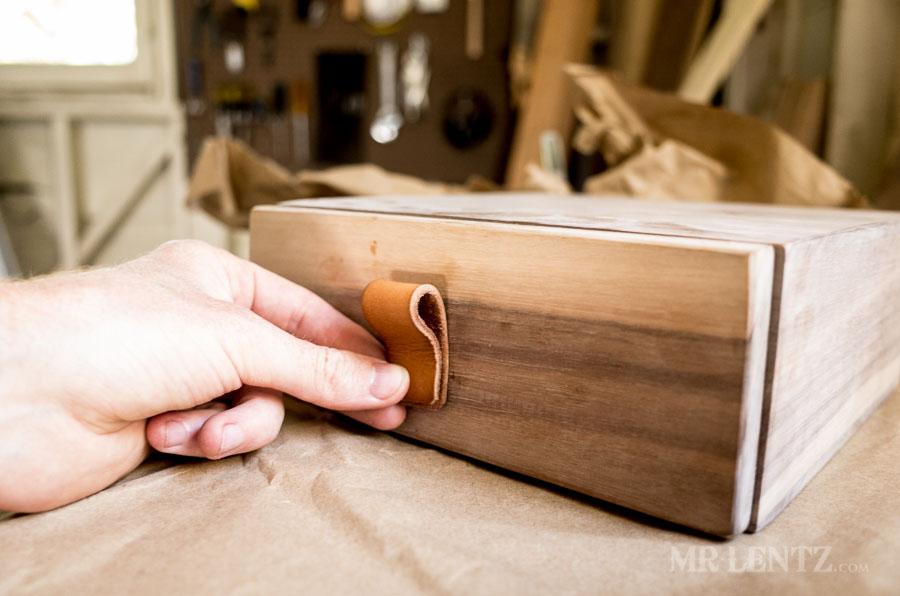
Ok, and finally – the best part, waxing up the box with my home-made wood wax. A combo of beeswax and olive oil making it a spreadable paste that soaks into the wood.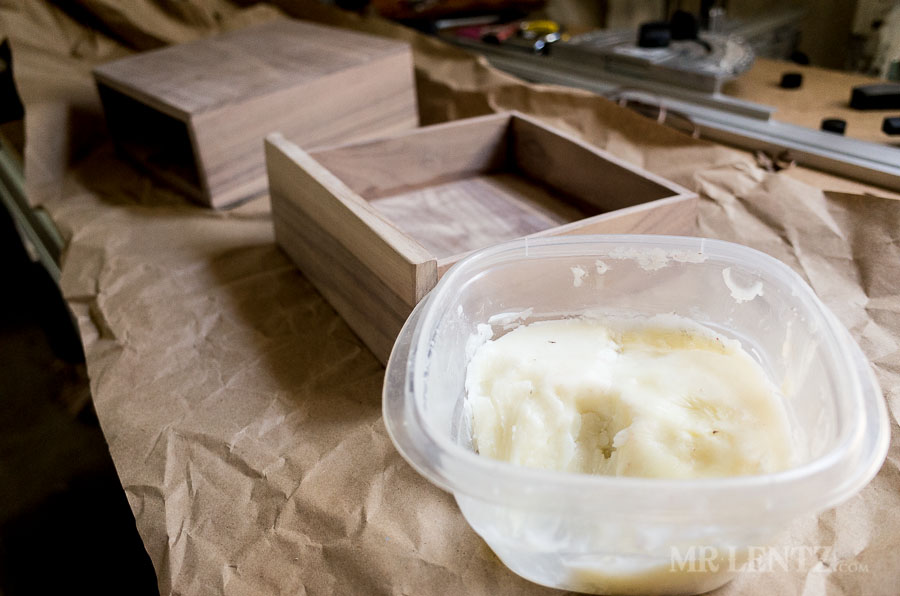
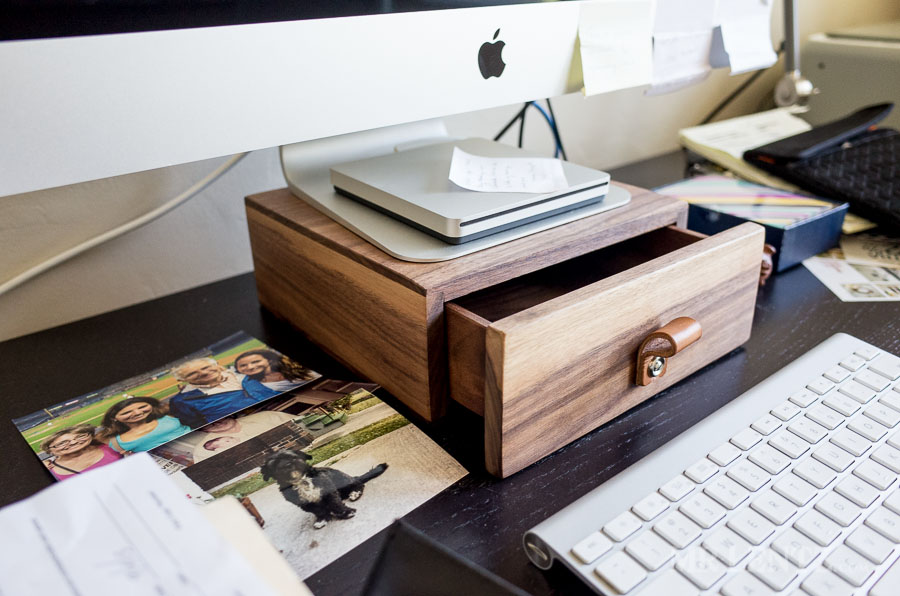
Here’s the finished piece, all waxed up and ready to go to work, forever holding up a heavy Apple screen and providing endless joy for that lucky recipient. In fact it will be so distracting that she will not get any work done, instead just staring for hours at its endless beauty.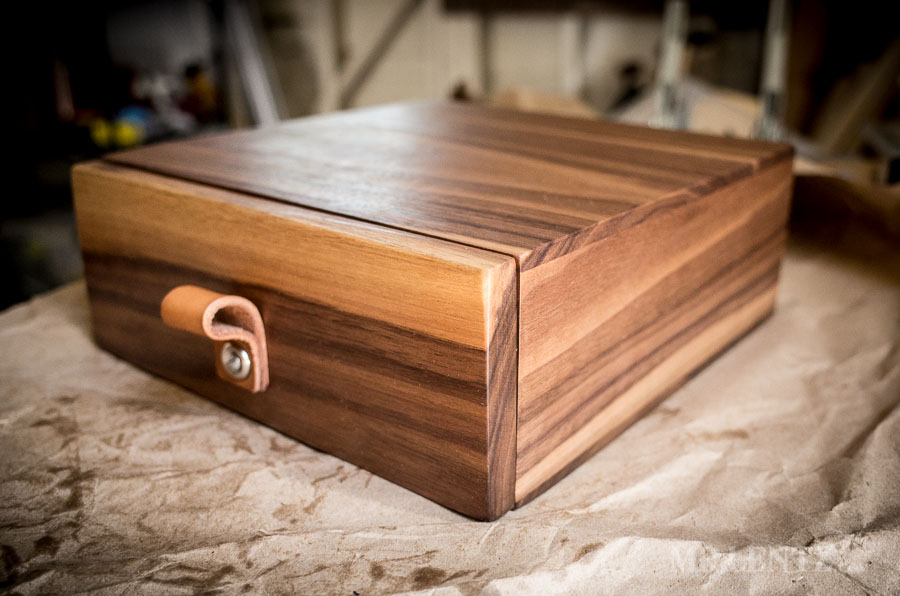
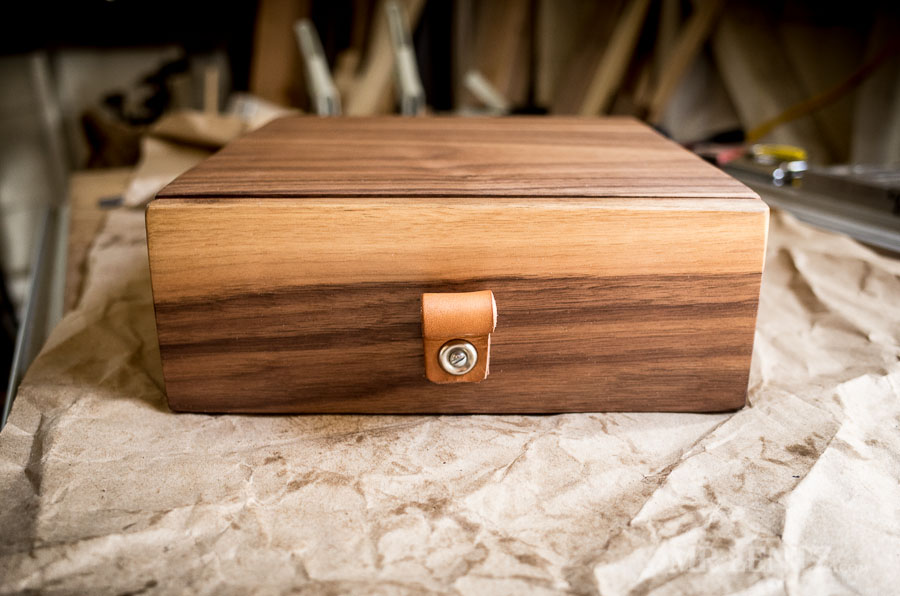 Here it is on its first day of work. Of course, my girlfriend later commented on how much she wanted a handmade leather woman’s wallet, go figure!
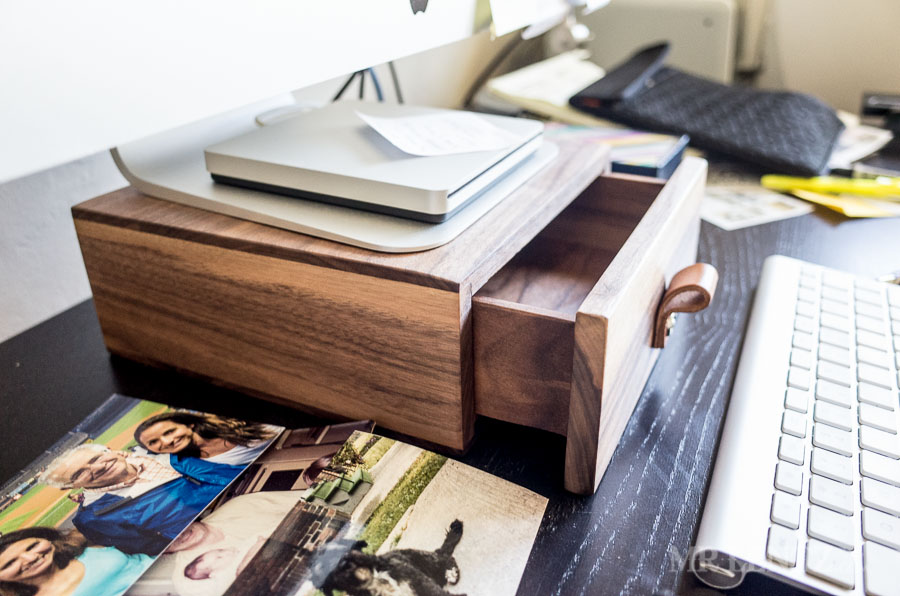
READER'S FAVORITESVIEW ALL


That is a beautiful drawer/computer stand! I always enjoy your posts. Wallets for women? Good idea!
Hi Ann, thanks for being a fan! Yes, the wonderful world of wallets for women, they can get quite complicated!
Looks fantastic and A Lot of work. Lucky girlfriend!
Definitely a lot of work, but worth the effort as I find it fun to tinker around in the workshop at night.