
Everything, Leather, Tutorials
Almost Lunch Time (Day 2)
Jul
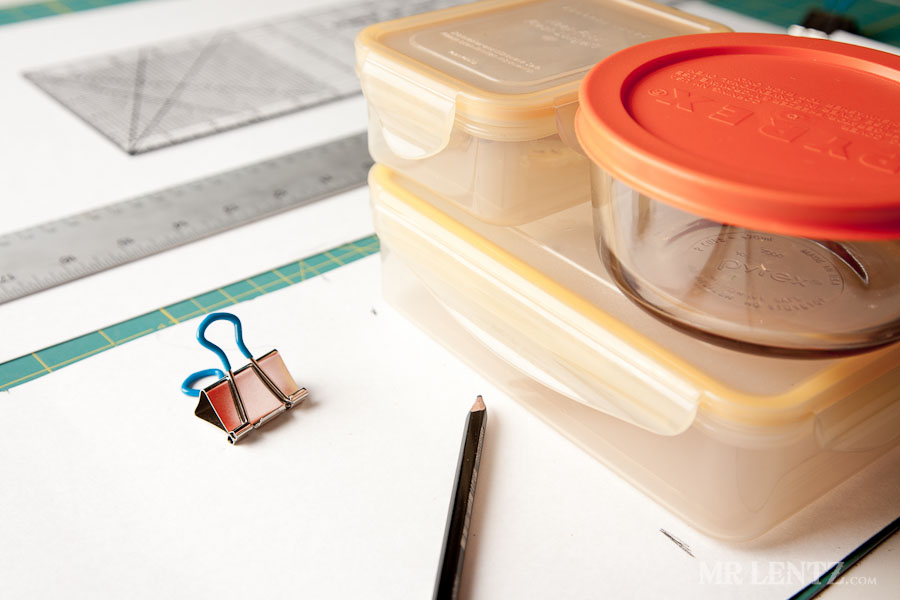
A few days ago I came up with a design for a simple one-piece leather foldable lunch box. Today I took that design to the prototyping table and got to work figuring out how to make the drawing a reality. After a little while, cutting pieces of poster paper to shape, I realized that the foldable design might not work as I had drawn it. Part of the problem was the sheer area of leather required, the other part was the practicality of folding the sack up while not completely turning your sandwich into tossed salad. And the final problem that made me dump the idea altogether – the idea of unfolding this lunchbox at a desk – only for it to take up a gigantic amount of surface space – seemed very unappealing and thus un-manly.

So the design was scrapped. Then re-thought. Don’t let design flaws bring you down…let them challenge you.

In the new design I am going for a very rigid looking box with straight lines and only the necessary adornments. The box will be designed so as to be as functional as possible while retaining as minimal of a look as can be achieved. It will fit the average sized men’s lunch, be easy to open, close, and carry off.


To help achieve the rigid, straight lined look – I decided to use wood as a structure holding the sides up. For this first design pine makes sense, helping create a nice and simple look – unstained, un-died, au-natural.
Like this post so far?
I spend most of my free time creating tutorials like this to help those like yourself get into leatherwork and woodworking, or get better at it. If you'd like to support my efforts, consider checking out my handmade leather goods shop and purchasing a gift for yourself or a loved one. It's readers like you that help keep a small U.S. business like mine going strong, so -thank you!


With the leather cut and marked, I got to work dyeing with walnut husks.


Then a nice even coat of Extra Virgin Olive Oil on the top, and a super light coat on the bottom to help free up the fibers.

To help secure the leather to the wood sides (before firming up with screws later) I used a contact cement sold by Tandy Leather. This is the least toxic contact cement I have ever found with no VOCs. I have avoided using other contact cements altogether until now – the other brands release an intoxicating amount of dangerous fumes.


Slowly rotating each side simultaneously, and by some fluke of Murphy’s Law, I was able to get the leather to line up perfectly on both sides.

Each side was marked 3/4 inch from the edge for screw placement. With a drill press this is fairly easy to get nice straight holes in the narrow wood.

I perused my local hardware shop for some flathead – slotted screws. Apparently they have been phasing this type of screw out since the 60’s. There were only about 10 sizes left on a wall of more than 400 screw types. This also means they were slightly over-priced, but worth it – in order to retain the detail and suggestion of straight lines. 
The final steps included fastening on the hardware to make this box functional. Early on I ran into a problem when figuring out how to install the snaps on the formed box. Basically I could not hold the snap setters in place with two hands while simultaneously trying to fit the hammer inside of the box to give them a good enough whack. So, I developed a quick little jig. Basically installing the setter in a piece of wood that is clamped to the table.

The jig allowed me to get inside the box, and hammer from the outside.

The handle design was made from a single thick piece of leather, inserted into slots cut on the top, and riveted to smaller pieces to help keep it in place. This design allows the handles to pop-up when needed, and lay flat when not in use – helping to keep the rigid look and straight lines of the box.


Strong.

Minimal.

Manly? I am not entirely sure – I guess it’s subjective. I will be using this design for work.


And functional.
It felt great to take an idea and transfer it from paper to the real world. Of course – it wasn’t without its own trials and tribulations, though nothing so bad as to prevent me from completing the design. In fact – a lot of the challenges that this box presented – has fueled even more ideas for different lunch box designs. Maybe I will start a small lunch box series.
Take some time this holiday weekend and dream up something you would like to make – and feel free to post any questions if you need some help getting started.
READER'S FAVORITESVIEW ALL

Pingback: Almost Lunch Time | Mr. Lentz
That is beautiful. I want one so very badly! If you feel inclined to make any more, please let me know! I’ll be your first lunch box customer! Just beautiful!
I just may have to add this to the shop then!
Gorgeous.
That is absolutely gorgeous. You definitely need to include that in your shop.
How does it look like folded?
Al – only the top folds over so that the snaps can be set. Otherwise it is a pretty rigid structure.
I am very happy that I found your webpage. Lot of inspiring information and useful tips. I will try to make this bag for sure.
Keep working! Now you have new follower.
Inga
P.S. Love your design of webpage, photos and all branding together.
Thanks Inga! I have been slow at posting lately, because I have been so busy with orders. I have a bunch of new writing coming out soon!
going to try and attempt t make this for my b/fs birthday. i have a woodworker helping me, but any tips for a complete newbie? Thanks! Your stuff is amazing.
Pingback: Ideas para hacer las bolsas de lunch de tus hijos | Guia Inmobiliaria Vida y Estilo
The beginning of a dopp kit, perhaps?