
Everything, Leather, Tutorials
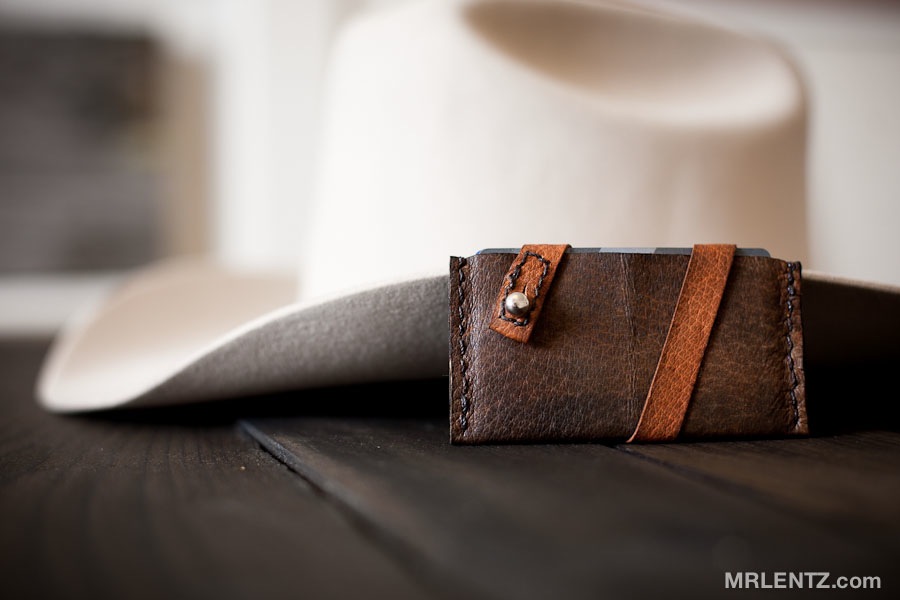
Making of – The Leather Strap Wallet

Feb
Last week I realized that there is a cloud of mystery that surrounds a lot of what us craftsmen and women do in our shops. Sometimes we just show you the end result, the product up for sale in our shop…and leave out the fact that it may have taken us days or weeks even to develop the final piece. In some cases we screwed up royally, making mistake after mistake. I decided to document the making of this super minimal rustic strap wallet that I recently created, from start to finish. I will show every step so that you the viewer can get a good sense of what goes into the making of something as simple as this little wallet. I will make sure to also insert every mistake I made along the way…even though I have made this item a few times before, some things are just out of your control…but that’s ok. That is what handmade items are all about, imperfections. That’s why this wallet doesn’t look like a machine cut it perfectly square, or an airbrush blasted on the dye in uniform appearance, or the stitching is so perfect you want to gag. Nope – this sucker is flawed in all of the right ways and I love it.
The first step in any of my leather work has been to start with a sketch of the design in a notebook. I will usually have a good idea of what the initial design will look like, then I will go ahead and create another 3 to 6 sketched versions of that design. Varying length, the way the strap attaches, different shapes, etc. Taking a step back from the designs I will then pick the one that calls out to me the most, based on the feel of the design, it’s functionality, and if that design can be realistically created with my tools and in consideration of the laws of physics.
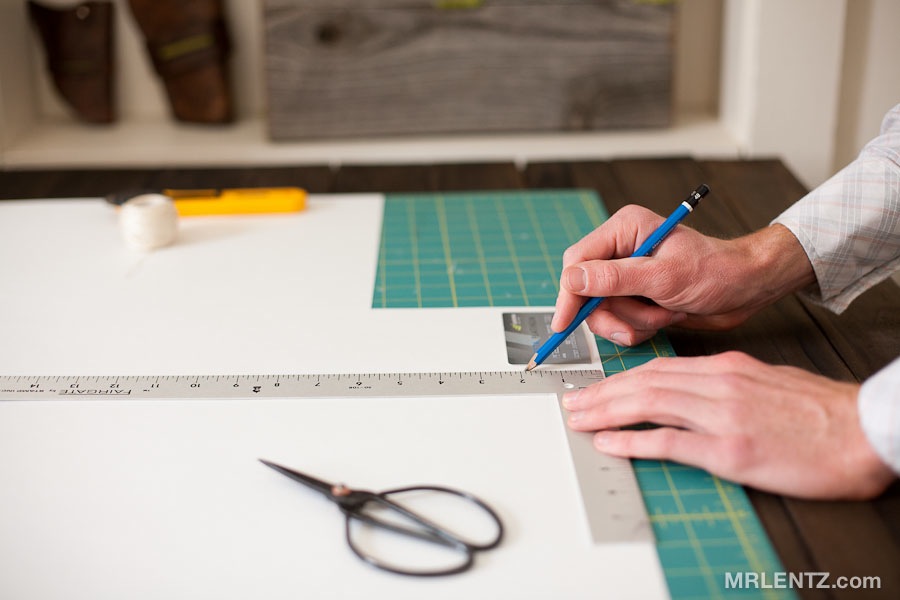
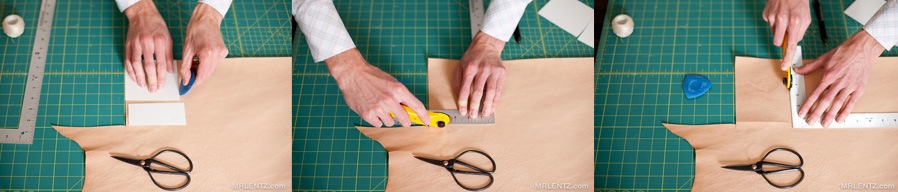
Heading straight over to my drafting table, I will then take my sketch and create a life size template using found objects (in this case my credit card) for reference as to actual scale. I draw it out on thin white posterboard because it’s easy to mark, cut, and cheaper than leather if you screw it up and need to start over. At this point it is pretty important to get your lines straight by using a 90 degree ruler and your best judgement, but don’t worry if it ain’t perfect. If curves are involved I bought a set of ‘French Curves’ which are basically a few plastic ruler-like forms shaped into multiple curves that you can use unless of course… you happen to be Picasso.
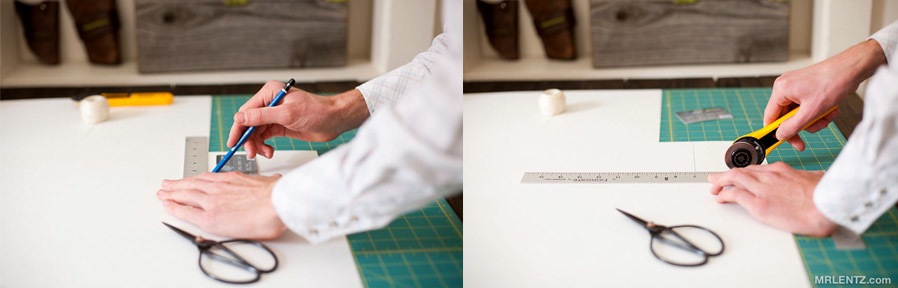
After drawing out the template, I use a rotary cutter and a ruler to make the initial straight cuts. This works the best compared to craft razors or scissors, you will end up with nice clean lines. Above I am cutting out the main outer template and the interior divider that will go inside the wallet to separate the cards and cash.
Like this post so far?
I spend most of my free time creating tutorials like this to help those like yourself get into leatherwork and woodworking, or get better at it. If you'd like to support my efforts, consider checking out my handmade leather goods shop and purchasing a gift for yourself or a loved one. It's readers like you that help keep a small U.S. business like mine going strong, so -thank you!
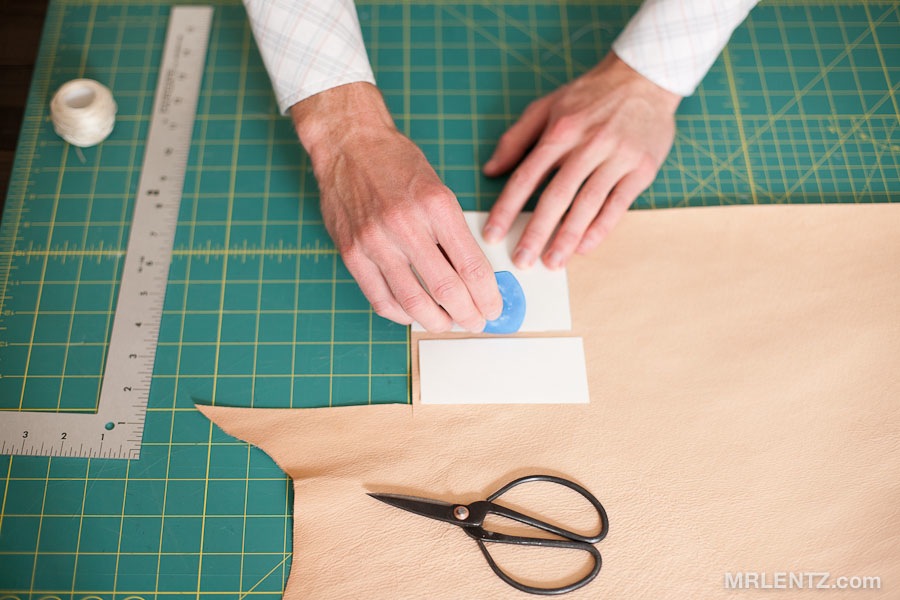
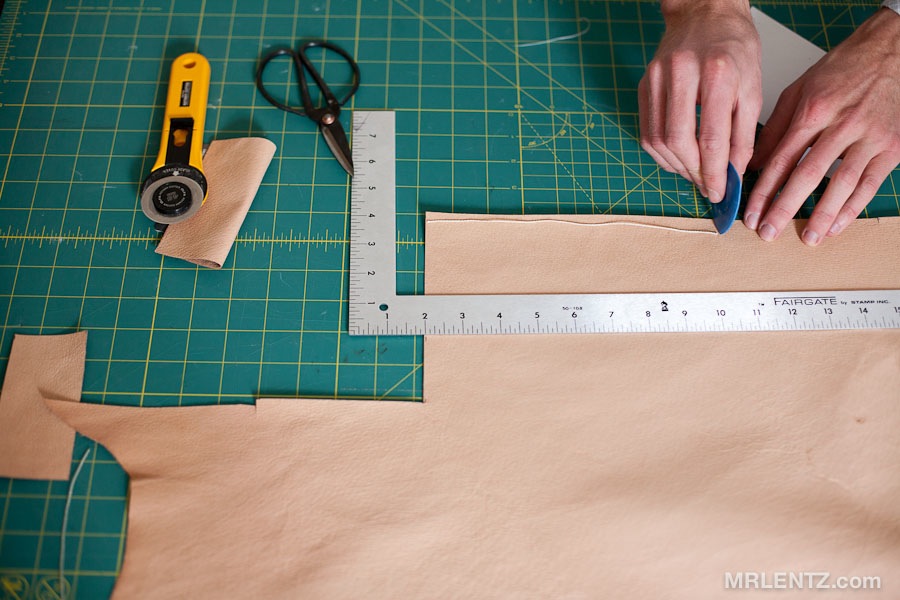
Once the template has been set, I bust out the vegetable tanned pig skin. Vegetable tanning is a natural process of preparing and preserving leather by use of tree bark tannins. In the photo above I am tracing out the template onto the leather using a piece of tailor’s chalk. I like the chalk since it easily rubs off down the line, that way I don’t have to worry about pencil or pen markings.
The rotary cutter is used to cut out the exterior and interior pieces.
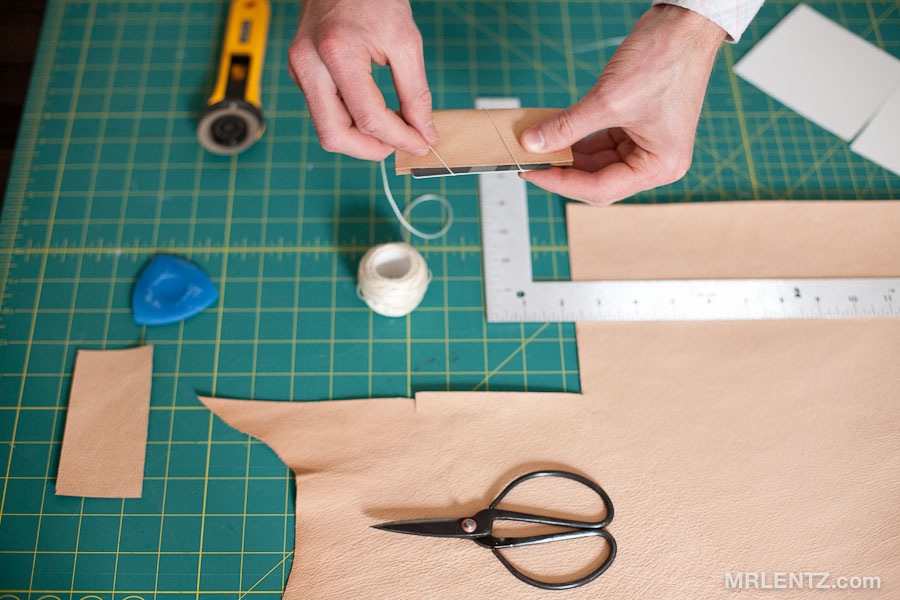
Next I need to figure out how long to make the strap. Since this is a piece that is a bit 3D in shape, the best way to determine the length is to use a piece of string wrapped along the approximate location of the end strap. I would add on another inch or two just in case, since it is always easier to cut leather off, then to try and put it back on.

Unknowingly at this point I am making my first mistake…the strap needs to be a tad wider to accommodate the hole that will be punched into it…that also needs to be surrounded by stitching for extra strength.
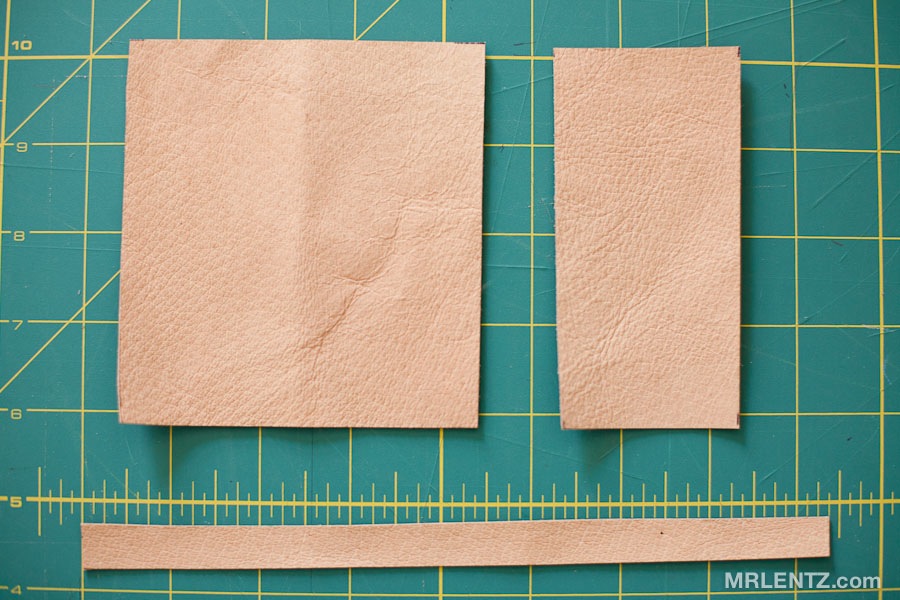
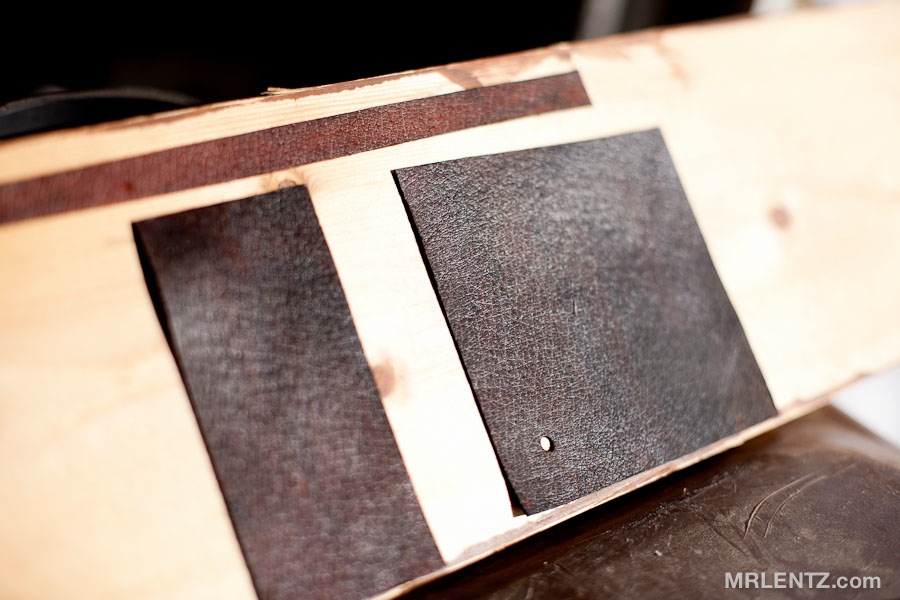
All of the leather being used in this wallet is shown above, ready for the next step.
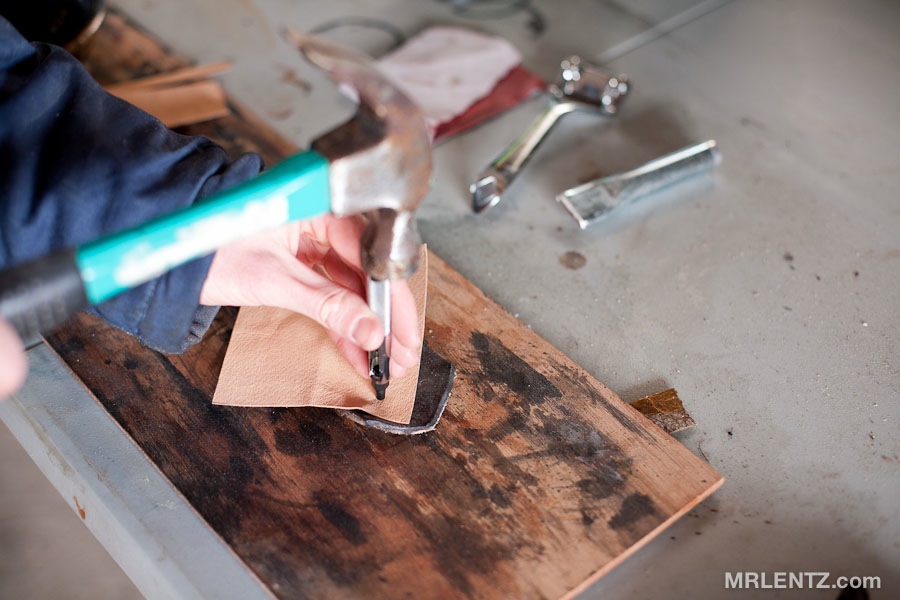
I have taken the leather out to the shop for some punching and staining. A hole needs to be punched for the metal nub that the strap attaches to. I use an interchangeable leather hole punch to get the job done. The pig skin is placed on top of another thick piece of old leather to protect the hole puncher as it pierces through.
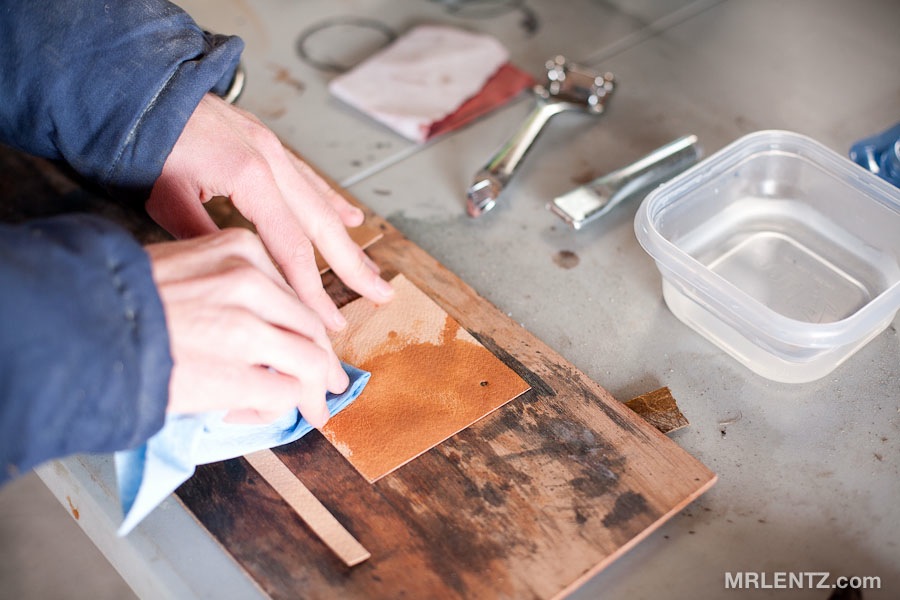
Before the leather can be stained, it is a good idea to moisten it first, and possibly clean with Saddle Soap. Saddle Soap is used to remove dirt and grease left by your oily little fingers…which can cause uneven stains. In our case I chose not to soap it up since I wanted a more uneven look anyways.
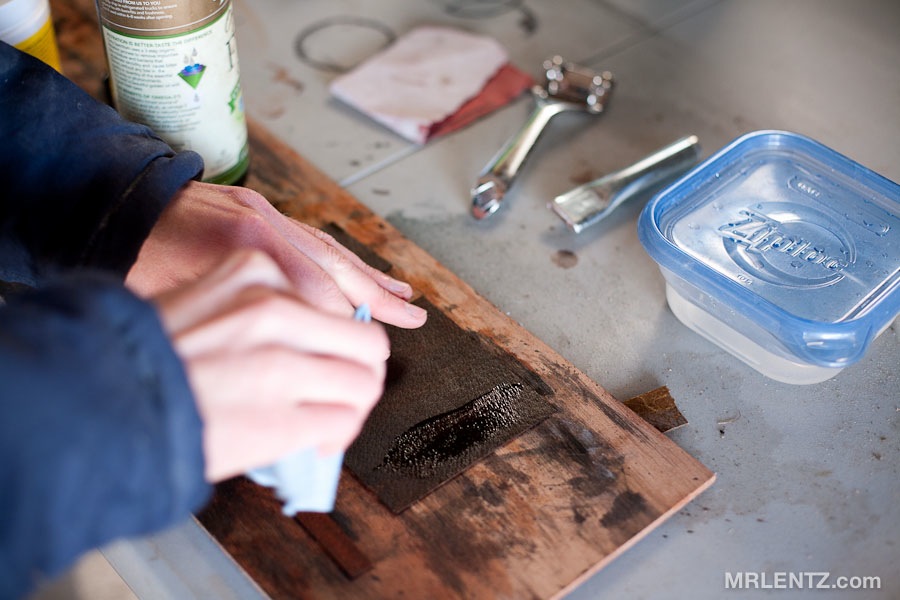
Even though the stain is eco-friendly, I still use gloves since it tends to stay on your fingers for another week…and since I am currently in the world of dating – that would put out a strange first impression as my hand raises the first margarita of the night to my lips.
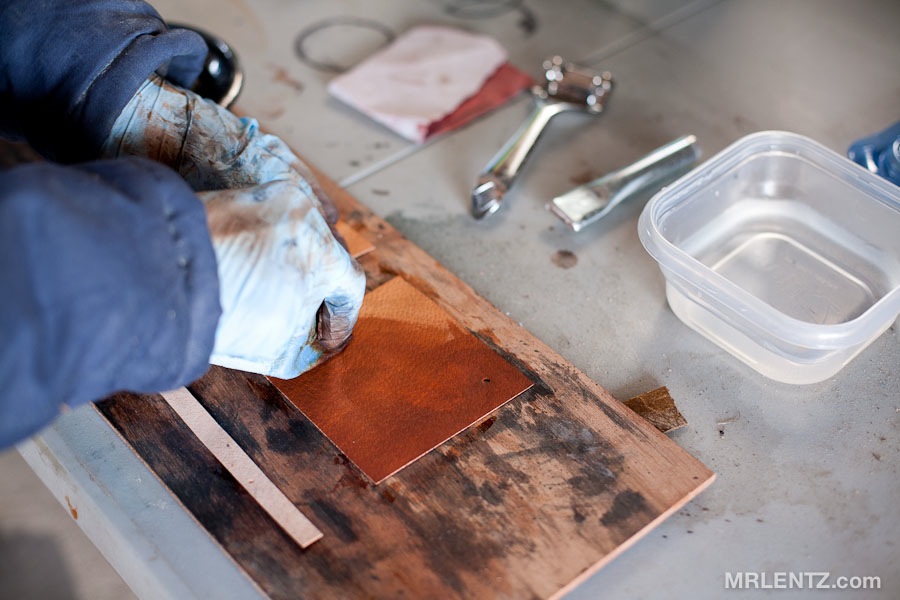
The stain I use is called Eco-Flo and I typically apply it in a two step process. Here I am using a warm reddish brown coat as the base, then I go over that coat with a watered down black. The red gives the black a bit more vibrancy and life. Plus with two separate colors, you can make your item look a bit more worn in places. Remember – perfection is for machines and mass production.
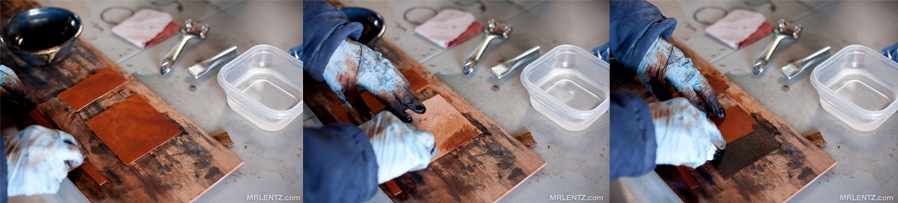
I just realized that this is where I made a second mistake, which was out of my control. Unfortunately at this point my shop is not well heated, so when I went out to stain the leather in a frigid 19 degrees – the stain started to freeze as I was applying it. Then my hands started to turn black from frostbite. My eyes glazed over and my breath froze into icicles that slowly obstructed my ability to breathe…so I went inside and took a 24 hour break.
The next day was a scorching 34 degrees, so I went back out into the shop and finished the staining process. Above, I am applying a thin coat of flax seed oil to help condition and soften the leather.
Even though 34 degrees is enough to make me sweat…it sure ain’t enough to help the oil dry and soak into the leather. I decided to lay the pieces out in the sun for a bit until no oil came off to the touch. It is important to make sure the oil isn’t standing on your leather when you go to the next step of waxing. I have had problems before if you hurry this step.
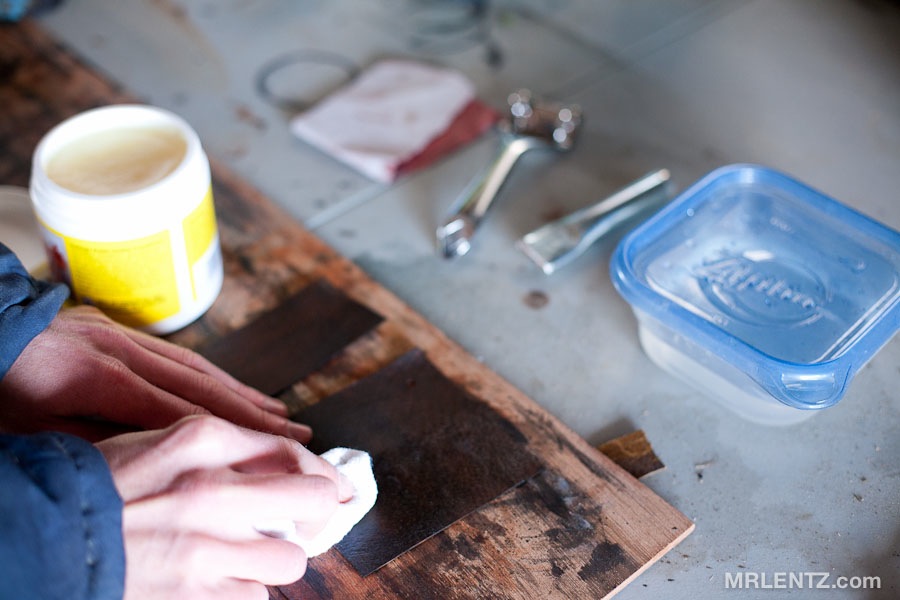
A nice thin coat of beeswax finish is rubbed into the leather. Once dry give it a slight buff to remove excess wax and create a subtle shine.
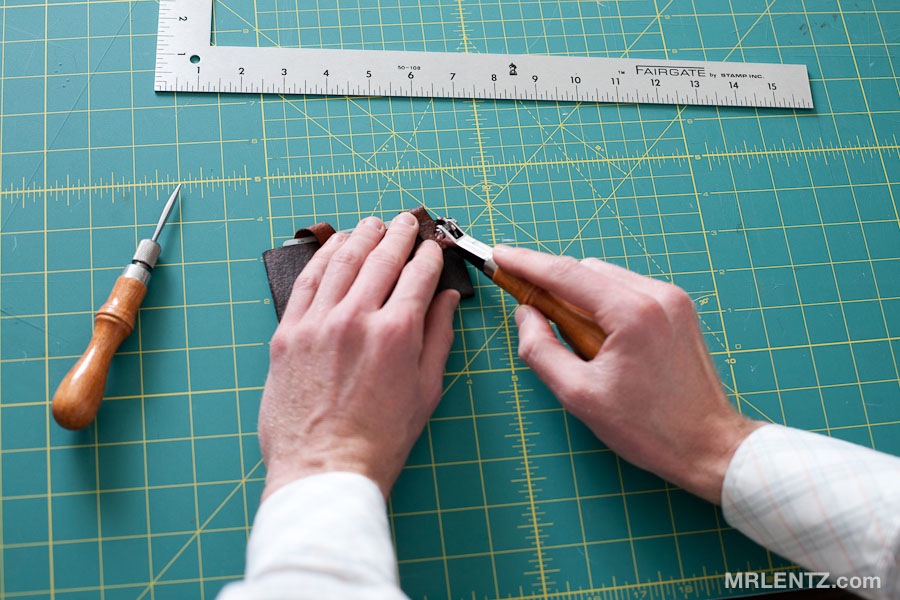
Back to the draft table the leather is ready to be marked by an Overstitch wheel, for placement of the stitching on the back of the wallet – where the strap attaches. The Overstitch wheel creates uniform markings in the leather to space out your stitch length.
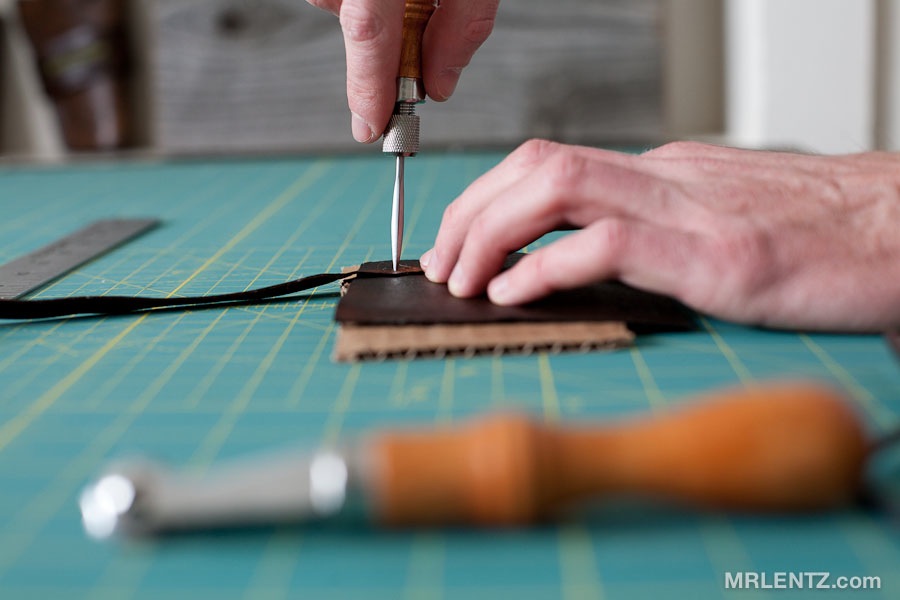
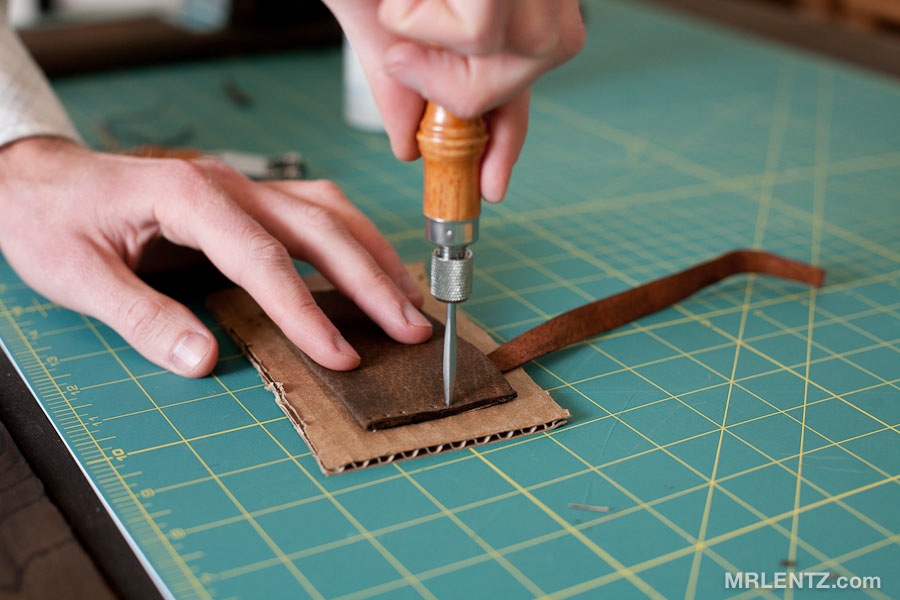
On top of a piece of cardboard to protect the awl, I punch diamond shaped holes into the leather.
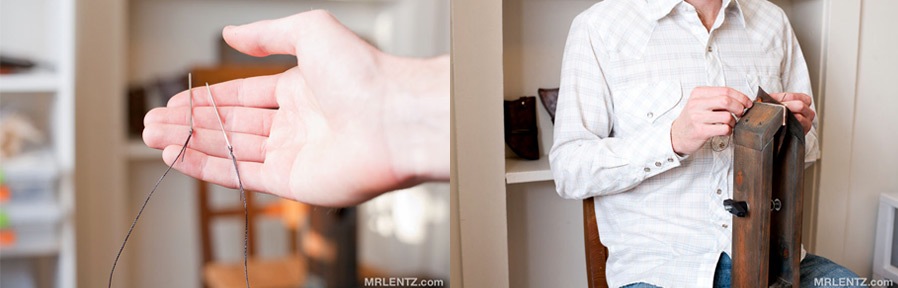
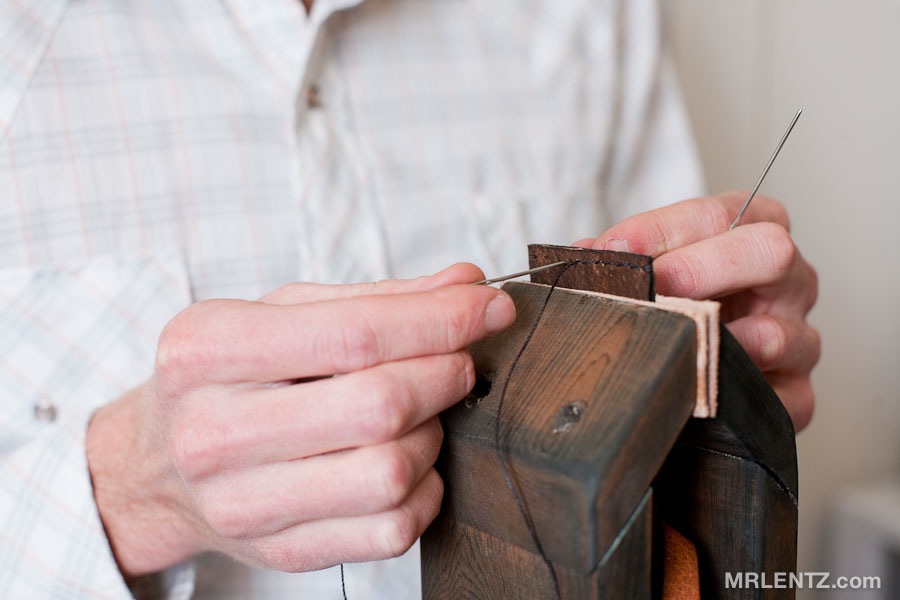
The strap is ready for the first round of stitching. I like to use two needles attached to one arms length of waxed thread. Above and to the right is a stitching pony I built with scrapwood and a few dollars worth of hardware. The stitching pony helps free up your hands when hand stitching and is super easy to operate.
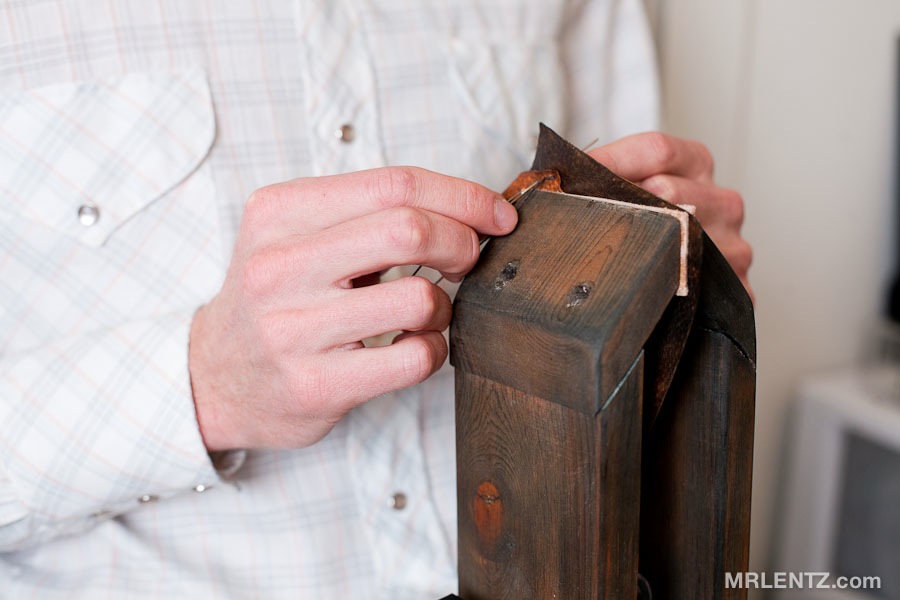
Here you can see another, pretty huge mistake. Somehow I ended up punching the holes for the stitches at the wrong angle than what was needed to make the strap go all the way around the wallet. Then as I was starting the stitch, my friend came in the door and began to chat with me. I was a bit distracted and ended up stitching the strap on going the wrong way and at the wrong angle. After completing the stitching, I realized to my horror, the mistake that was made. I did not stand there and wallow unhappily at my misfortune…instead – I immediately cut out the stitching, realigned the strap and carefully repunched the holes making sure I was not touching any previous punch marks. The result was that the mistake was pretty much covered up by the correct placement, and no one will ever be able to tell.

After you have stitched on the strap, end the stitch by going over the first two stitches again and then cut the excess thread off. Now the main compartment and interior divider is ready for placement. When possible I like to glue along the stitch line with simple all-purpose white PVA glue, which dries clear. This helps keep your leather in place while you punch holes and stitch through multiple layers.
The Overstitch wheel marks the holes to be punched along the side of the wallet.
The awl pierces through the leather and is caught by the cardboard beneath.
During the stitching process I loop the first stitch over the top of the wallet twice for added security. I then continue with a hand stitching method where each hole gets stitched twice, which adds an incredible amount of durability. If one stitch breaks years down the road, the rest of the stitching will still hold it in place.
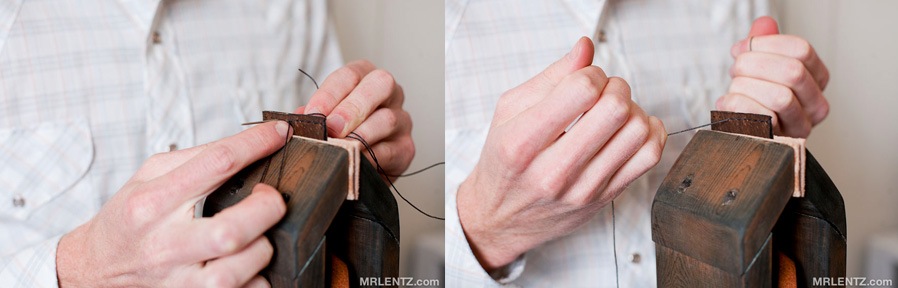
After each stitch a good hand tightening secures the thread in place. When you get to the end of your stitching, again stitch back over the previous two stitches to lock down the thread.
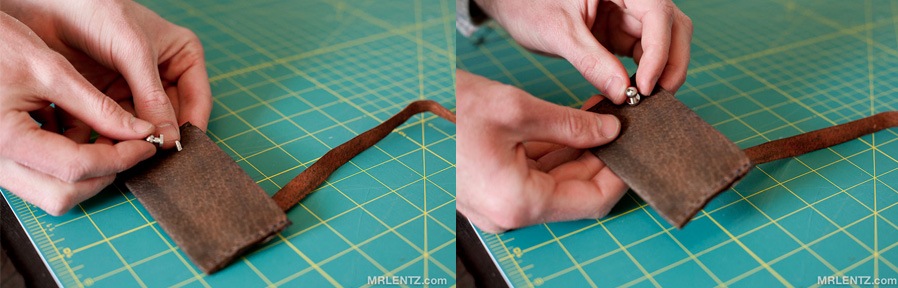
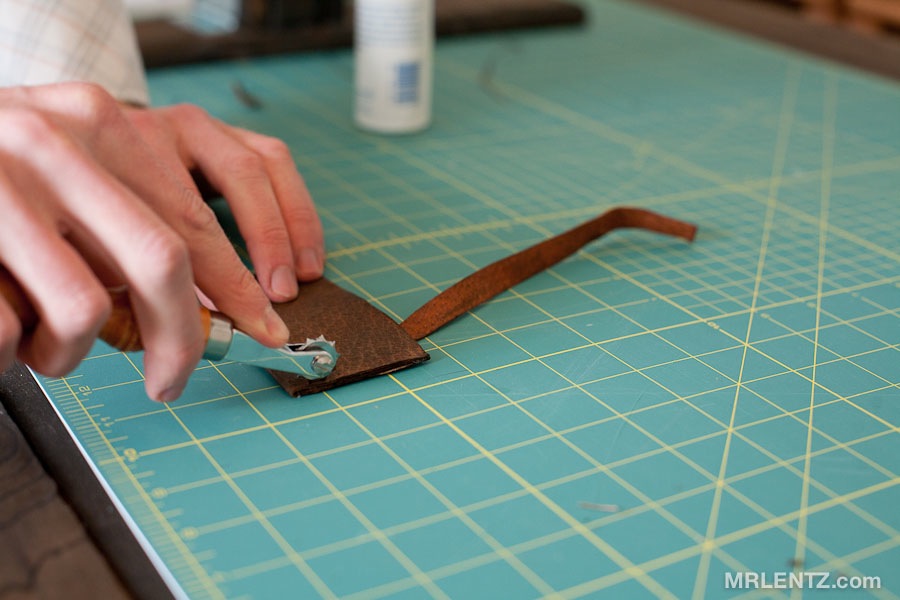
In the final steps I then attach the metal nub where the strap will fix onto. I then stitch a rectangle into the strap where the hole will be punched to attach to the metal nub – making sure to fold the end under to give the user a bit more to grab onto.
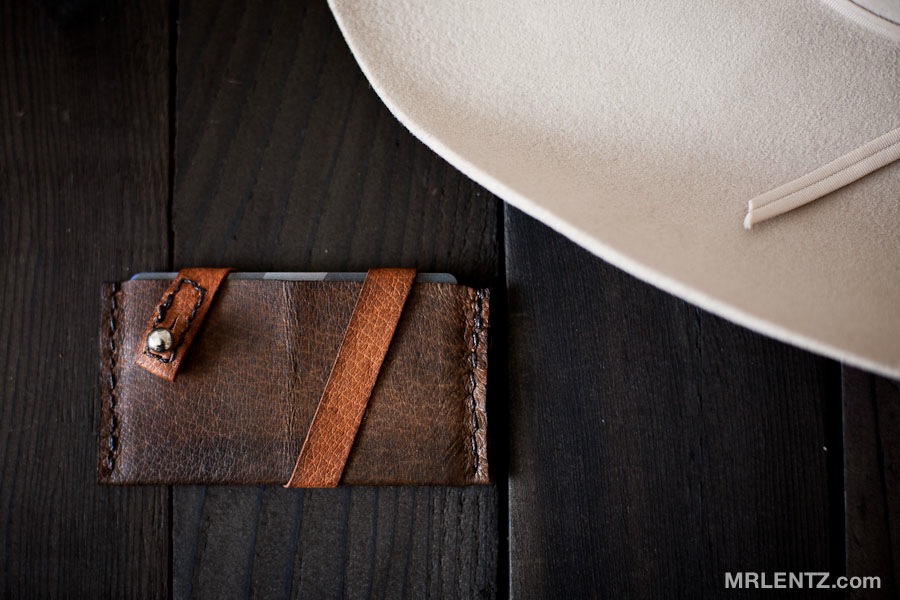
So there you have it. A birdseye view into the making of this simple little wallet. I am hoping that this will be the first in many ‘Making Of’ series having to do with my leather and wood designs. Feel free to ask any questions in the comments section. This little sucker is available in the Mr. Lentz Shop in case you don’t feel like creating one on your own.
I love it too! While this is an excellent tutorial – it is just enough to make me realize that I could never make such a perfect piece of imperfection!
Also, the frostbite inducing 19 degrees and the sweltering 34 degrees? Never happening to this Florida born and bred girl!
Hi, I just wanted to say how great it was to stumble across this post. Your opening paragraph nailed it right on the head, and it’s such a pleasure to see how these creations come about. Thank you for sharing your process!
Seriously, leatherworking…as well as many other trades are just a learned craft. If you told me to make something like this 3 months ago I would have looked at you in a bewildered daze! Patience, persistence and…prudence?
…and thank you ladies both for the kind words!
Thank you for sharing this. I’ve been curious about leatherworking, but I was a little overwhelmed as to where to start. This will be very helpful!
Thanks Kelly, feel free to email me with any questions once you get going!
So interesting, very well done!
Just wanted to say how glad I am to have found this on Pinterest… I’m taking my first stab at leather working and attempting a rather large project… Go big or home right?! Lol… I’m working on a full grain leather poncho for the rainy Washington weather I’m gearing up for here in Tacoma wa. My fingers are tired but I’m plugging along and it’s looking good so far. Thanks for posting this article. I’m learning lots as I go 😉
Thanks Nicole! That’s right – go big or go home. Dont be afraid to take some risks. By the way – I would love to see photos of that poncho you are working on, feel free to send a few my way!
Excellent ! Thanks ! Makes me want to dig out my old leather working tools and go at it again …
Go for it Byron!
Thank you so much for this tutorial! I’ve been wanting to try my hand at hand sewing leather, and this is more inspiration to give it a go!
Do you have a website where you would recommend purchasing the vegetable tanned leather?
Thanks!
Hi Troy – glad you like the tutorial – also make sure to read through one of my newer wallet tutorials that also includes a part on hand stitching: https://www.mrlentz.com/2013/11/how-to-make-a-leather-wallet/
You can find a good deal of vegetable tanned leather at TandyLeatherFactory.com they have a lot of local stores around the U.S. Currently I am buying my leather from SpringfieldLeather.com and have been very happy with the quality. Good luck!
Hi Mr. Lentz. Thankyou for your video. Iamb a Merit Badge Counselor for Leatherworking and have done leather for a very long time. Watching your video I picked up a few tips I have never heard before such as the flax seed oil for conditioning and the way you protect your hole punching point. Thanks for the info. You posted on your mistakes as well. It is good for the kids to understand that mistakes as part of the process and therefore makes it less intimidating for anyone who tries. The wallet is beautiful. Where are you that it is so cold? Definitely understand the finger colors… You should see the looks I get from my fellow church ladies. Sharyl
Thanks Sharyl! I have developed even better techniques since I wrote this post. I now condition all leather with extra virgin olive oil, beeswax and carnauba wax. I also make all of my own dyes out of vegetable matter….and I moved to the Desert Southwest! It ain’t quite so cold down here.
Hey mr. Lentz. Can you show me the backside of the wallet?
Hi Ferris – the backside only has the strap stitched in place, sorry I never took any pics of it! If you like this tutorial – you may like this newer one even more:
https://www.mrlentz.com/2013/11/how-to-make-a-leather-wallet/
Thank you Mr. Lentz for the tips on leather working. I collect thrift store leather and up-cycle it. I use methods like gluing ( which im trying to get away from), but certainly wondered and want to try stitching. Your tips have certainly help expand my tiny knowledge of leather work. Thanks so much for your post! Oh by any chance do you get into or know how to hand shape a harder leather? I’m thinking to wet and form, but I have no idea. Oh, thanks again for your thorough post, I will check out your others. 🙂
Thanks Sora – makes sure you try out my other simple wallet tutorial. It gets into the stitching part a bit more in depth. I have not done much wet forming, though I might try it out later on and get a tutorial up here.
hi , I am always looking for new pattern, projects to make and designs to tool . sincerely deb