
Everything, Leather, Tutorials
Leather Knife Sheath Tutorial

Dec
Please note – this is an old, outdated tutorial meant for the absolute beginner. If you would like to learn how a standard leather sheath with retaining strap is built please see the new knife sheath tutorial here.
In the final moments of 2014 I managed to pull together the last tutorial for the year. One I had promised a few emails back and one that I had been wanting to do for quite some time (I purchased the knife back in July after all!) Now that the holiday season has started to wind down, I can finally take a breath or two of the outside air. So crisp and pure, such a memory of several months ago when I last inhaled the fresh outdoors. Well, let’s get down to business shall we…
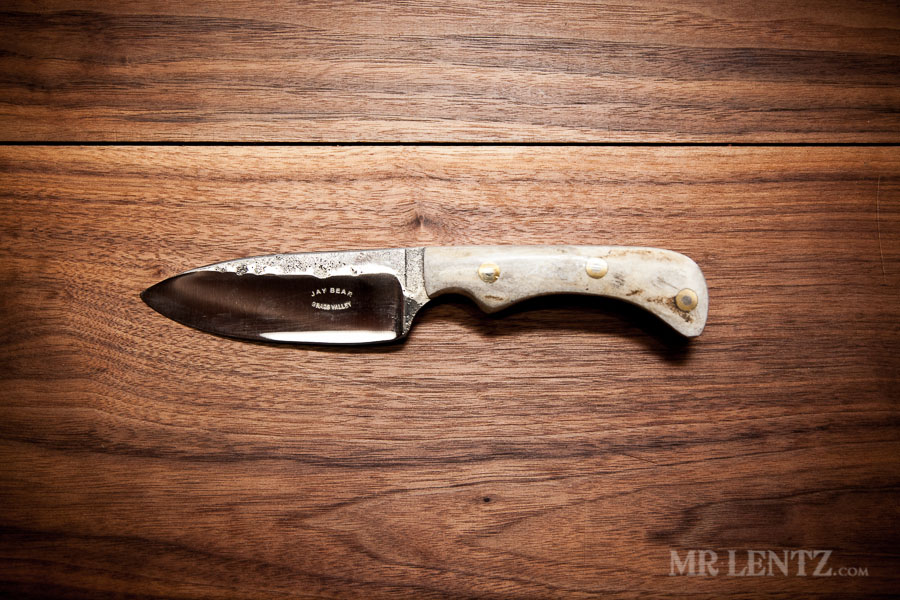
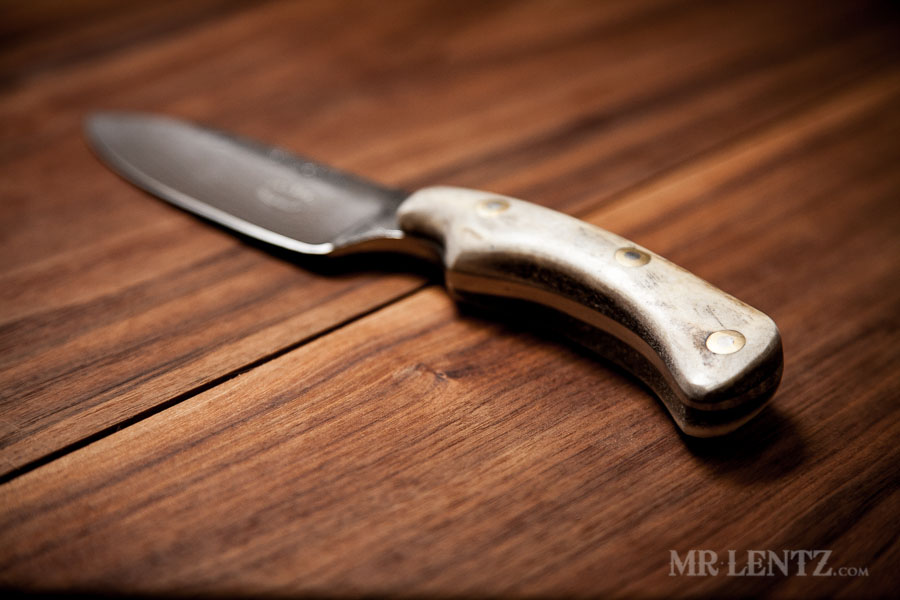
This here is the knife. As mentioned, I had bought it several months ago from a man in Northern CA who hand forges his knives from scratch. Then he makes custom handles out of wood or collected antlers. It was a design and an idea I couldn’t pass up on, and I love supporting other makers out there. If you get a chance take a look at his selection of knives at Jay Bear Knives, he’s one talented dude.

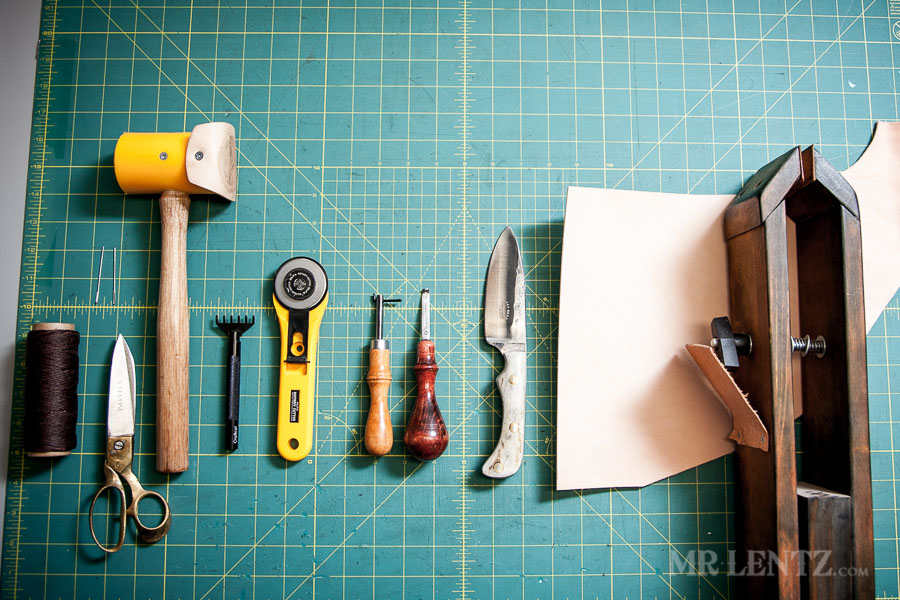
The tools of the trade needed for this job are shown above. From left to right: hand-stitching thread, scissors, a mallet, diamond shaped awl puncher (pro-series with interchangeable heads), cutting wheel, stitching groover, edge beveler (the smallest size you have), your knife…it can be any size, some leather (I am using full-grain vegetable-tanned), a stitching horse.
Like this post so far?
I spend most of my free time creating tutorials like this to help those like yourself get into leatherwork and woodworking, or get better at it. If you'd like to support my efforts, consider checking out my handmade leather goods shop and purchasing a gift for yourself or a loved one. It's readers like you that help keep a small U.S. business like mine going strong, so -thank you!
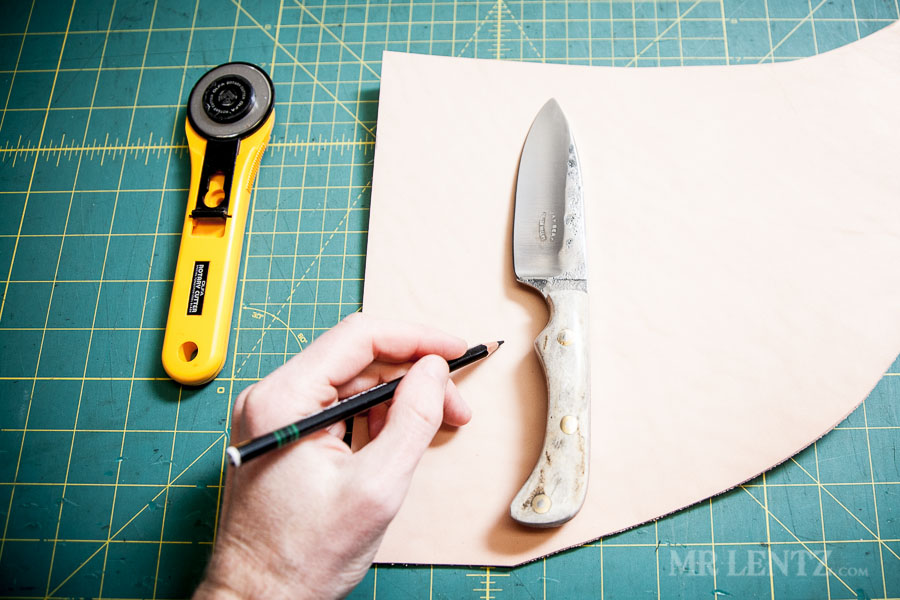
Now, I had been thinking about this tutorial for several months – and when it came down to it and I had some free time… I decided to just wing it! It’s really the best (most fun) way to design and make things. Basically I decided to throw the knife down on the leather and start drawing the shape around it. I figured I deal with any problems as they come up…which they always do. So be sure to read ahead before proceeding on your own as there is one big problem coming up fairly quickly!
 After sketching out the first side, I flipped the knife over to continue the shape on the other side, keeping in mind that the sheath will be folded in half and sewn up the side. Most of it is symmetrical, but I wanted to also add a belt loop for easy attachment on the waist.
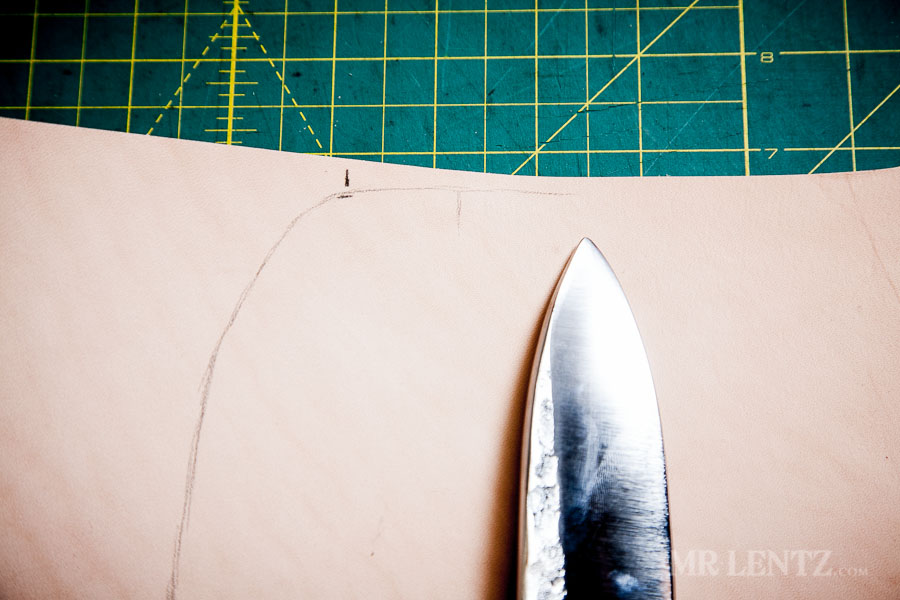
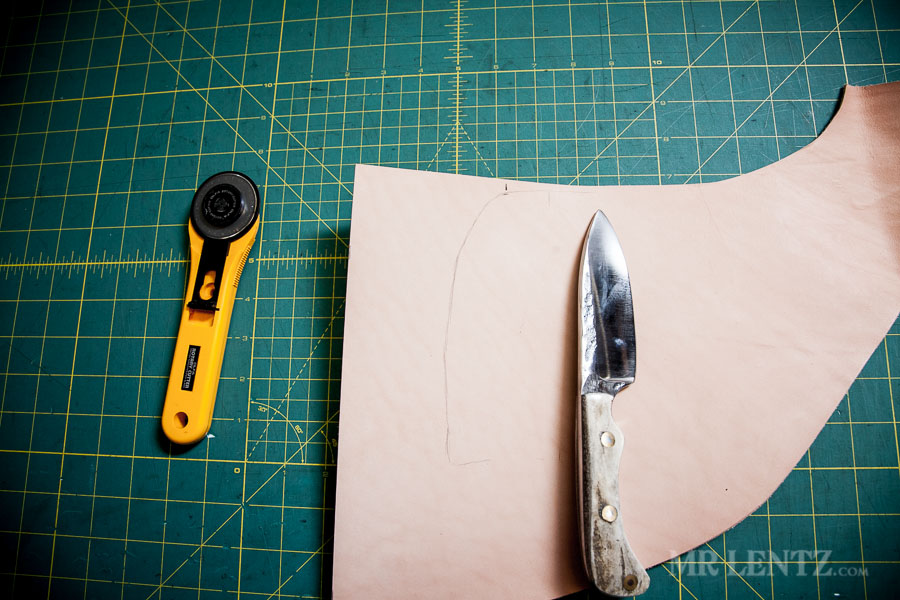
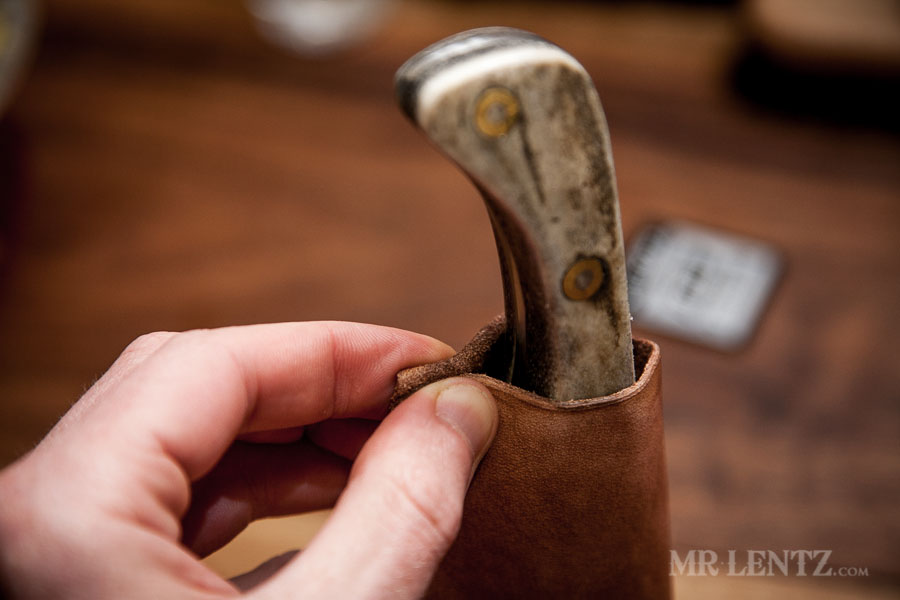
Here you can see the extra length drawn for the belt loop, it should be about 1/2 inch longer than the width of your belt so that there is room for the stitching. Keep in mind that this tutorial will work for a knife of any size, you just have to eyeball things and adjust for your own knife. On mine I wanted the entire blade to be protected as well as about an inch of the handle so that it would sit snugly in the sheath.
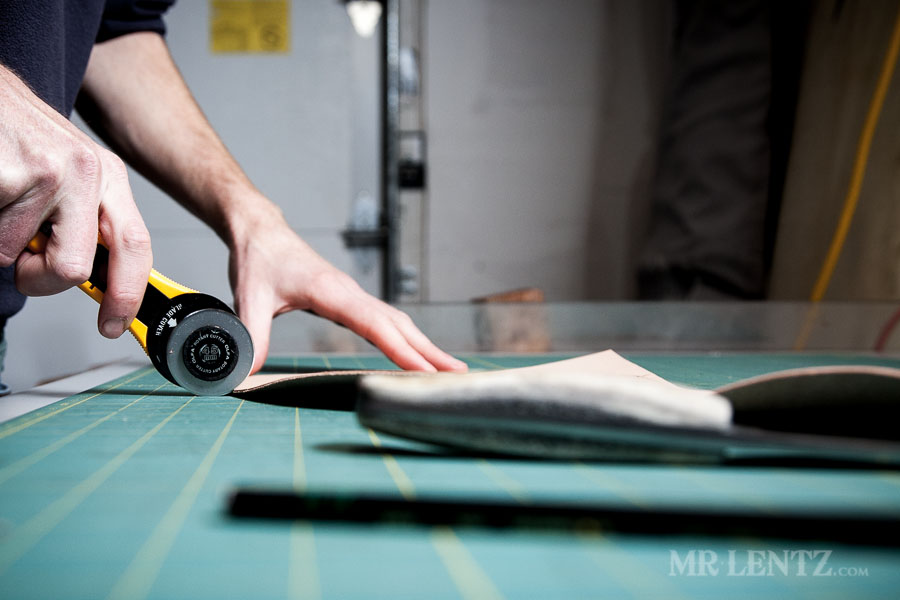 I cut out the larger curves and straight lines with the cutting wheel…
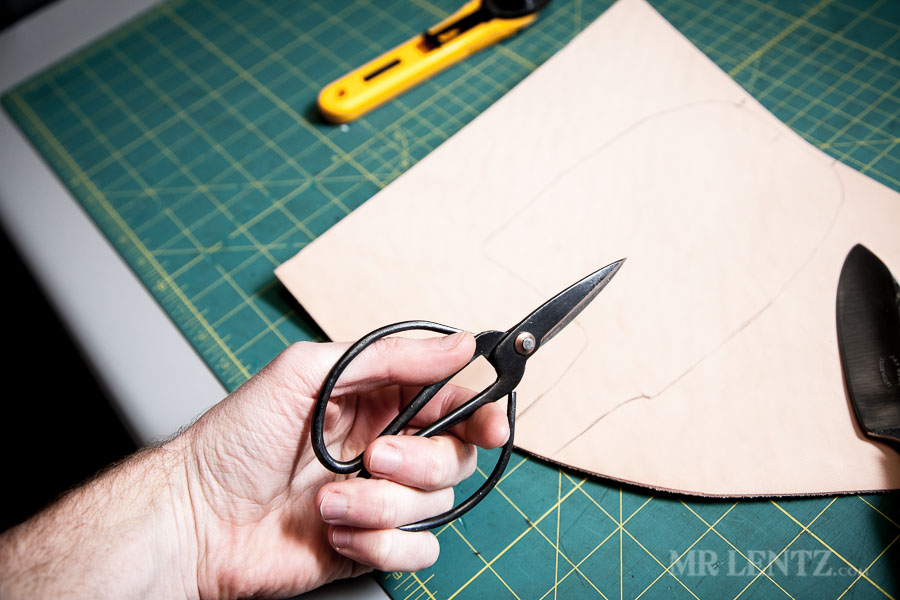
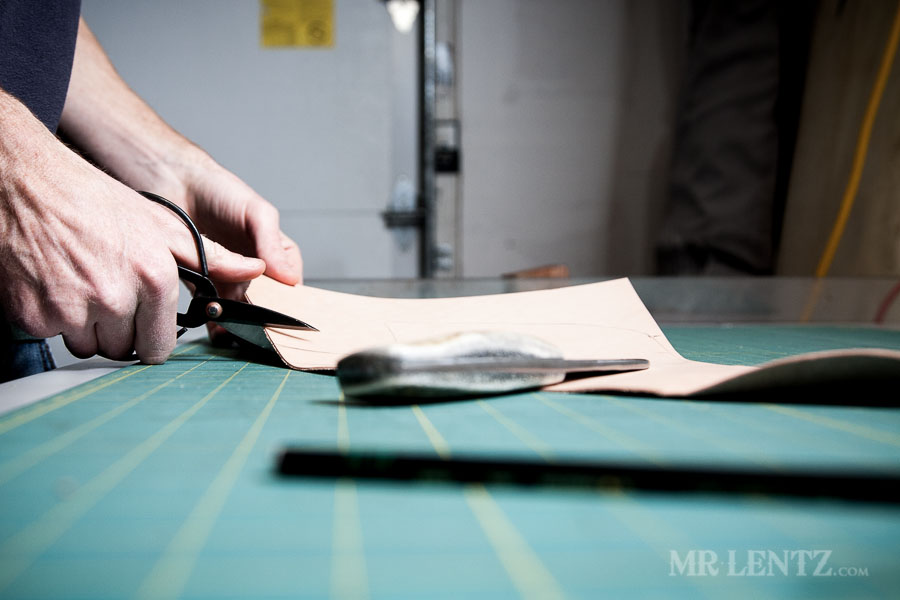
Then I moved on to my pair of Chinese scissors to cut tighter curves and round corners.
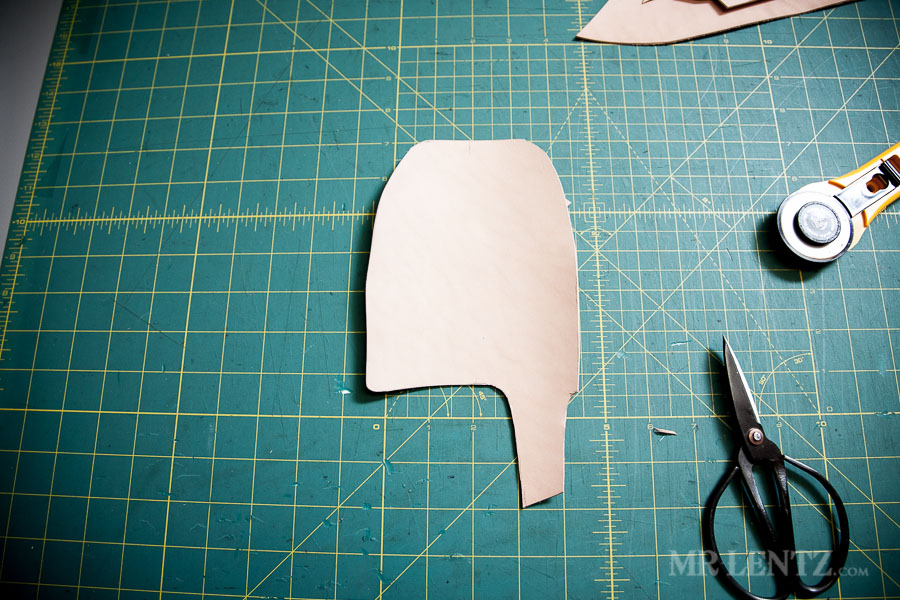
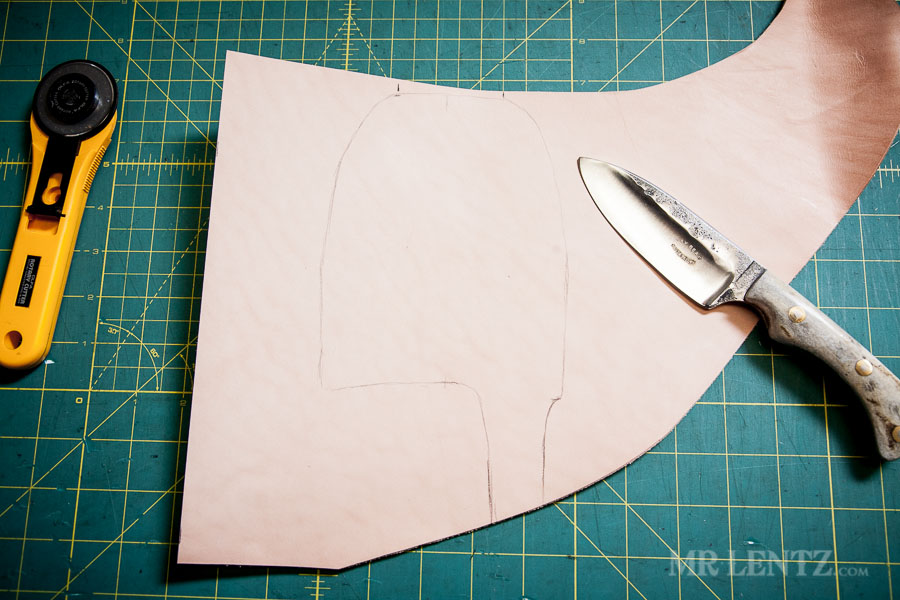
Here’s the basic shape I got.
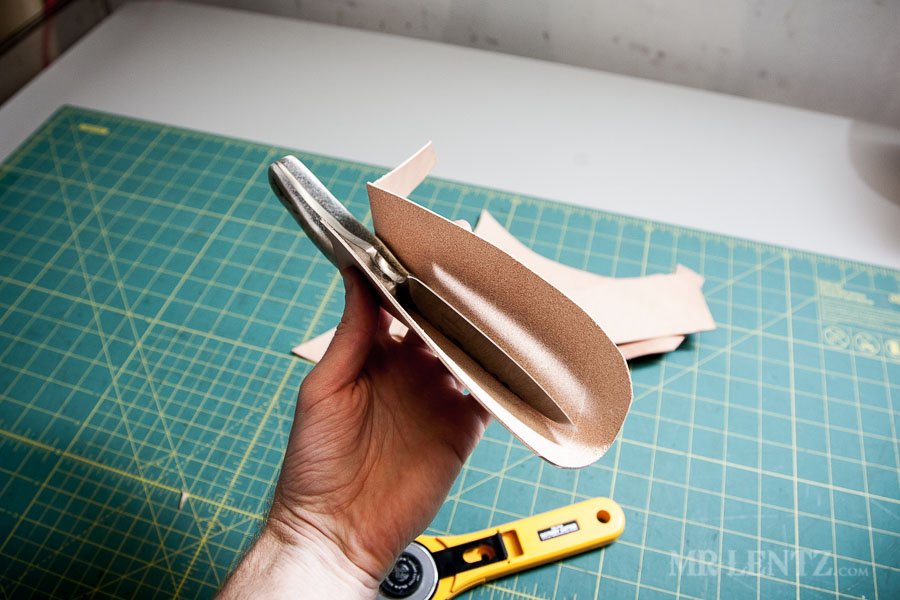
I then folded it in half and took a look at my symmetrical drawing skills. They apparently were a bit off – so I held it down while folded and cut the excess off.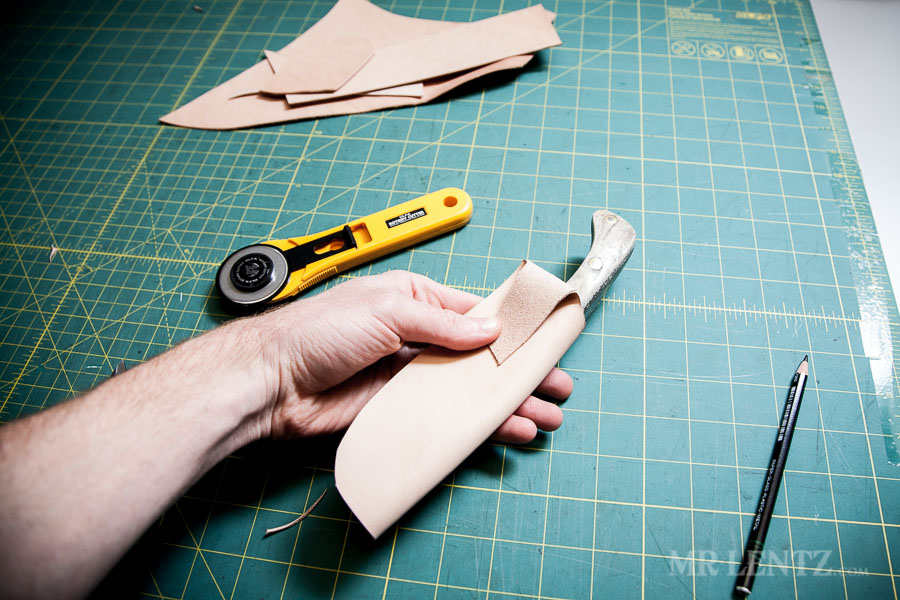
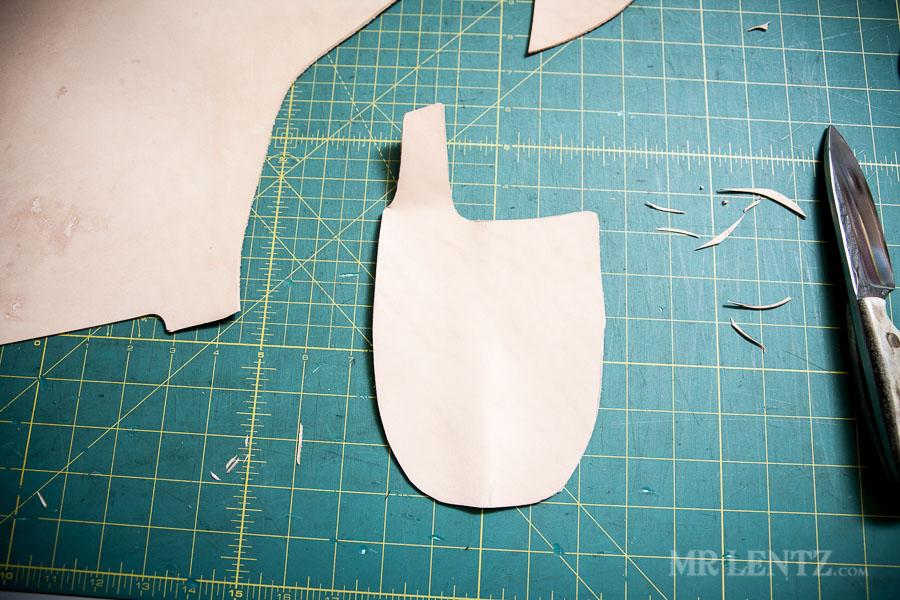
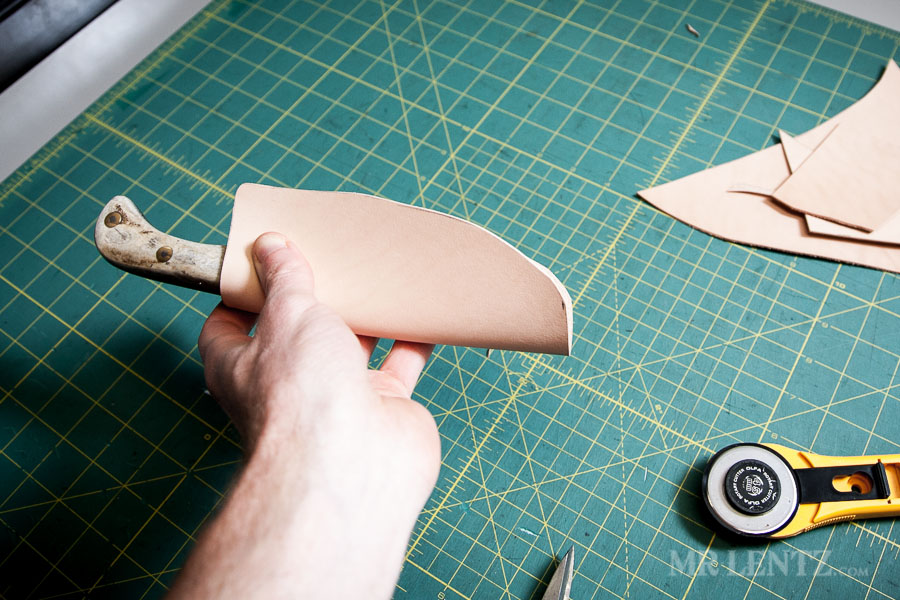
After looking at my shape for a minute or two and testing it out with the knife holding it on my belt I realized pretty quickly I had made a big mistake. This goes with the territory of doing things on the fly! The shape I had automatically cut out was meant for a left handed person. There was a fifty fifty chance of that I guess, but doesn’t it always seem to work out for the worst?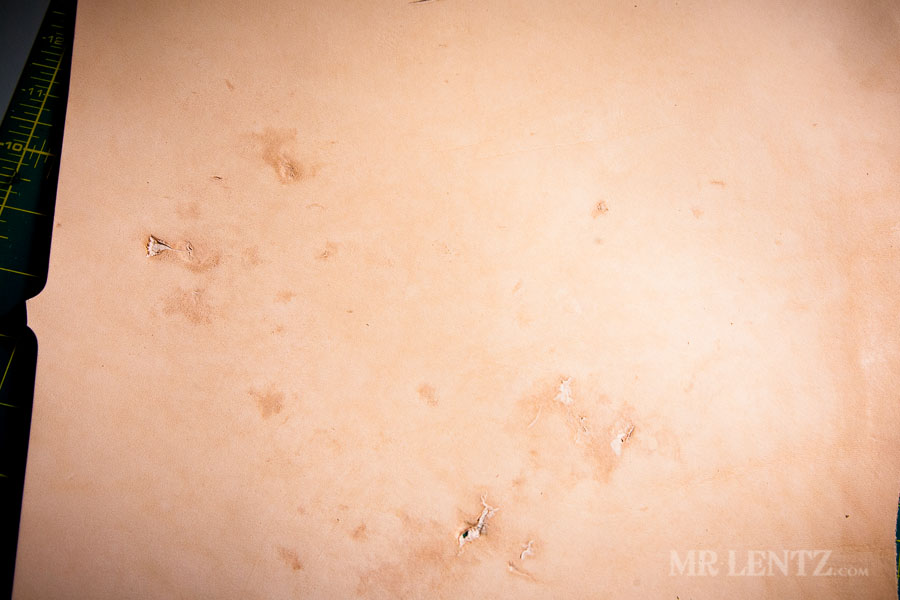
Knowing that I should probably correct this mistake early on, I decided to take advantage of this setback by choosing a new piece of scrap leather that I liked with extra scarring. Above is a piece I would not normally use on my wallets because it is a bit too marred…but I must admit – I do love this kind of texture and it’s perfect for my sheath.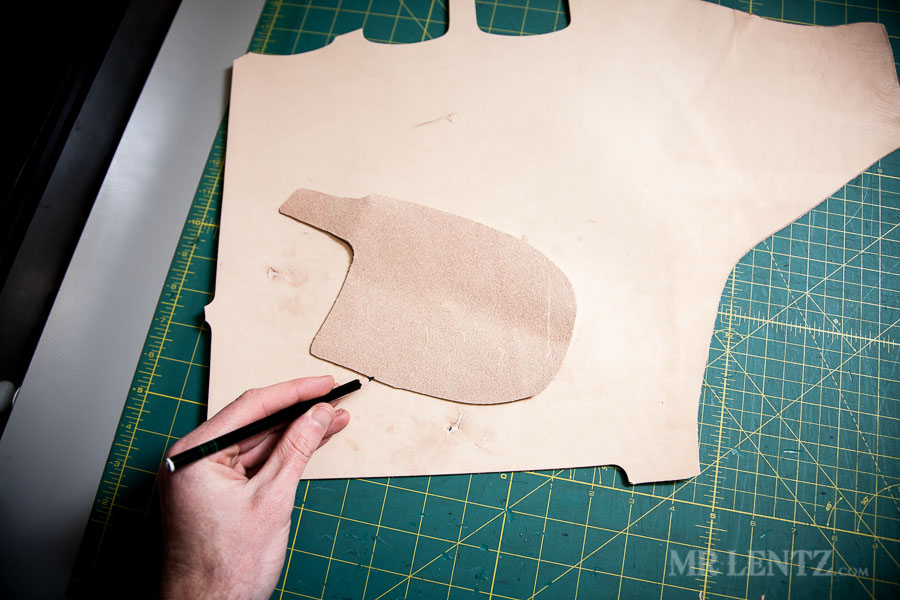 To get the same pattern but in reverse for a right handed cowboy, I flipped the pattern over and traced it out.
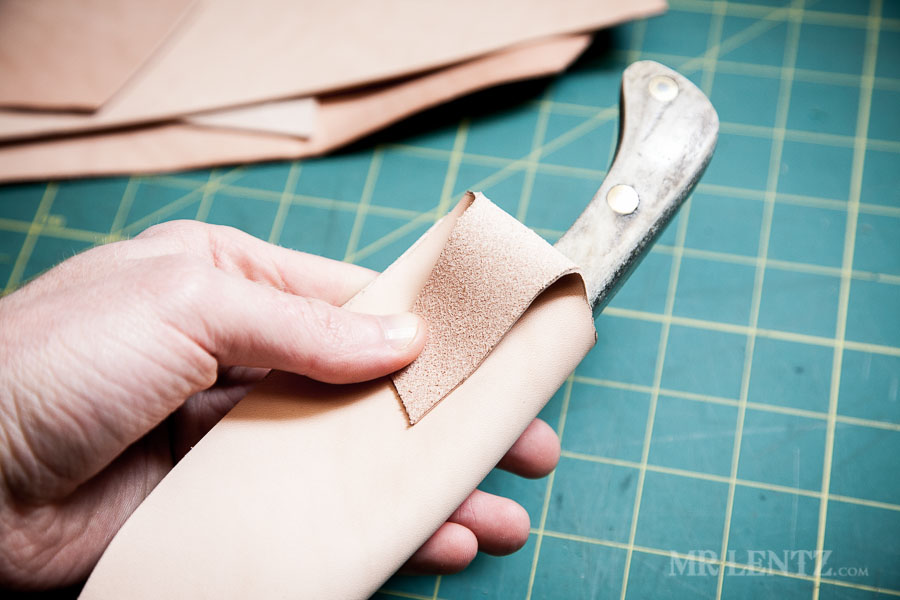
  Once cut, I lightly misted the edges to prepare the leather for cutting the stitching groove and beveling the edge.
Here is the stitching groove in action. Its job is to create a line parallel to the edge to give me reference for punching the stitching holes. It also helps sink the thread to protect it from wear. 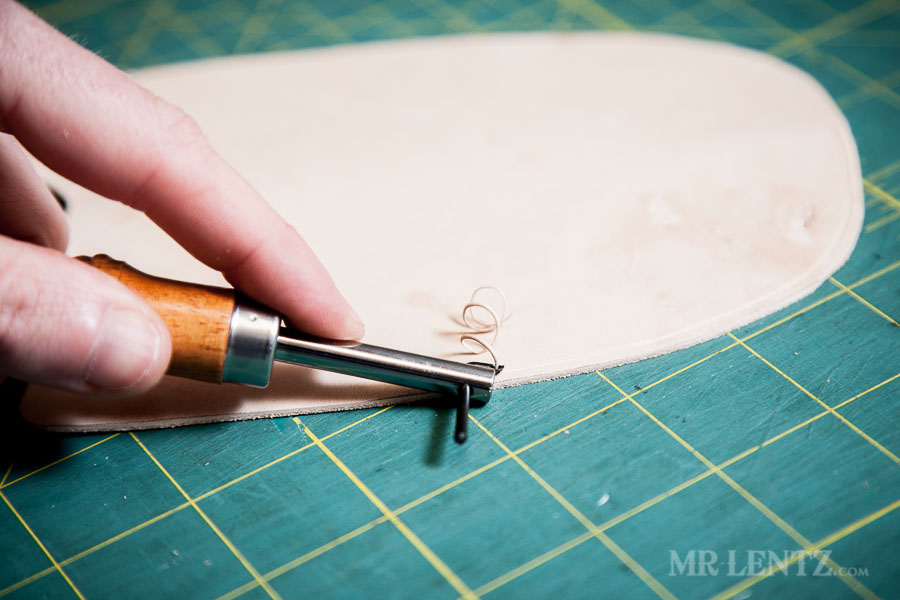
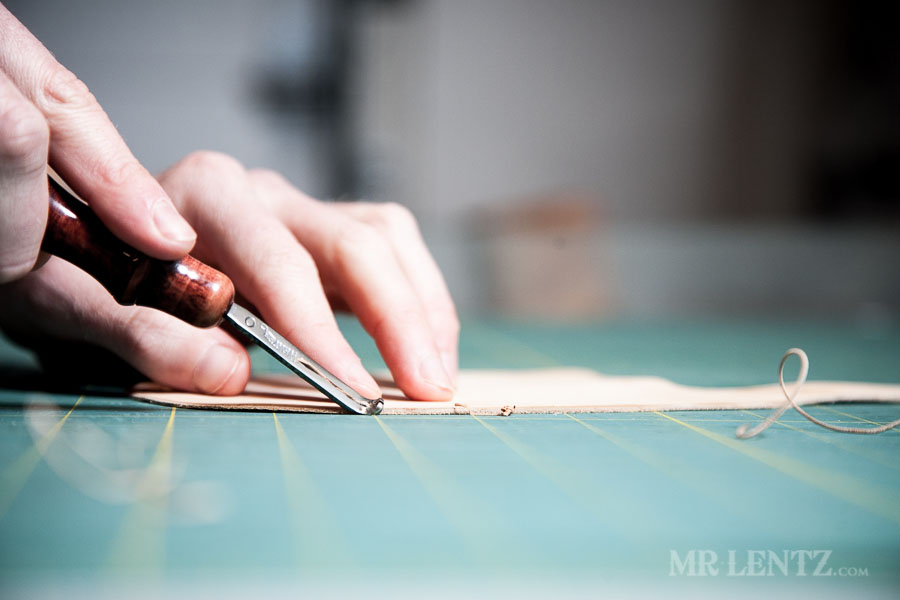 After cutting the groove, I bevel the edges to take care of that hard looking edge when you use the cutting wheel.
 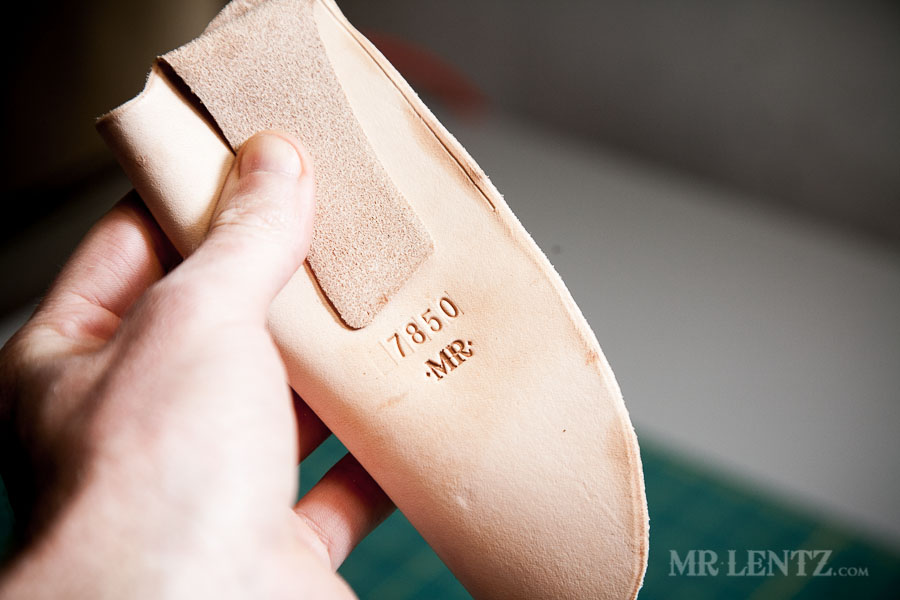 I stamped it with the next number in line and branded with my logo, why not!
Then I took a break and caugth myself deep in thought about knife sheaths.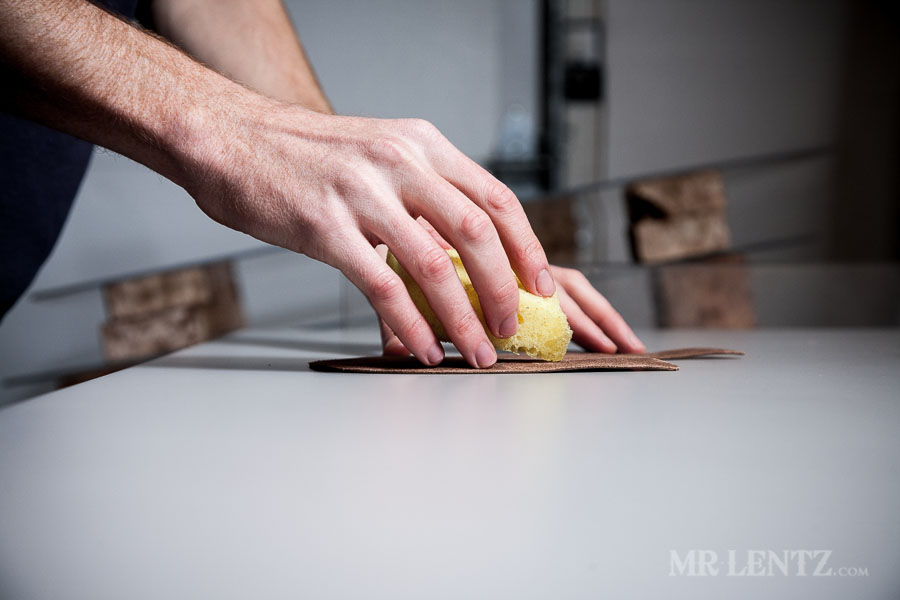
I skipped photographing a step – my dyeing process. That is another tutorial for another day. It can be quite complex. You don’t actually need to dye vegetable-tanned leather as it will age quite beautifully on its own, creating a deep rich patina over time. In the step above I am applying a light coat of oil. There are many types you can use, as well as pre-fabricated oil/wax mixtures. I make my own all natural mix…the same stuff I send out in a free tin to all of my customers. It’s great stuff and I can work with it, without using gloves!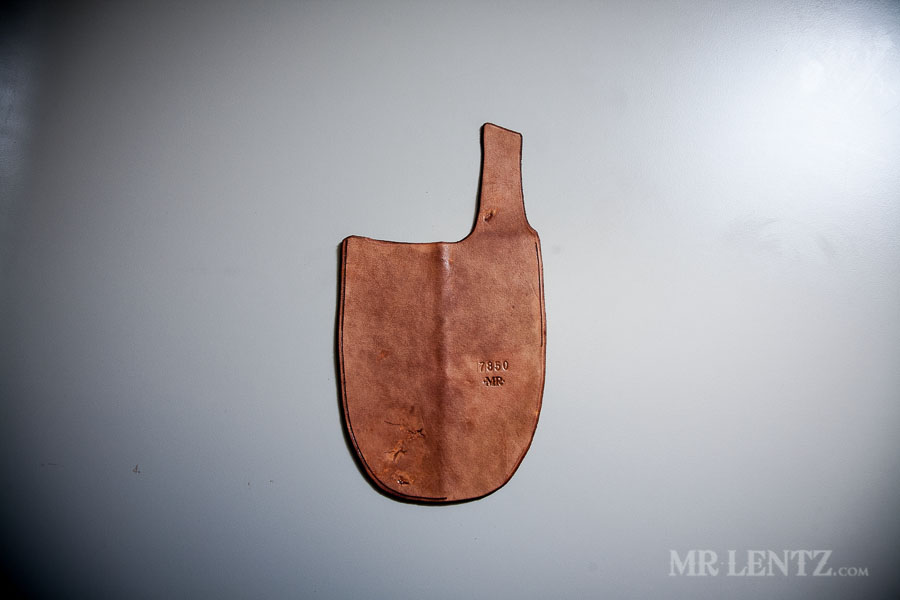 After the oiling and waxing the sheath pattern is really starting to look like something.
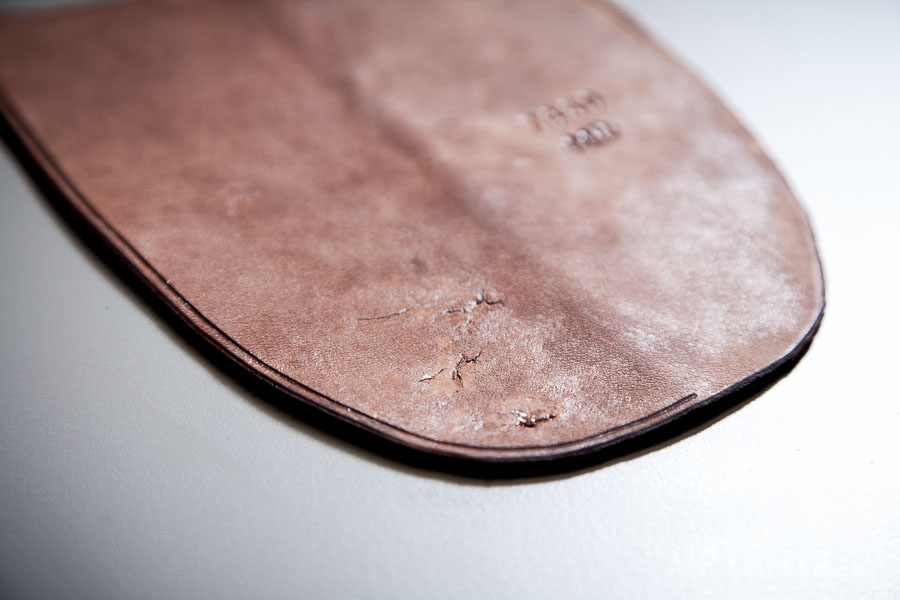
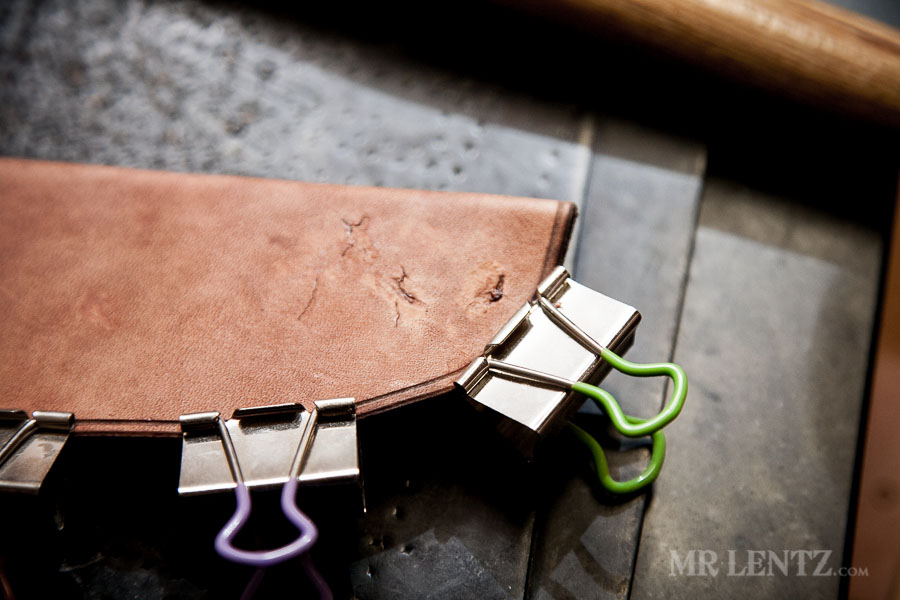
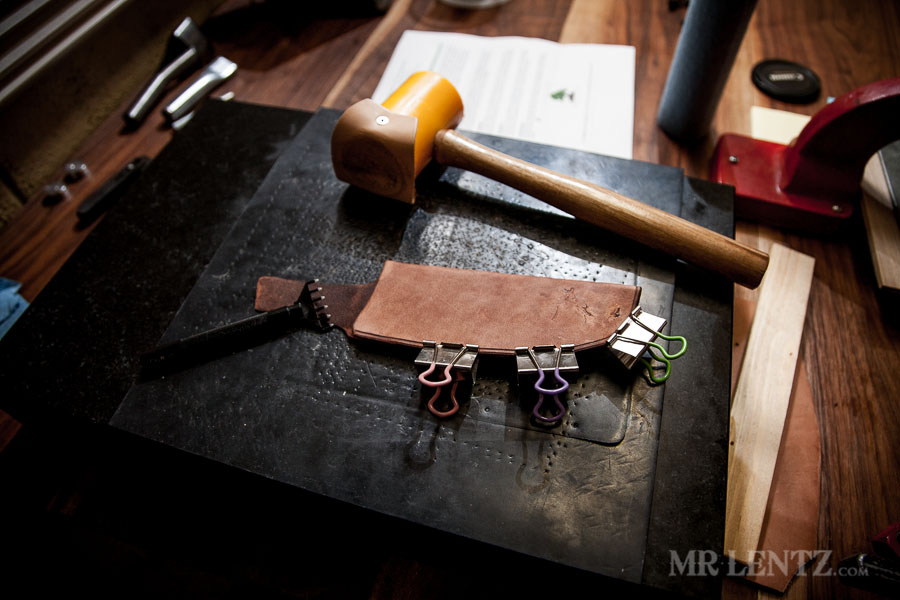 On to the pounding block. I have clamped the sheath together to help me align it when I punch through with the awl.
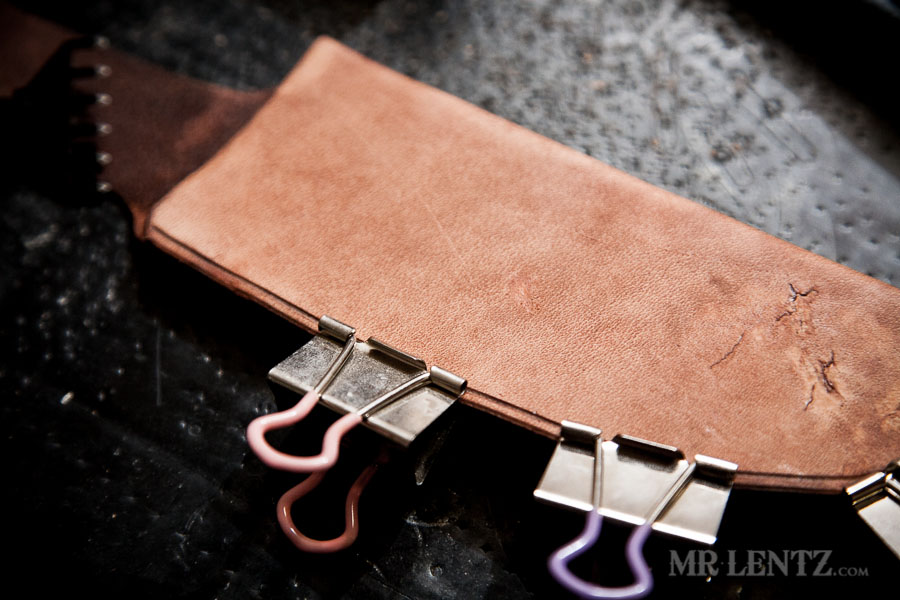
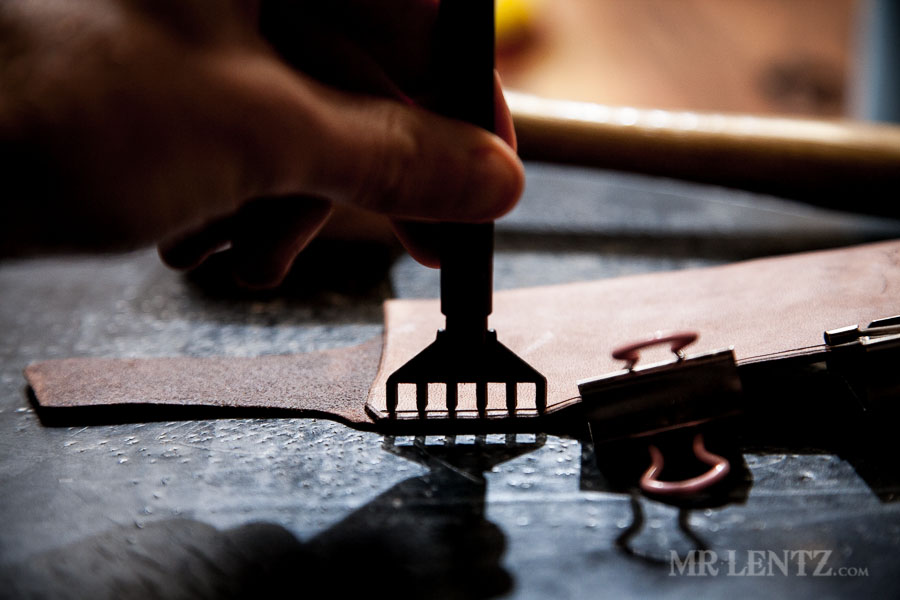 I carefully line up the awl in the groove and knock it with the mallet.
 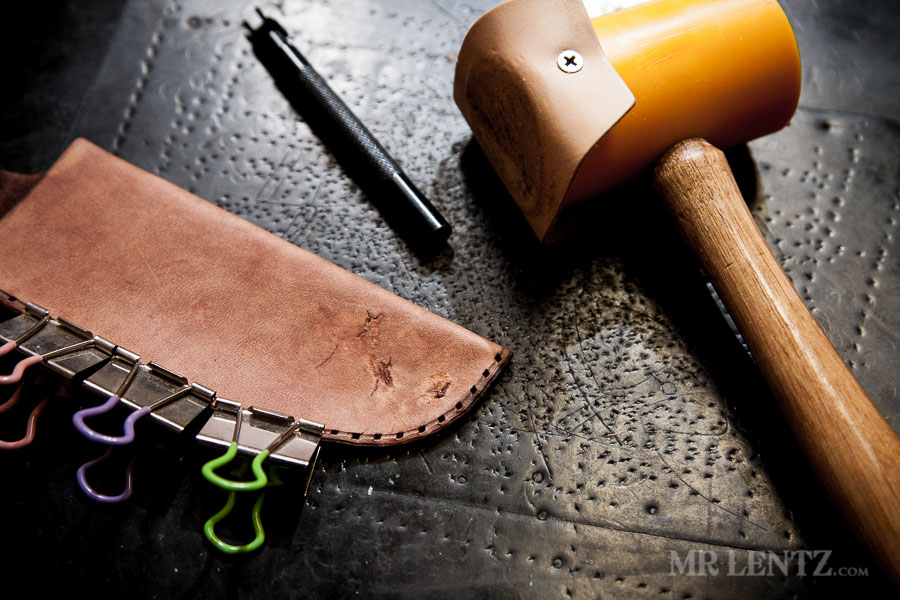 All the way around the sheath, re-attaching the clamps on the other side to help keep things straight.
 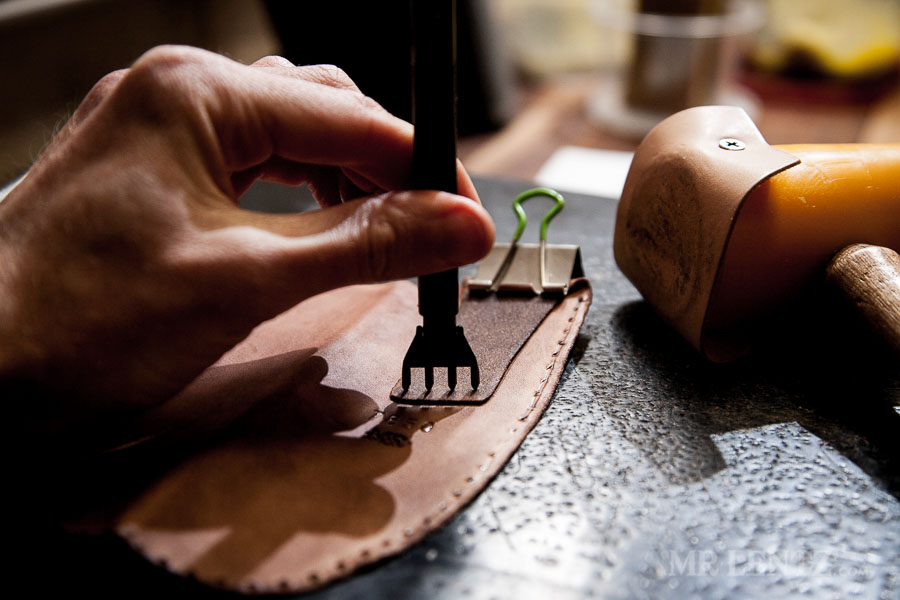 I then open up the sheath and fold the belt loop part into place.
 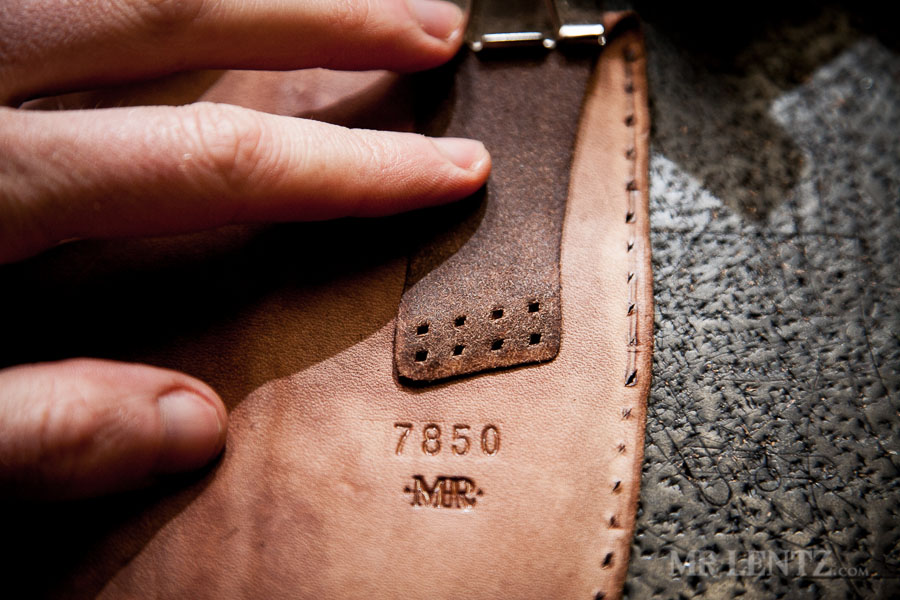 Punching two sets of four holes for a little extra durability.
 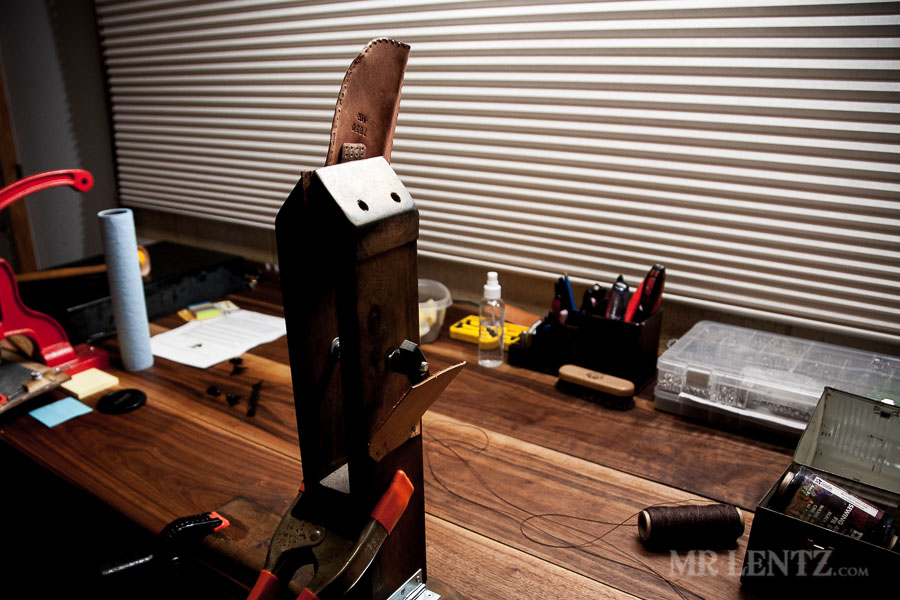 Here is the sheath in the stitching horse. The first step is to stitch up the belt loop before stitching up the sides…or you can guess what kind of trouble you’d be in.
 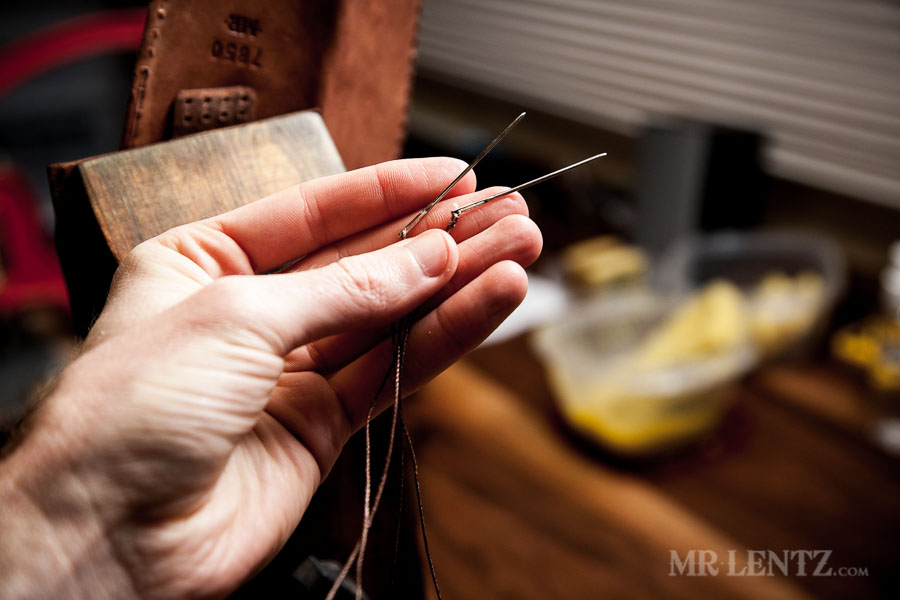 I am not going to go into detail here about how to make the stitch, but I do recommend that you check out this other tutorial half way through, as I have some great closeups with explanations on how to hand-stitch. The same applies to this sheath. Here’s the other tutorial: How to make a Leather Wallet
 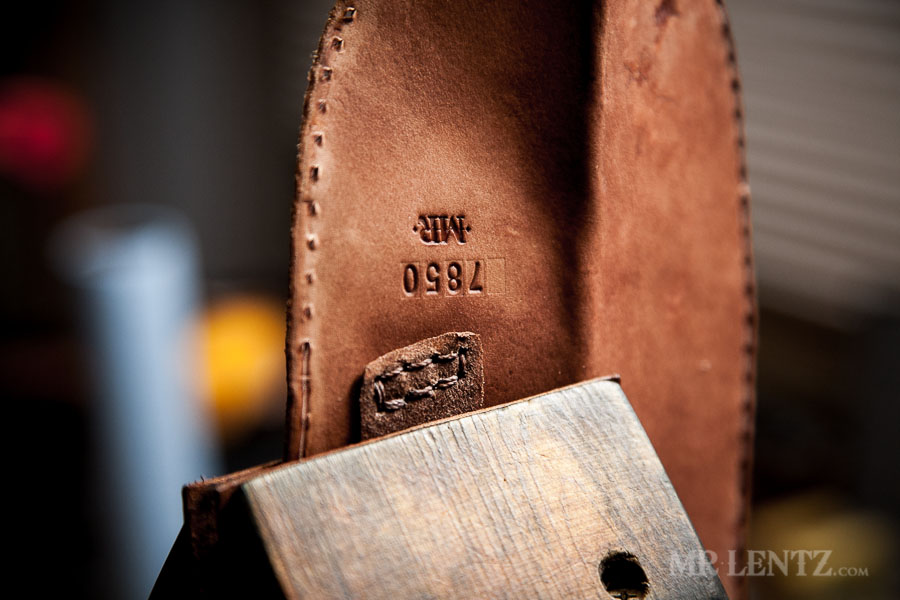 I chose to double-stitch the top part of the belt loop for a bit more strength since it is a stress point.
 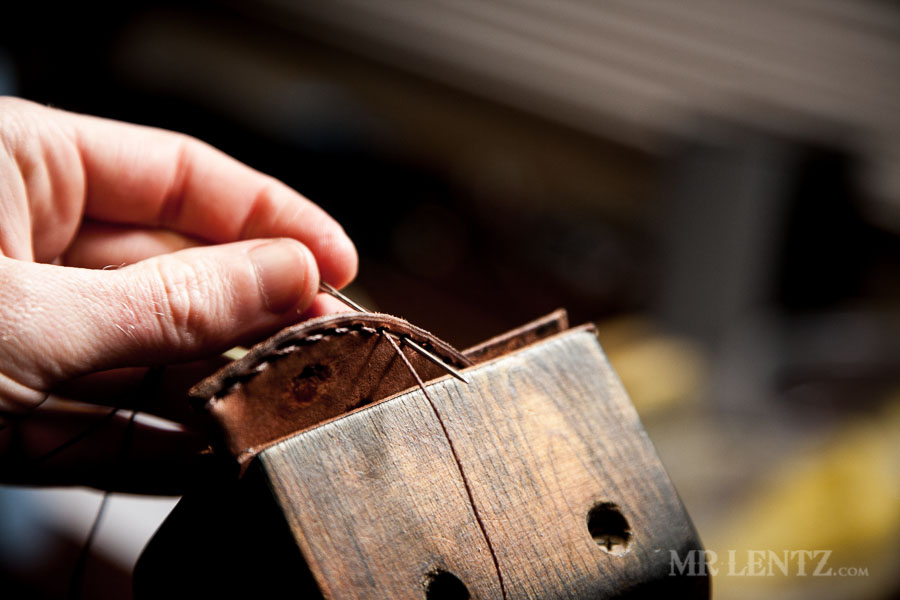 Now you can stitch up the side.
 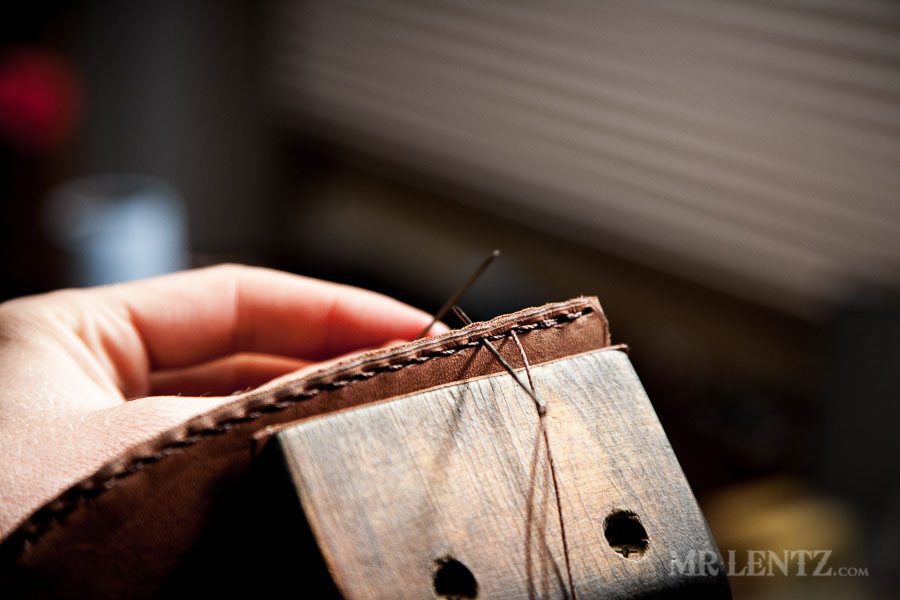 Make sure to back-stitch 3 or so holes to help the thread stay in place.
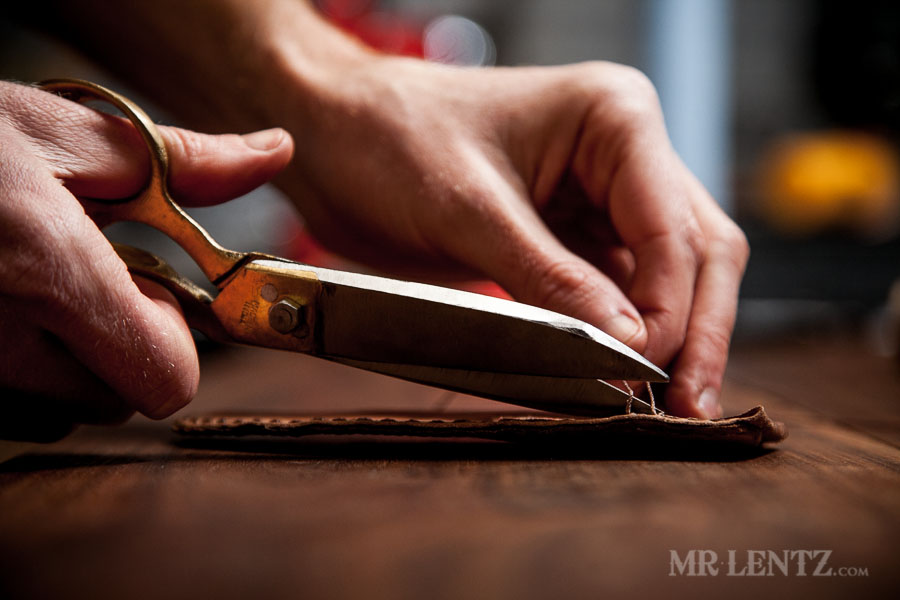
Now that the sheath is ready to test out…I noticed another big problem. The knife slides in nicely. So nicely that it goes straight down into the thread area. This is real bad. Within days that thread will be sliced by the knife.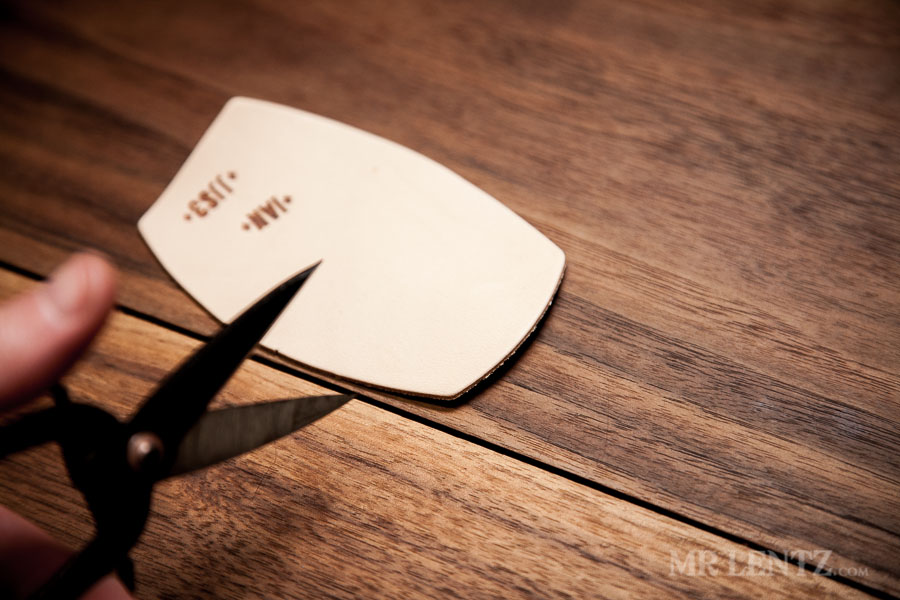 Where there is a problem, there is a solution waiting to be had. I took another scrap piece of leather.
 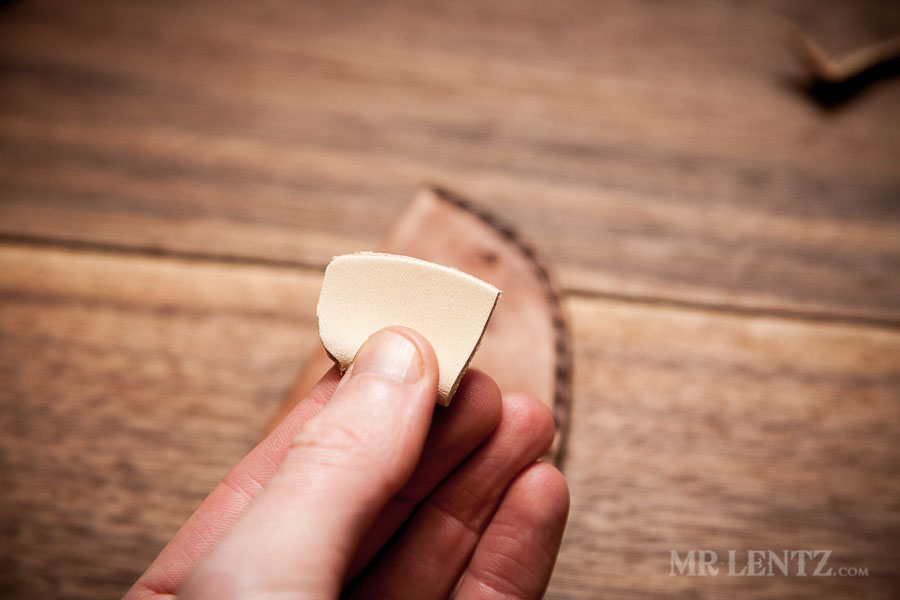 And cut it into the shape of the bottom of the sheath.
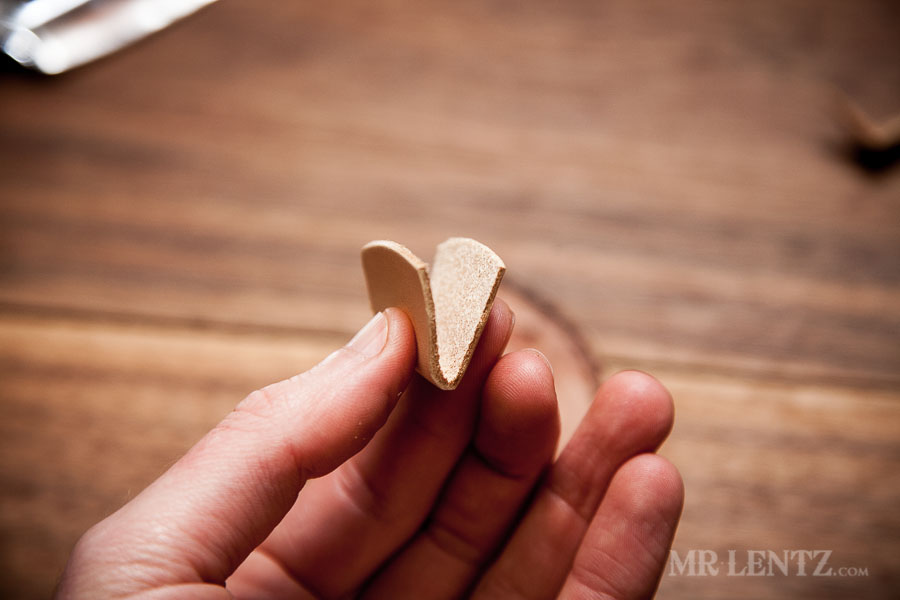
 I then proceeded to wedge it in there to the bottom. A perfect solution? No. But it makes the sheath functional, and time will tell if some other solution needs to be found. If you want to fully avoid this problem, you will need to cut out a thick strip of leather the same shape as the side of the sheath with stitching. Then you will need to stitch that in between the side so that if the knife pulls down to the bottom or side…it will just hit a thick piece of leather and not the stitching.
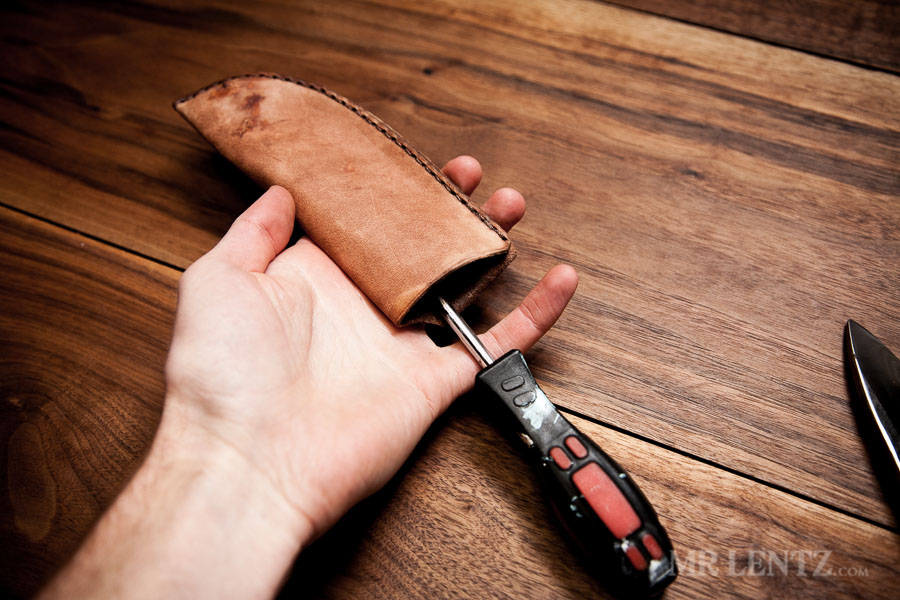
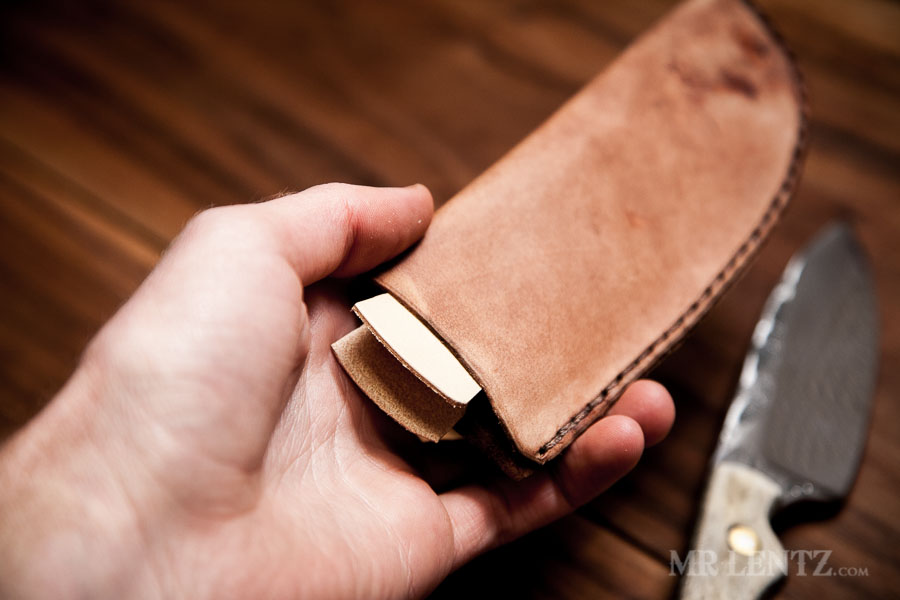
 Another problem arose quickly thereafter…don’t you love the world of hand-made? The knife felt a bit too loose in the sheath since I had designed it just a tad too big. I needed to tighten it a bit with a few more stitches.
 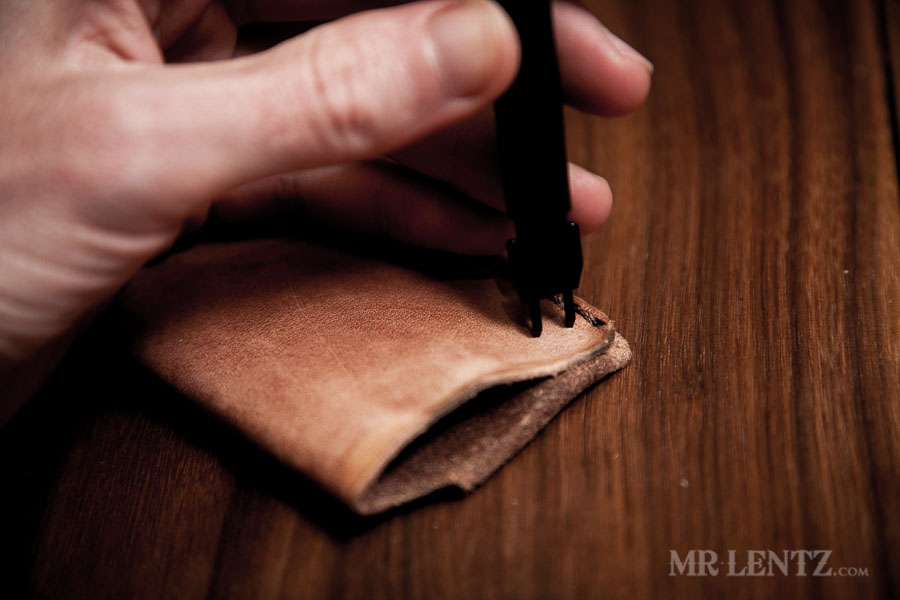 Punching the holes with the awl.
 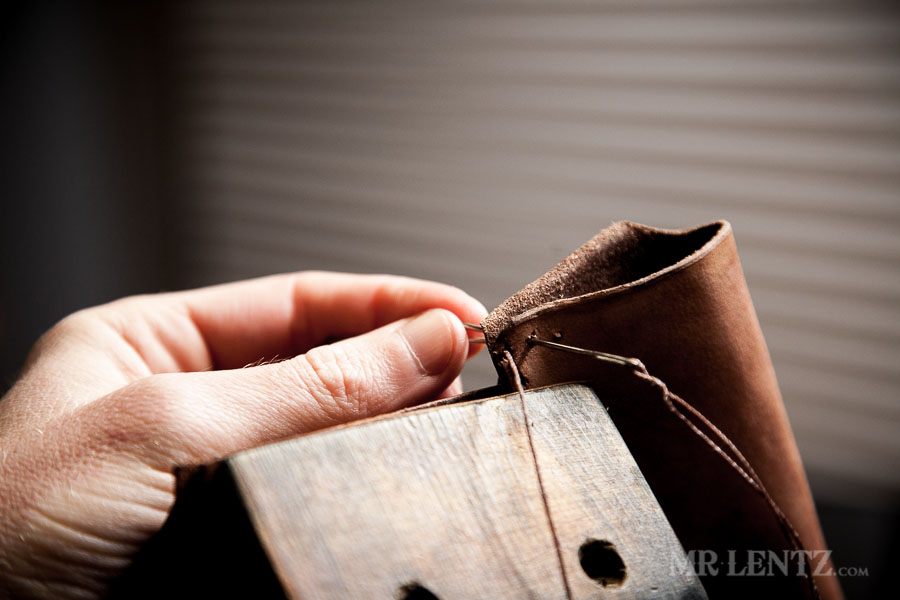 I stitched that sucker up. Again – this is all on the fly and more about just winging things. This here ain’t a perfect solution either as it is possible for the knife to slowly wear these stitches down each time it is drawn. I decided to take that chance as it isn’t the end of the world if it does happen…since these last two stitches are separate from the structural stitches on the side. If they get cut I cn easily re-stitch later on.
 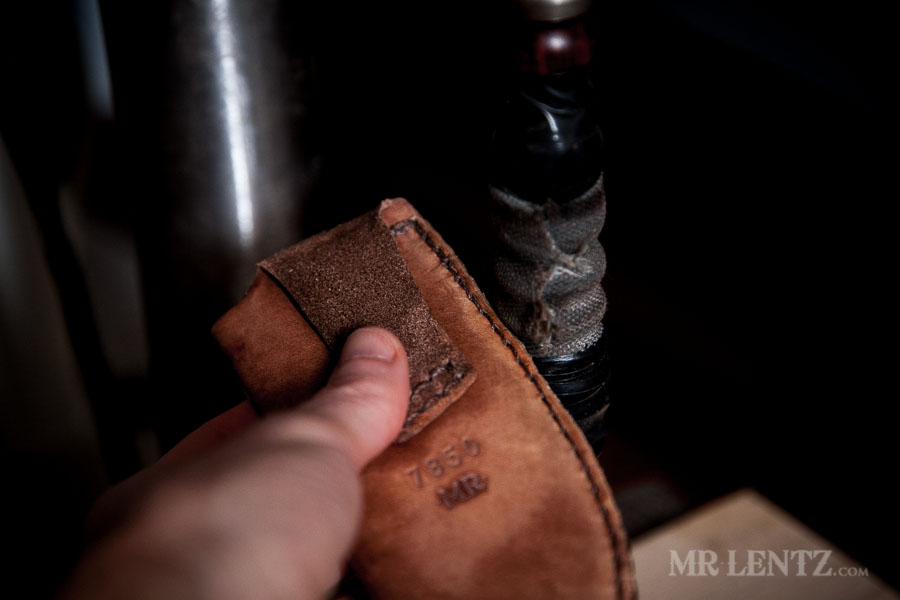 While the sheath is still moist I press the edges against the burnisher. It is a drill-press mounted one and does quick work on smoothing and polishing the edge.
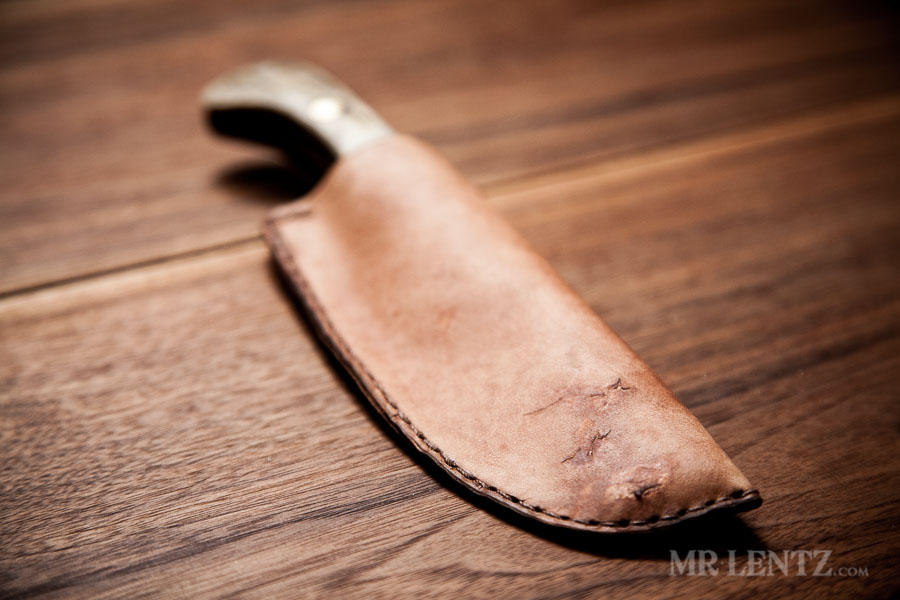
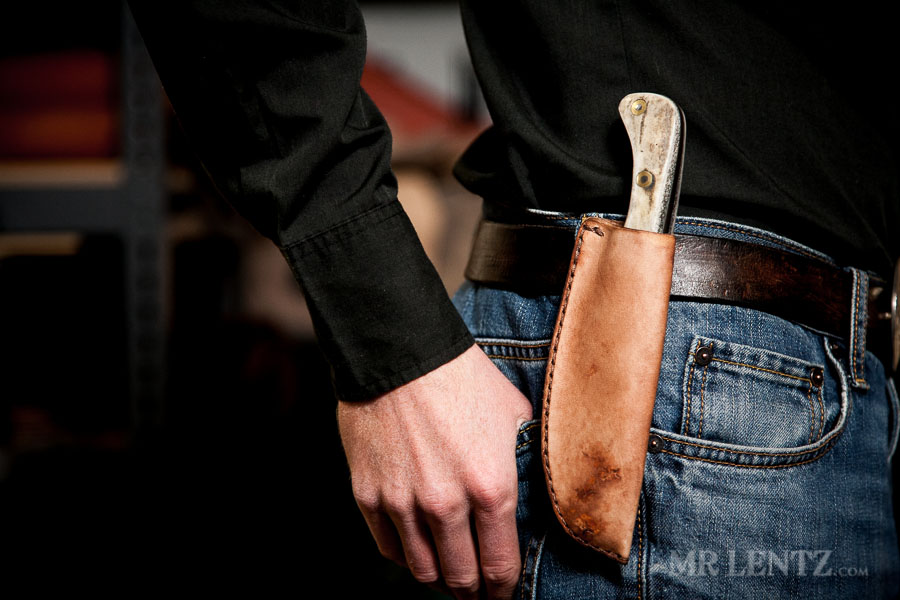
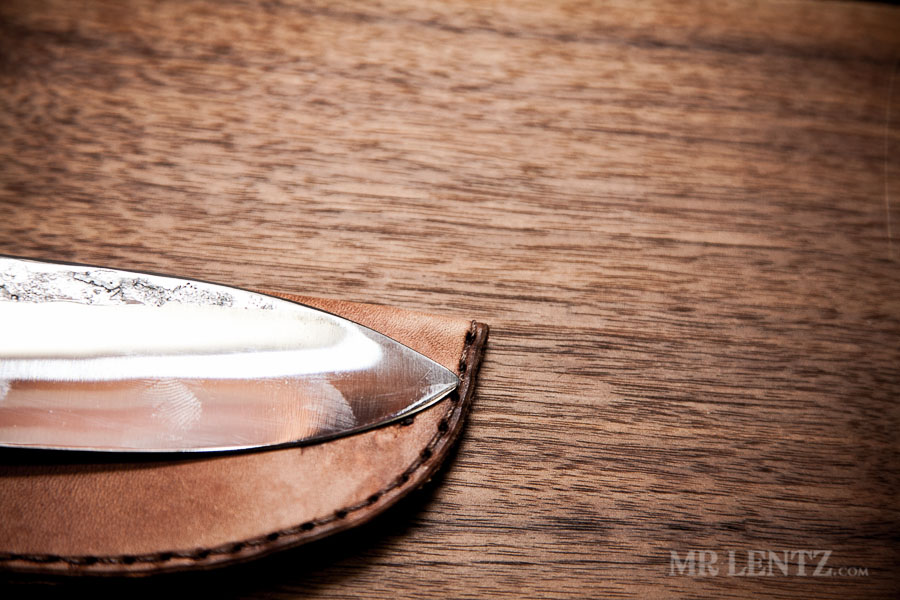
Now what is a knife sheath tutorial without some beauty shots?
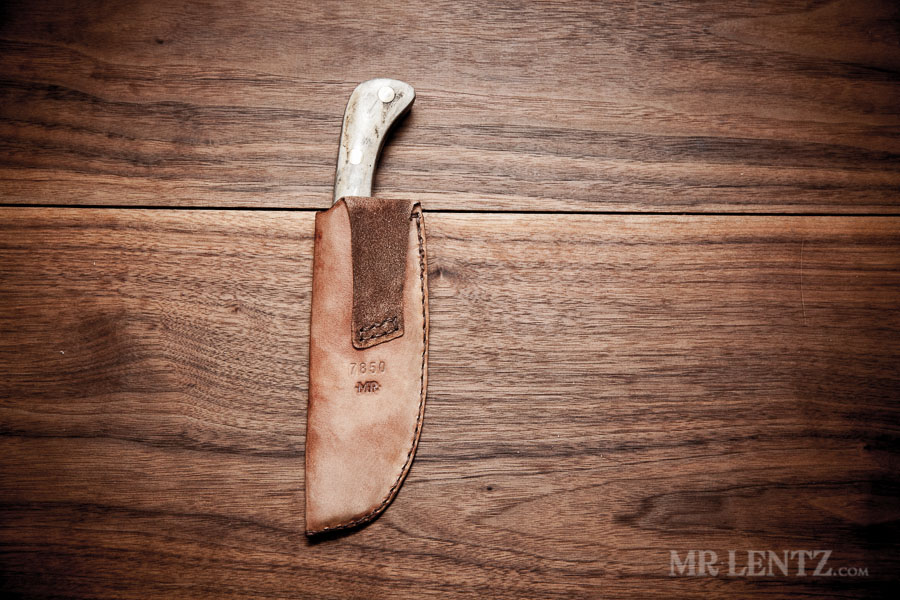
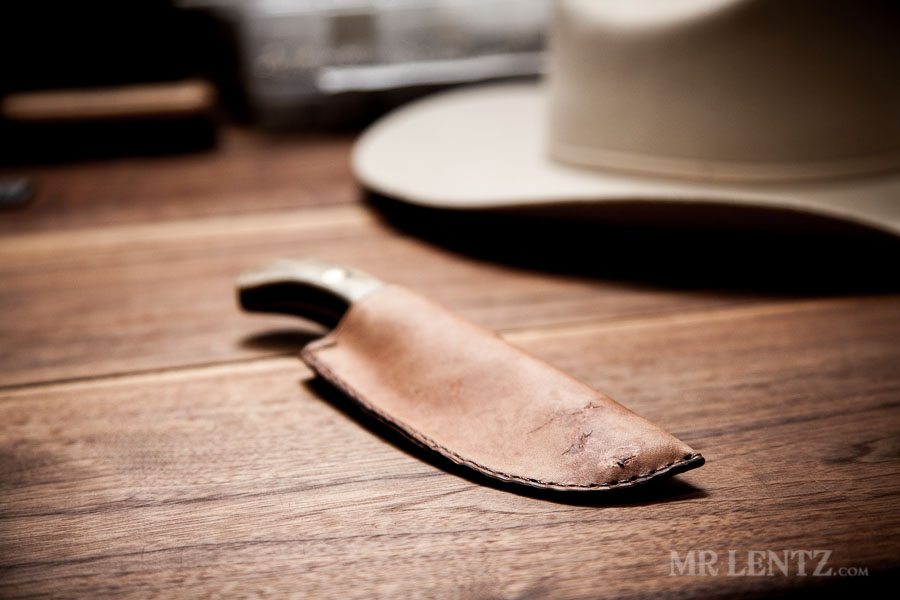
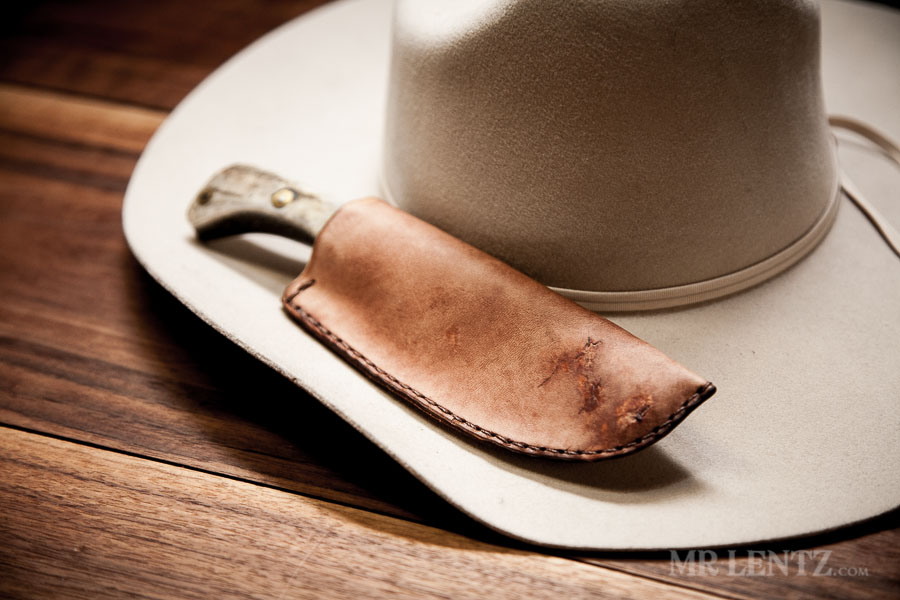 I must say – I do love that scarring that I chose, it makes a great accent. If you loved this tutorial – please let me know by writing a comment in the section below. Feel free to ask questions there as I am likely to respond so all can benefit. Happy New Year to all and thank you again for supporting my work and livelihood!
READER'S FAVORITESVIEW ALL


This looks great! I’ve been admiring your blog and find that your tutorials have been a great help considering I am just starting out. Looking forward to reading your tutorial on dying soon as I have been finding different things on forums; from your belt tutorial, you mentioned using EVOO and beeswax after dying the belt. Does beeswax provide enough protection and waterproofing? I have seen people use resolene. I don’t understand what the difference would make between the two.
Hi MM, well everything wears down over time, so no matter what you use, it will need to be reapplied as you wear it in. I choose not to use chemicals on my goods for my own health as well as my customers. Beeswax is a great alternative if you use it right, other oils also help make your product water resistant.
How much wider is the template than the knife? Half inch? Quarter inch?
Or as my wife would say, what’s the seam allowance?
Hi Charlie – currently I am using a 1/2 inch on the seam allowance so to speak. Though – this is for very thick 8/9 oz leather with a welt sandwiched in between. If you are using a lighter leather and following this older simple tutorial you can get away with 3/8 inch or slightly less.
Hi,
happy new year!
I’ve been reading your blog and it’s inspired me to get started in leatherworking.
First I made a felt lined roll-up-bag for my wife, to take her brushes with her when she goes out painting.
Next was a small wallet for myself. Since my driverslisence is bigger than the newer cards it had to be a bit bigger than the ones you offer. (Not as big as the ones you make for passports).
And finally (probably not really, there is some more leather left…) a knivesheath for the first knive I made for myself a few years ago. Untill today it had an orange kydex sheath, functional but not really nice to look at.
My question is, the leather you have used for your sheath looks quite thin, mine was about 2,4 mm. My sheath although wet-formed and stiffer than before still feels a bit wishy-washy.
Another question is, why didn’t you sew in a welt (not sure if the translator got me right here) to protect the seam from the edge.
Marcus
Hi Marcus – you are correct – the leather used here is quite thin. If you want a long-term durable sheath I would use at least a 6-7 oz leather or higher. The leather I used in the tutorial was a scrap piece and since I was in the mood (and didn’t have any thicker stuff around) I just went for it. On your second question – yes a welt would help a lot actually. The best thing todo is to cut a very narrow strip of leather, a thick piece, and sew it in sandwiched on the edge. I am planning on a follow up tutorial to this one detailing even better techniques.
Hi,
I just received one of your items bought through etsy (a passport wallet)and I just love it, great job.
I wonder if it could be possible for you to make for me a sheat for my favourite knife, exactly as the one above made for your knife……if yes i could send you all pictures and measurements of the knife.
Waiting for your comments, I send you my best regards.
Marcello
Hi Marcello – I will probably be making a sheath or two for the shop pretty soon. Keep your eyes peeled in a couple of months and I may have it up for sale.
Thanks!
I am thinking of making my own blades and whats a blade without a sheath? Very good honest tutorial, will be trying this myself. Really good stuff!
Great info and awesome website! I was wondering, instead if the stitch to tighten it, did you consider wetting and bonung / forming the case to mold to the knife?
Hi JP – that is another way to do it and I should probably put up a tutorial on a wet-formed case soon!
Whatbi need to do is remake the back of a Marine K Bar sheath that a new puppy chewed up. The problem here is there is a metal plate riveted to the outside of the leather that I would like to retain: it is there so the sheath can be tied off to webgear in a position such that the knife can be drawn downwards in a hurry if needed. They are not the ‘normal’ pop rivets and I don’t know how to remove and reattach them. I am new to leather working and I had never heard of a stitching horse, where can I find one. The local Tandy leather store, my only option other than the web, doesn’t seem that have one. Thank you for any help or advise you can give me.
Hi Phil – Actually Tandy is a good place to find one – or Ebay. They should have some cheap ones on there. I made my own as it is fairly simple if you have the right tools.
Sorry Mr.L but the tool you used to punch your holes is actually not called an awl but stitching or pricking irons. An Awl has a single blade and you don’t hit it with a hammer, you easily push it through the leather because it is sharp and follow up by stitching.
Would hate to have you passing along incorrect info to your customers.
Have a great day!
Hi Daryl, while you are correct to call it a pricking iron as well – it’s a bit more an issue of semantics. These tools can actually have several names depending on the region you are using them in, the store, how old the craftsman is, etc… For instance they are also known as diamond stitching chisels. If you are looking to purchase one – your best bet is to call it a diamond stitching chisel or pricking iron (but make sure you get the diamond point for stitching, a straight point is used in lacing).
Cheers and thank you for the input!
Mr. Lentz
When using the stitch grover, why did you only grove half and not go all the way around?
Hi Casey – I chose to do this since it can be hard to line up your punched holes on the opposite side within the groove. If you miss a few – it can make the work look shabby.
Now this is truly fantastic work! This has given me new inspiration for leather work, and for that I am truly grateful. Thank you, brother.
Thank you
Very nice
Hey, I am trying to make a wallet. I really admire your natural dying process, but if I want to use a waterstain dye, how do I go about dying the back side. Every picture I see it looks like its been dyed but it doesn’t look like it been matted down (which is how mine looks when I attempt to dye it). Any suggestions or best practices???
Hi Cameron, thanks for writing – what do you mean by matted down? Typically I will dye the front grain side of the leather, as the back flesh side will absorb too much and push out the natural oils.
I’m brand new at leather work. I’m a retired sailor (not Navy, actual “sailor”) and have always been interested in knots and all things nautical. Recently bought a vintage “rigger’s knife” off Ebay and it didn’t have a sheath. After looking online a bit, i decided to try and make one myself. I like DIY work and have found that the tools and techniques I’m learning really appeal to me. However, for this project I don’t want a sheath finish that is too dark or high quality. The knife is old and used, so the sheath should be appropriate. Anyway, the first photo in this tutorial of you wearing the finished product is exactly what I’ve imagined for the look of my leather. Would you mind giving me a bit of information on what you used and how you applied it to get the light and rustic finish you achieved? Thank you very much.
Hi Jerry Glad you found that tutorial of mine. If I were you – I’d find a Tandy Leather store if there’s one close by. They sell scrap leather, get a nice size of full-grain vegetable tanned leather. The natural tan is good to start with. Mine is actually hand dyed with my own natural formula – but the tan will age and look incredible in a short while as you use it. Get a 6/7 ounce hide, that should be thick enough for a knife sheath. Good luck! ~ Mr. Lentz
Hello Mr. Lentz,
I am having trouble with the welt in my knife sheath. Any pointers would greatly help. I admire your work so clean looking yet rustic. Cool style.
Hi Nick – thanks for writing in. Do you mean you cut your own welt to be inserted in between the two layers that come together? If that is the case I assume you are using a thicker leather than I did, probably a 6/7 oz. or thicker?
Great tutorial! I’m just getting ready to make a sheath for a framing chisel and will reference this throughout the process.
Thanks Luke – I’d recommend using a thicker leather, maybe a 6/7 oz or more. One day I will upgrade this tutorial a bit if I have the time
Hi Mr. Lentz,
I liked the tutorial. Nice to see hand made items from the good old USA. I retired from the military and took up leather work again. I am a little rusty after 30 years. I like the fact you took time to put your mark on your sheath. After I made a few items, I started marking every thing. I feel its important people know there are still craftsmen in the US. It’s exciting to turn an item over and not see Mexico, China or some other foreign country on there. These are quality hand made items that will be around long after we are gone. Keep up the good work.
Thanks Jimmy! Good point, making your mark on items you make does make them even more special. Glad you found my site, try out a few more tutorials when you get the chance!