
Everything, Leather, Tutorials
How to Make Leather Moccasins (Part 1 of 3)
Mar
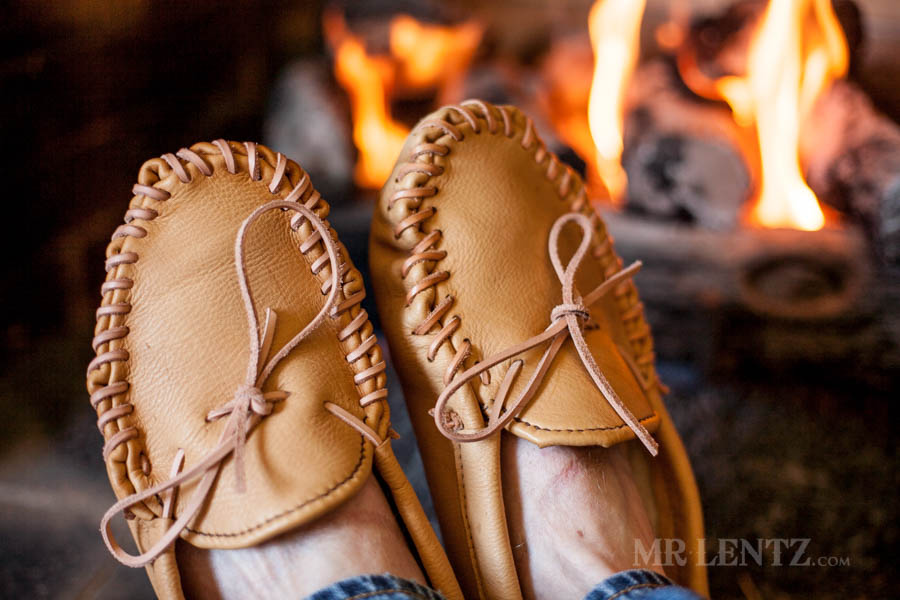
This past Winter break, as the holiday leatherworking season was coming to a close, I set off on the interesting and challenging journey of making my own fur lined moccasins. I like to dive into projects where I lack certain skills, just so I can learn them along the way – this project is actually great for that. It’s not so hard that a beginner shouldn’t try it and by the end you will have a pretty clear understanding of several skills including patterns, cutting, punching, skiving, sewing, lining, and lacing. Plus, you get even warmer feet for the next winter! I put together this fully photographed step by step tutorial on how to make leather moccasins to help everyone out there that’s interested in making more than just a keychain. Projects like this typically take me several months to photograph, record and put into a blog, so I have broken things up into three separate posts, this being the first. The others will follow soon, but there’s a fair amount here to get started!
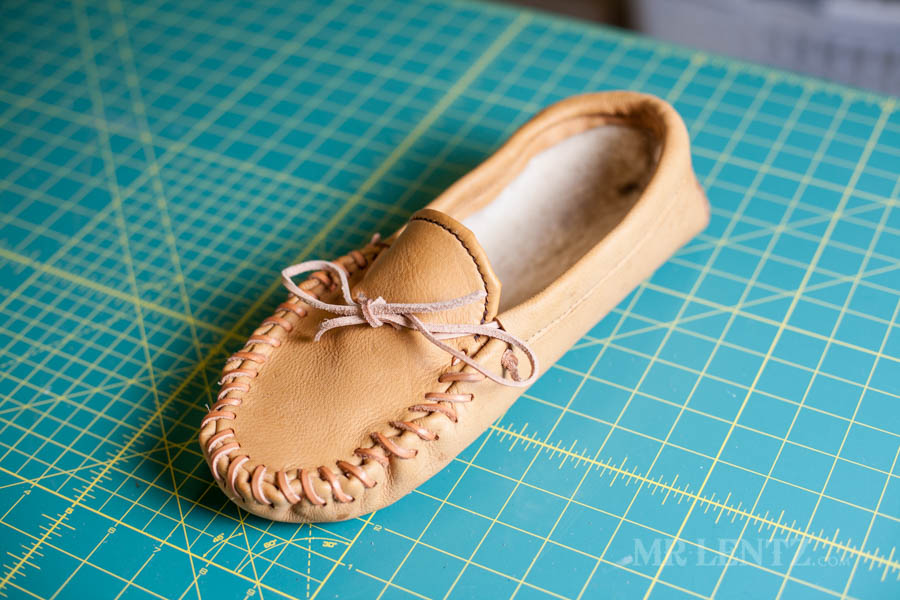
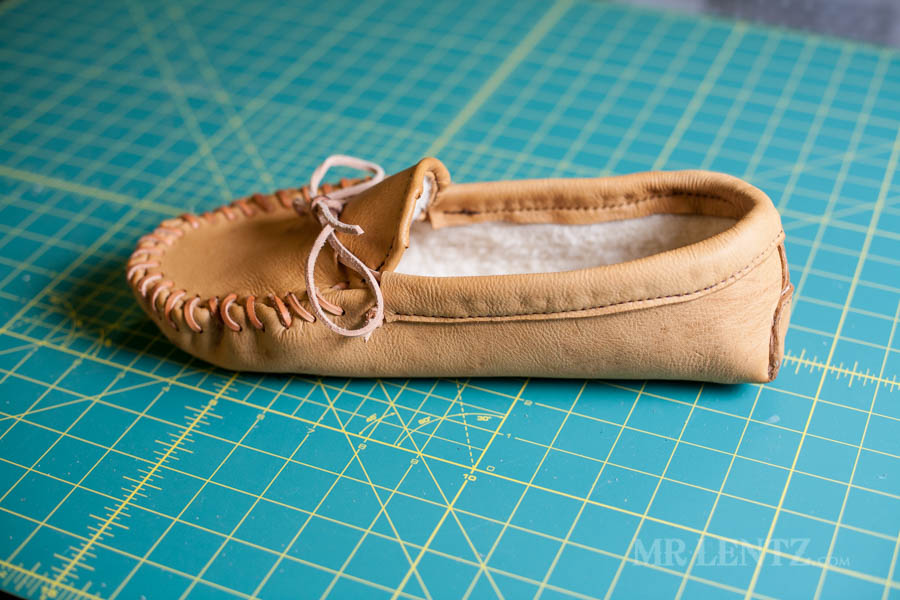


Above is the first moccasin I made…we actually it’s the second, I completely screwed up the first one I made in several ways…gave up the project for 1 full year, then decided I would not accept defeat and gave it another shot this past winter. Below are a few photos of the first failed attempt:
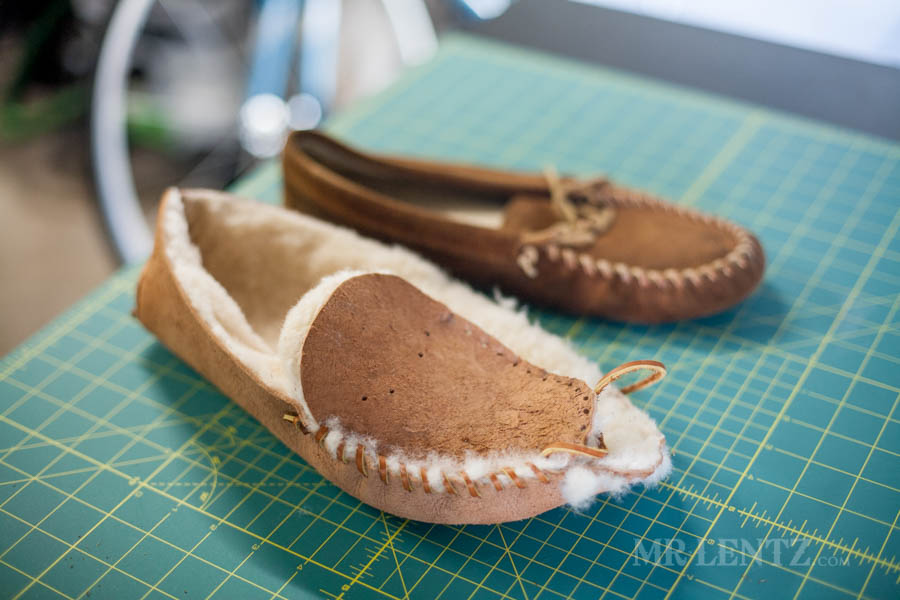
Above, my first attempt sits next to my original pair of Minnetonka’s. I struggled through every single step of this first try…hours and hours of work…only to find that the finished result was a hair too small due to excess fur in the inside, as well it didn’t feel durable on the outside as this is just a shearling’s skin exposed as the ‘flesh’ side out. It’s very brittle and tears easily. I worried about stepping on a rock and the thing splitting in half!
Like this post so far?
I spend most of my free time creating tutorials like this to help those like yourself get into leatherwork and woodworking, or get better at it. If you'd like to support my efforts, consider checking out my handmade leather goods shop and purchasing a gift for yourself or a loved one. It's readers like you that help keep a small U.S. business like mine going strong, so -thank you!
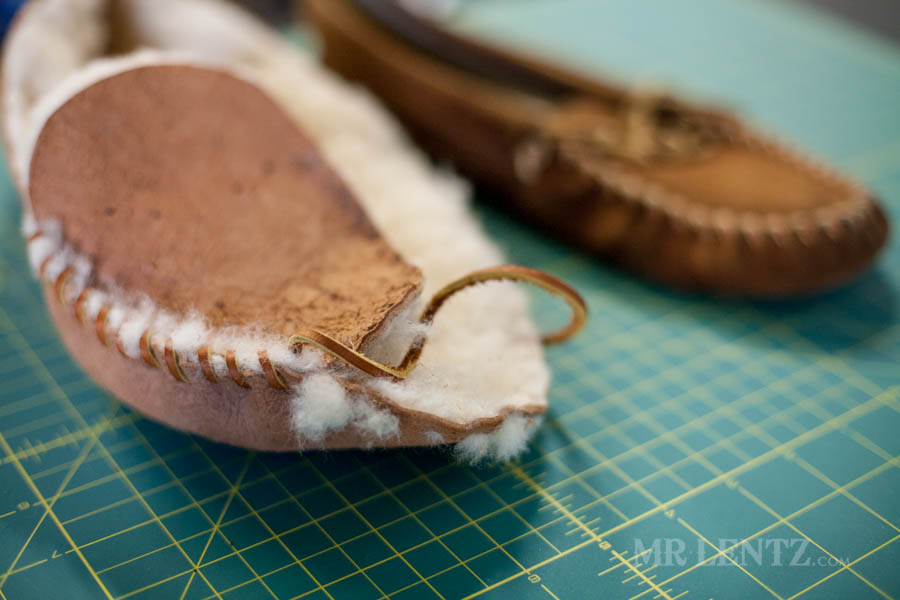
Above is a close up of that failed attempt, the fur was a big problem for all of the stitching work and lacing. Causing stitching holes to be way off and making it nearly impossible to pull lacing through at the end. I gave up and started anew below. Read on to see how my second attempt (and your first) will be a success.
TOOLS
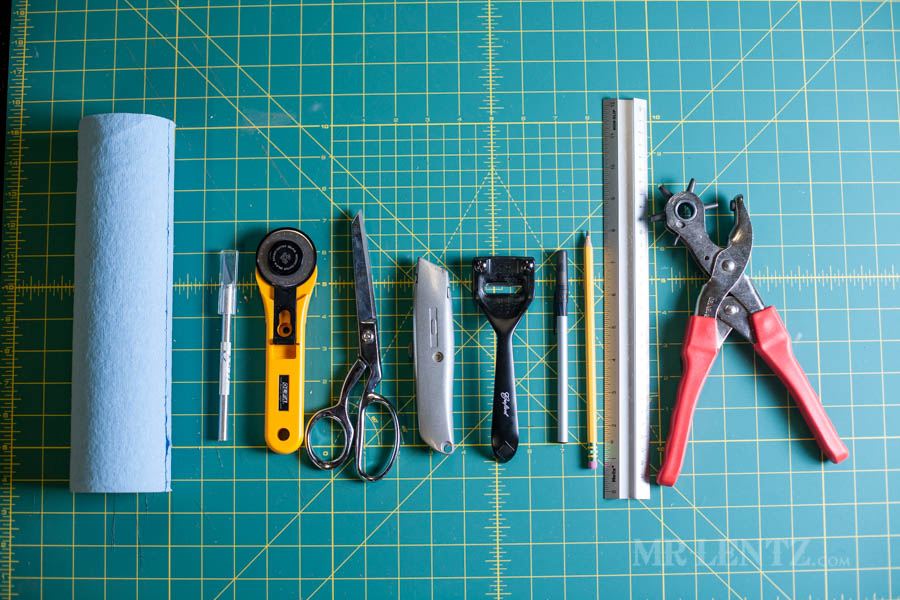
So you’re going to need a few tools to get this project completed. Above from left to right: Paper towels, small exacto knife, rolling blade, leather scissors, utility knife, pen, pencil, ruler, rotary hole punch.
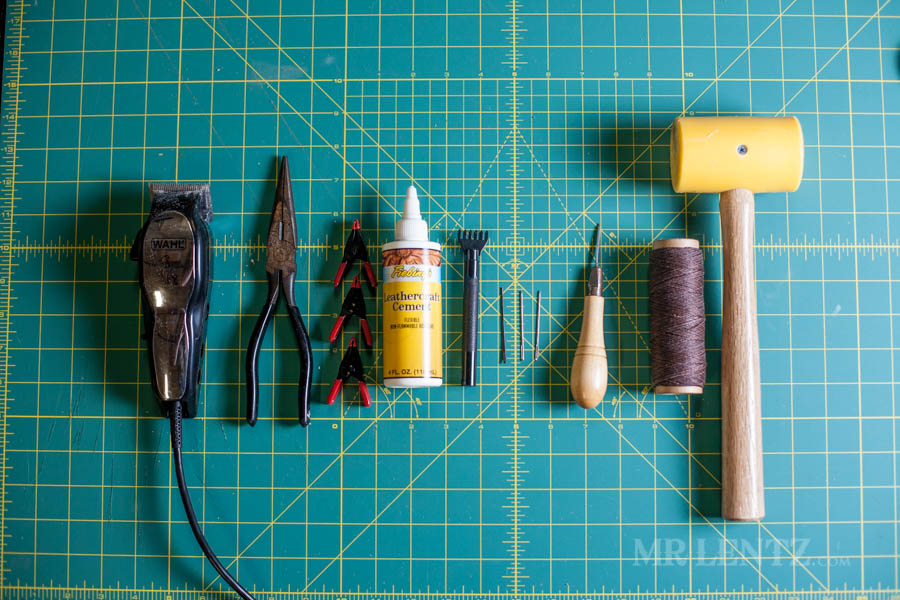
The above tools apply more on the stitching and lacing end: Electric Pet Shaver (yep mine’s a cheap one by Wahl designed for grooming pets), pliers, maybe 30 rubber coated mini clips to aid in gluing, Fieblings leathercraft cement or other PVA glue, stitching pricking iron, lacing needles x 6, harness hand sewing needles x 6 with blunt tips, single stitching awl, waxed stitching thread, mallet. (not shown here: stitching cutter – used to take your own store bought moccasins apart for pattern making, and poster paper used for tracing the pattern onto)
LEATHER
For this project I use a Top Grain deer hide bought on ebay, it has a thickness of 3 to 4 oz. Look for one with minimal holes and tears. I also purchased a shearling hide for the liner, also available on many online stores. You don’t necessarily need the liner, but this tutorial shows how with one, so modify at your own risk!
How to Make Moccasins
Ok, so the easiest possible way to get the right size for the paper pattern is to do what I did…cut up a pair of my own lined Minnetonka moccasins. I know, I know – it’s kind of like cheating. Well yes…but I don’t have the time to make 8 pairs of these things until I nail the size down just right! If you don’t already have a pair of moccasins to chop up, you may be able to find very cheap used pairs on ebay. It’s a small investment and will save a lot of heartbreak later if you just eyeball your size without a reference. My old moccasins were around 6 years used, and while they worked just fine, the closer I looked the more I realized they weren’t in fact made from deerskin or shearling…they may have been made from sanded pigskin and an artificial liner. So I was fine with cutting them up.
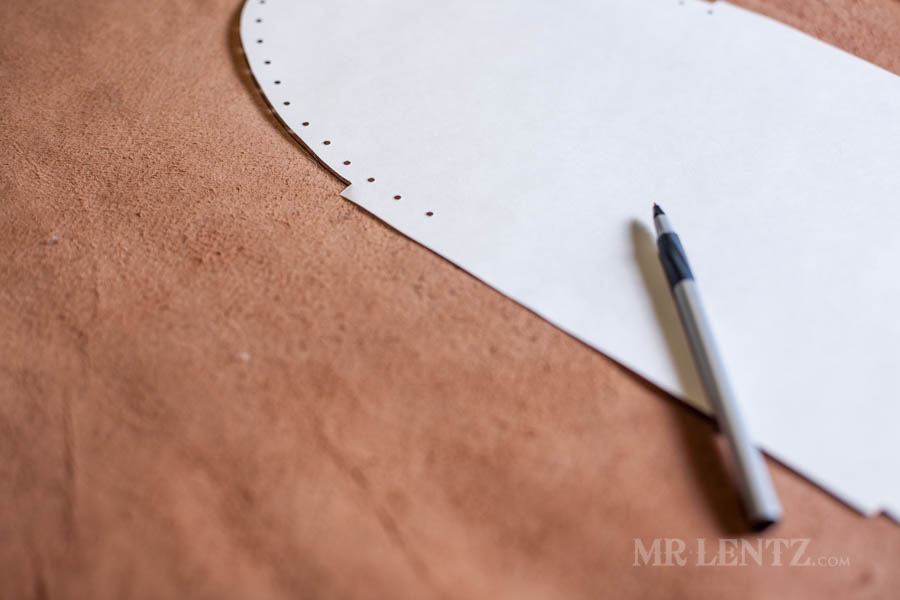
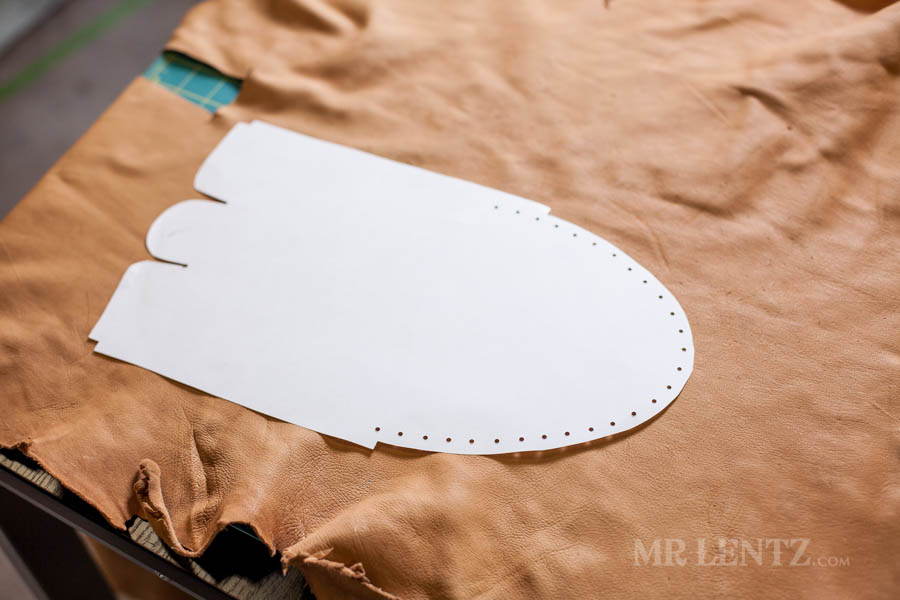
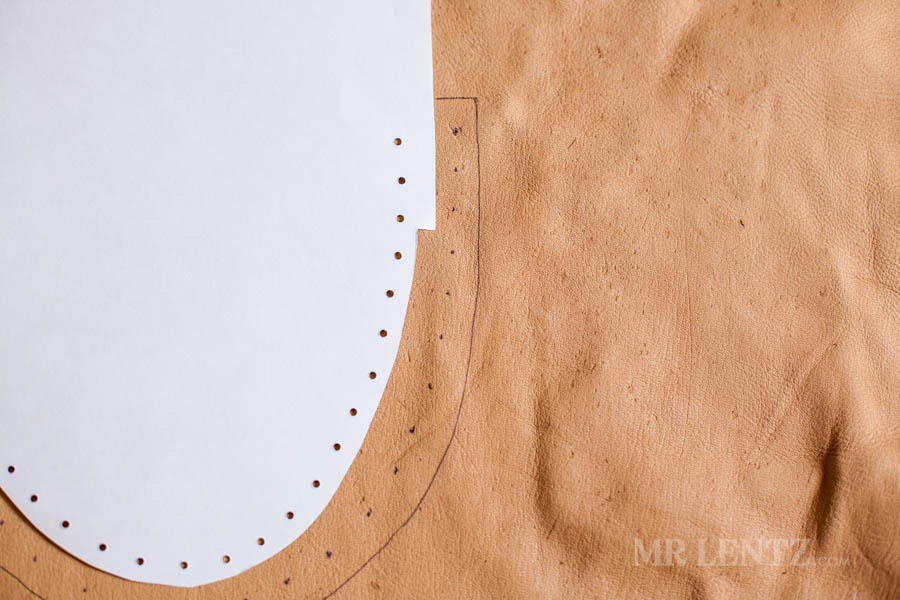
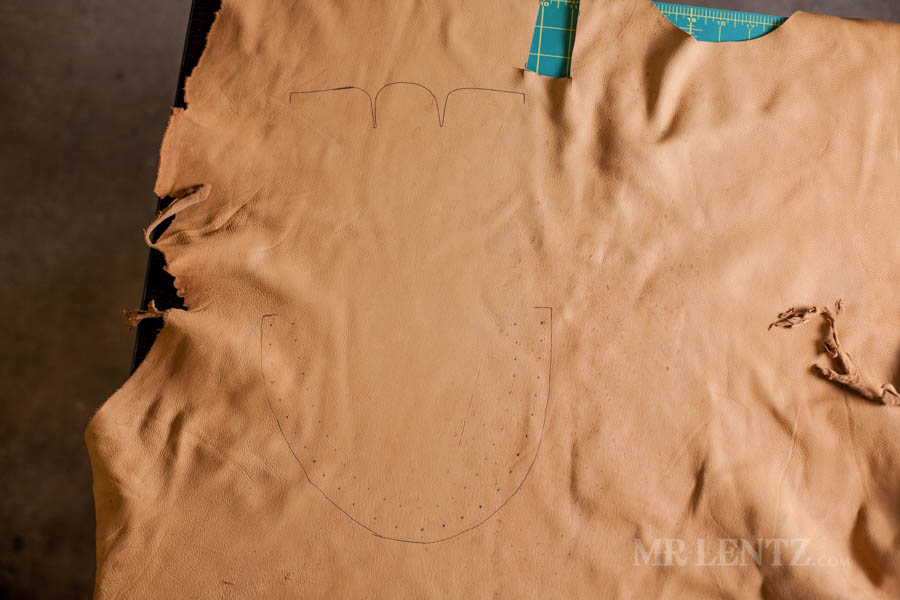
What you want to do with your store bought moccasins is use the stitch cutter and carefully remove each sewn element of the moccasin. Usually there is only a ‘body’, and a rectangular piece that holds the lacing, and an ‘upper’ – the part that rests on the top of your foot, plus the lacing. Leave the lining in place. When all of the stitching is removed the pieces should lay flat and look like a pattern. Take the ‘Upper’ piece, lay it on the poster paper and trace it out along with all holes. Then cut it out and lay the paper pattern on the leathery side of your shearling liner you bought. You will notice the pattern curves slightly to one side…this is important. You don’t want to end up with two left moccasins, so take a look at the image above. If it looks like this, then label the paper pattern ‘Left’. You can flip it over and label the other side ‘Right’. Whenever you cut using the pattern make sure to pay attention to this so that your pieces will fit just right.
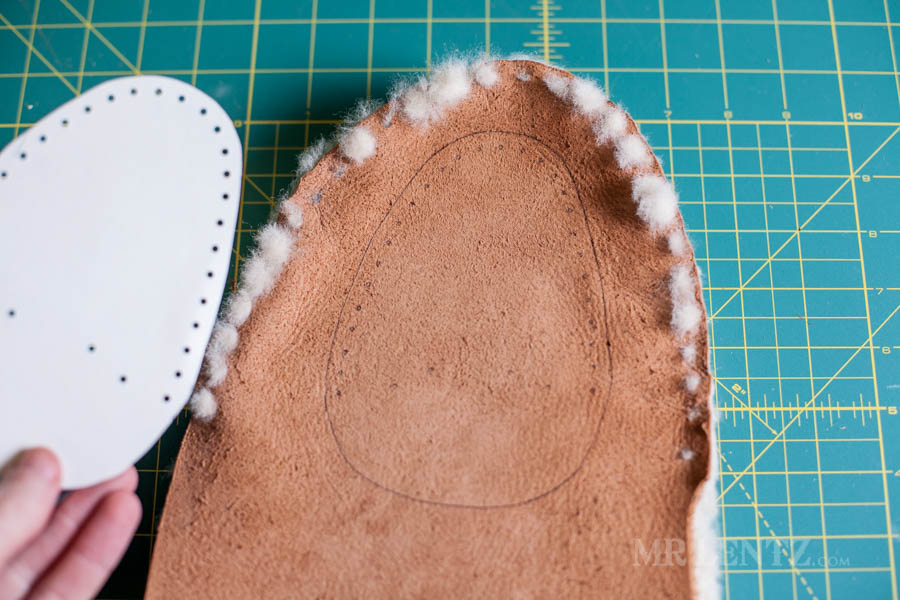

Go ahead and trace out your pattern onto the shearling liner, cut it out, and punch the holes. I used a pen for tracing as it is easier to see and the marks will be covered later with deer skin.
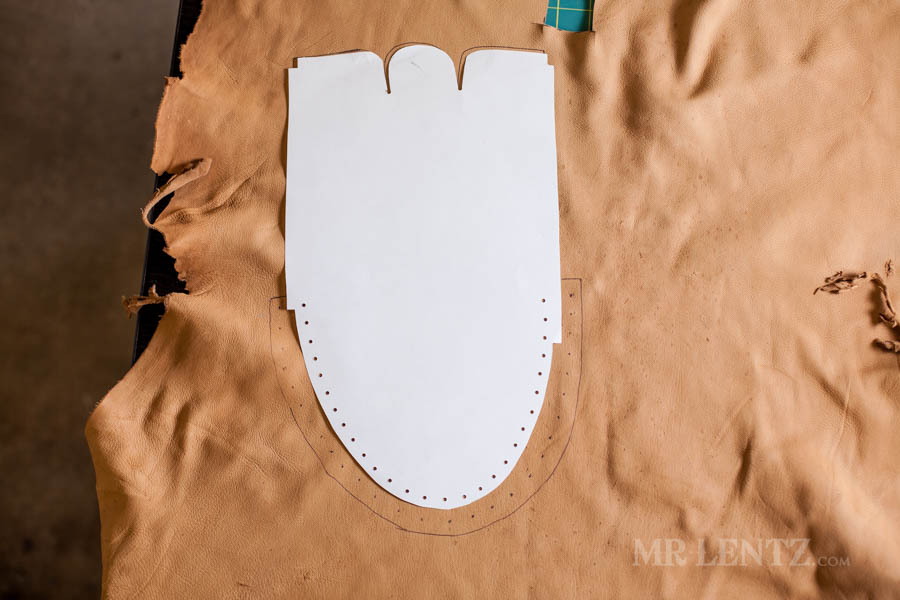
Now you will need to make the pattern for the body the same way you did with the Upper. When you label this piece…keep in mind that it will technically be upside down, so if it looks like the above photo when you lay it down – it will be a “Left”. Label the other side Right. Above is close to what yours will look like – but ignore the little extra space on the sides that look like 1/4 inch extensions (this was a mistake that I later cut off).

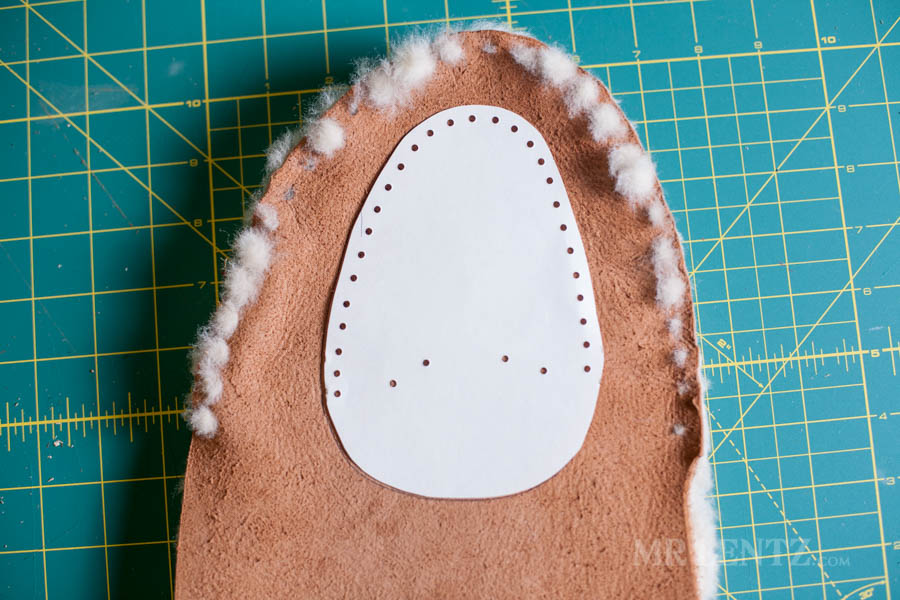
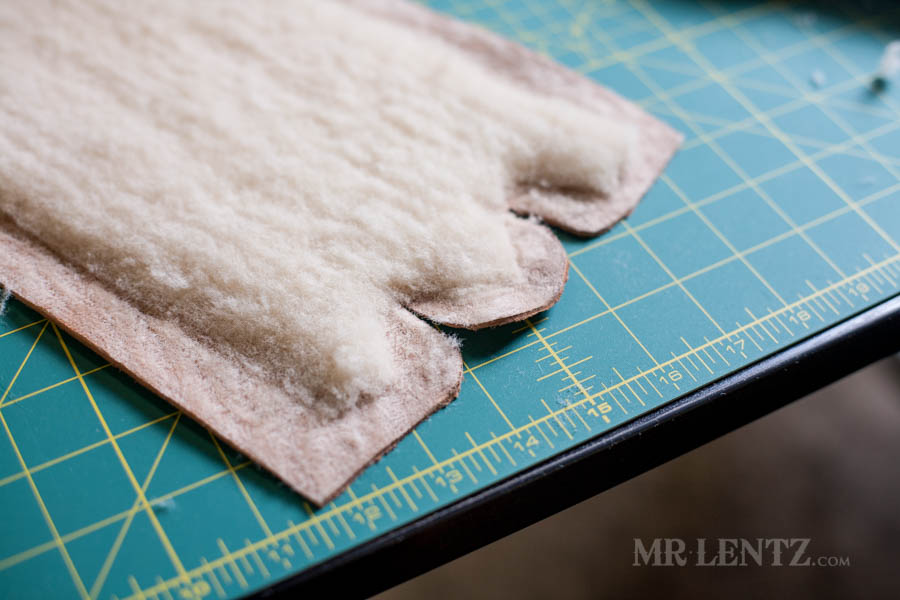
Now I cut out the shearling body liner and punch the holes.
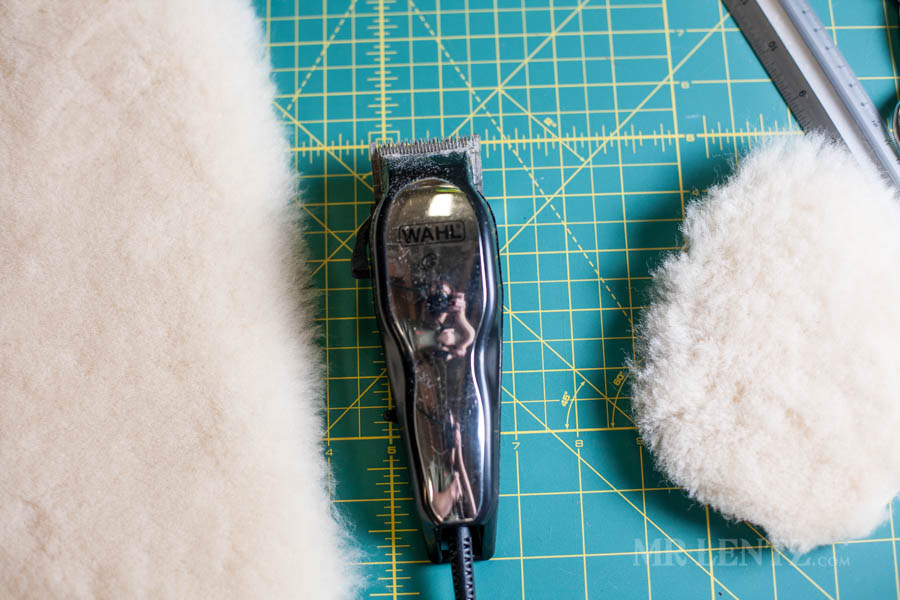
What you are left with is two very furry liner pieces. This is where your electric pet groomer plays an important role.
Start by squaring up the fir to the edge of the leather without using a guard on the buzzer.
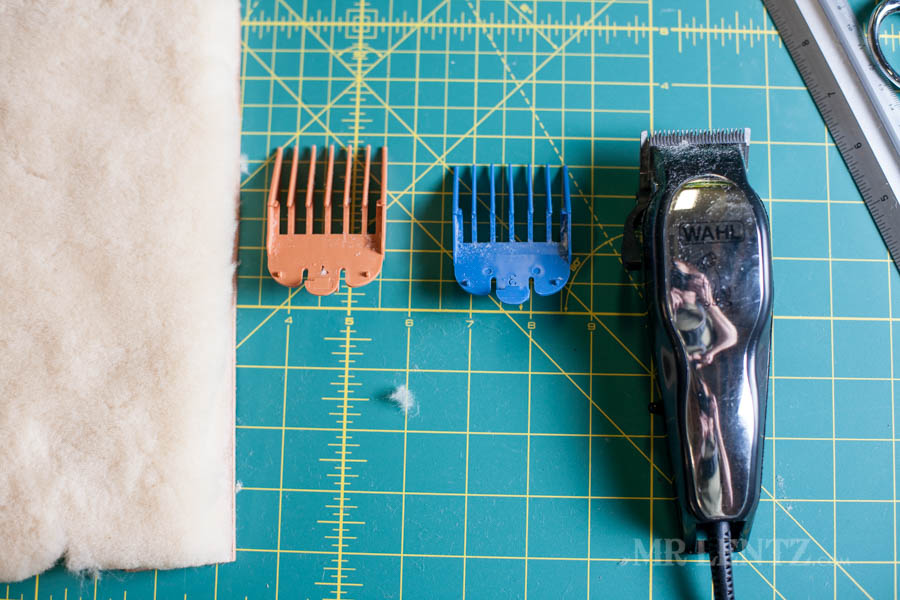
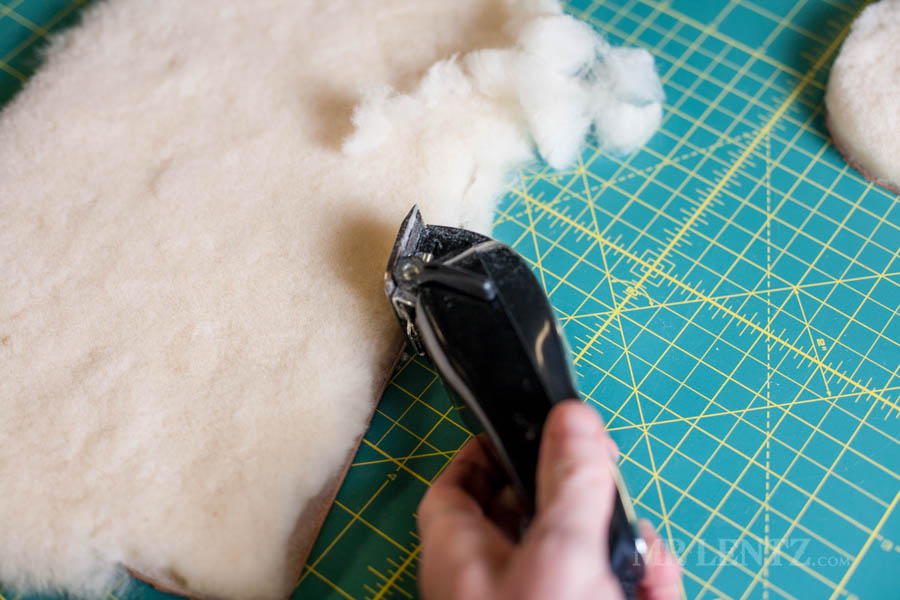
Next use a number 4 guard and make a full pass on the entire fur area to help take it down a bit. Then switch to a 3 guard and make a few more passes to further reduce the fur. I left mine at the 3 guard length. Take your time here and approach the shaving from multiple angles to make sure you even it all out.
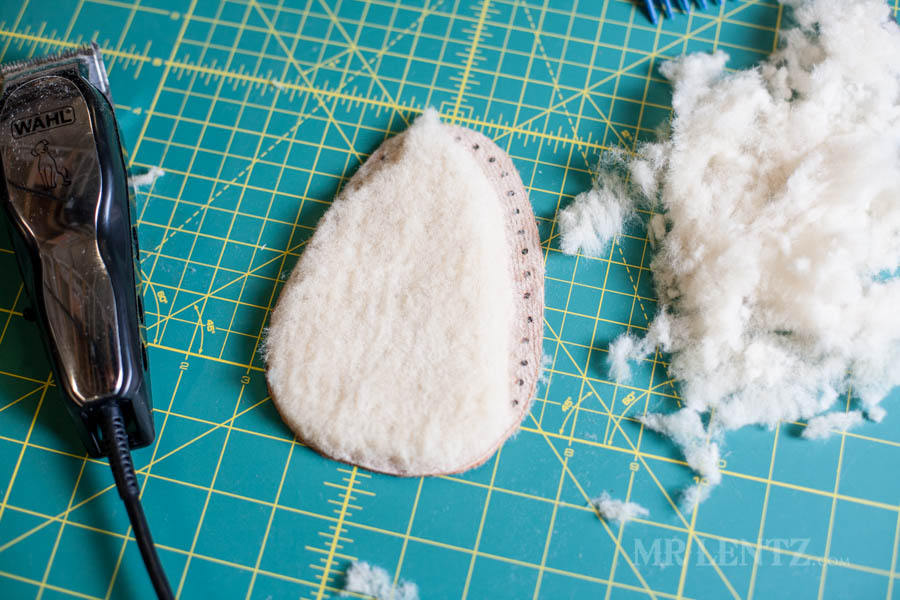
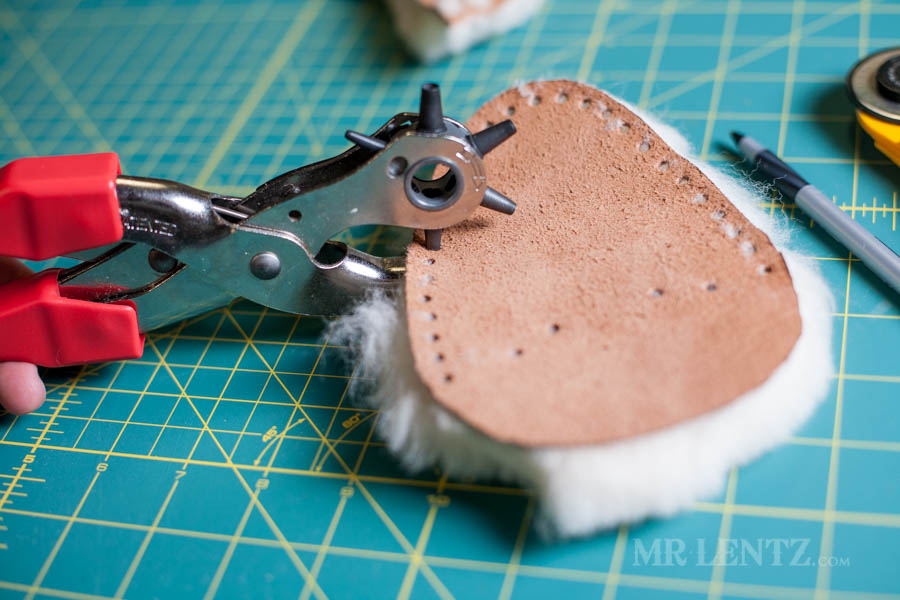
Next take the guard off and shave down to the leather around where the holes are punched in the Upper. Go in an extra 1/4 inch or so from the holes.

Then taper the cut so it is angled inward about 45 degrees. This helps when fitting things together and further keeps the fur away from the lacing.

Make sure to go around the edge of the entire piece with the buzzer and angle it all. Your Upper should now look similar to the above.
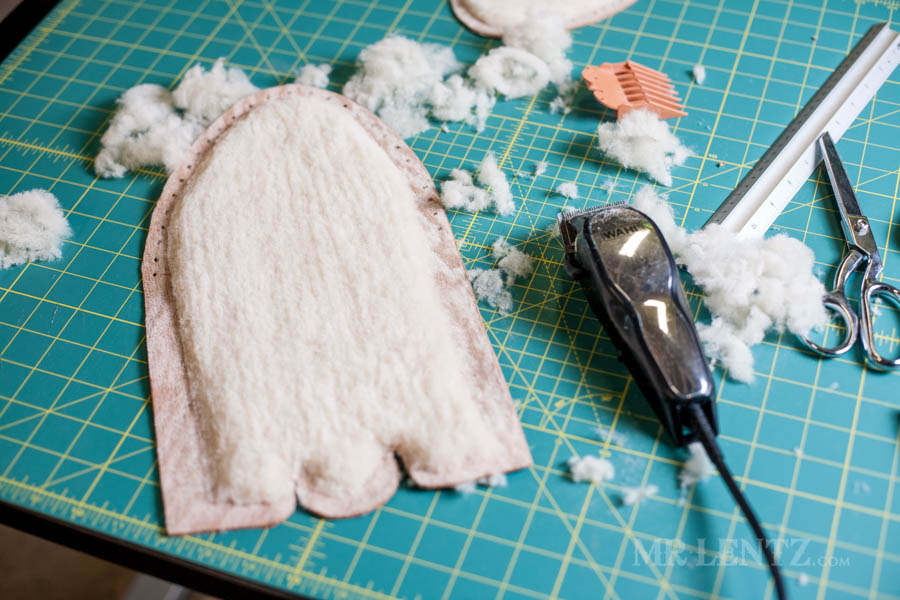
At this point I repeated the same process on the body. You can see that I chose to take a little more off of the lower half of the body around the edges. Maybe an extra 1/4 inch in. This will help when you go to stitch the piece that holds your lacing in.

On the rounded part of the bottom of the body, you can stay closer to the edge. You don’t need to take quit as much off here, as it will lead to a bare patch once completed.
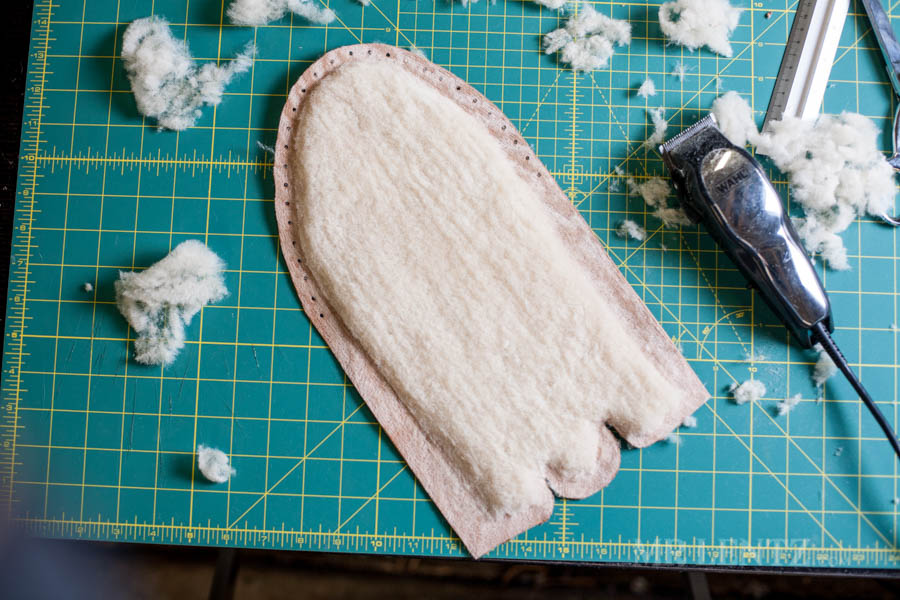
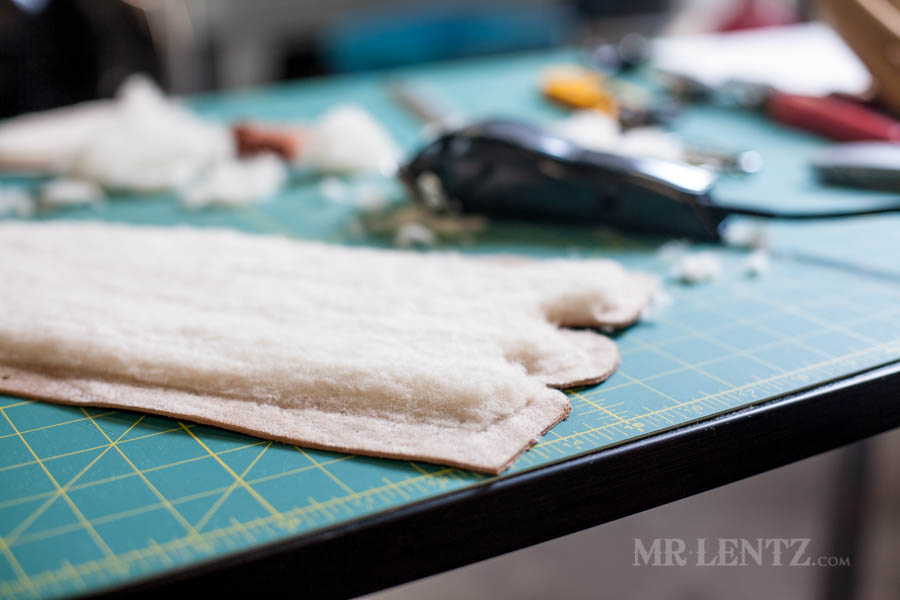
After you have angled all of the fur inward with the buzzer it should look similar to the above.
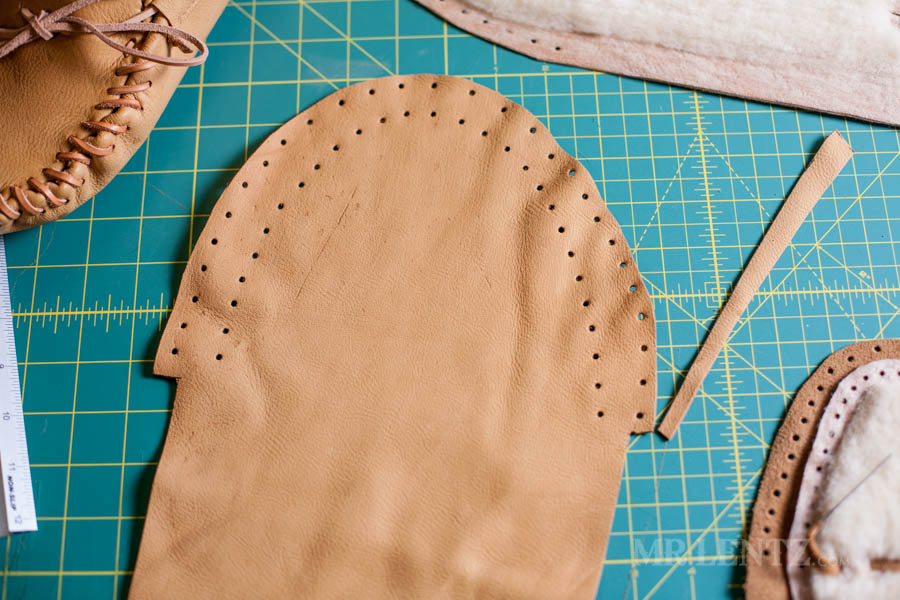
Now it’s time to make the exterior skin for your moccasins. Lay the deer skin down so the smooth side faces up. Pay attention to what side of the pattern is facing up and how you labeled them earlier. Above is correct for a Left moccasin.
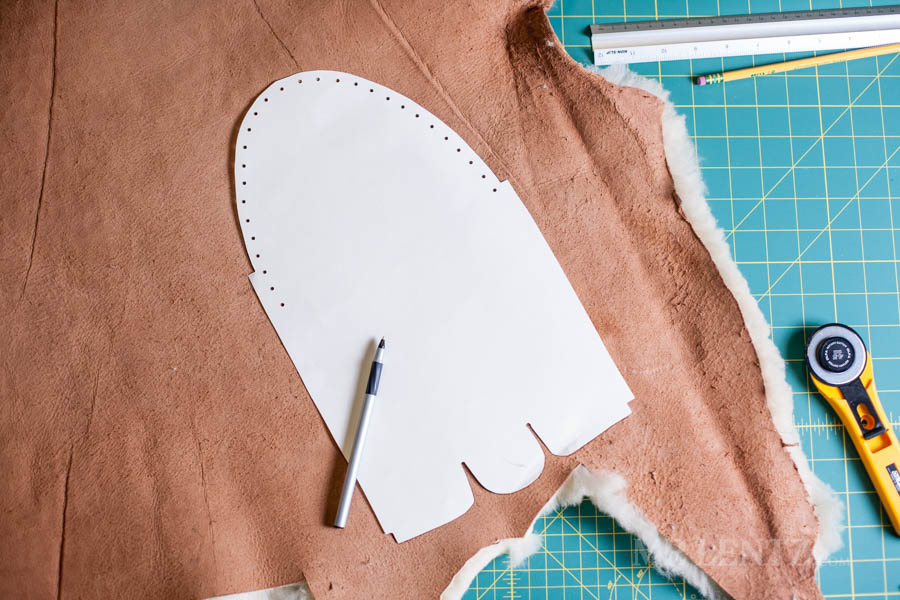
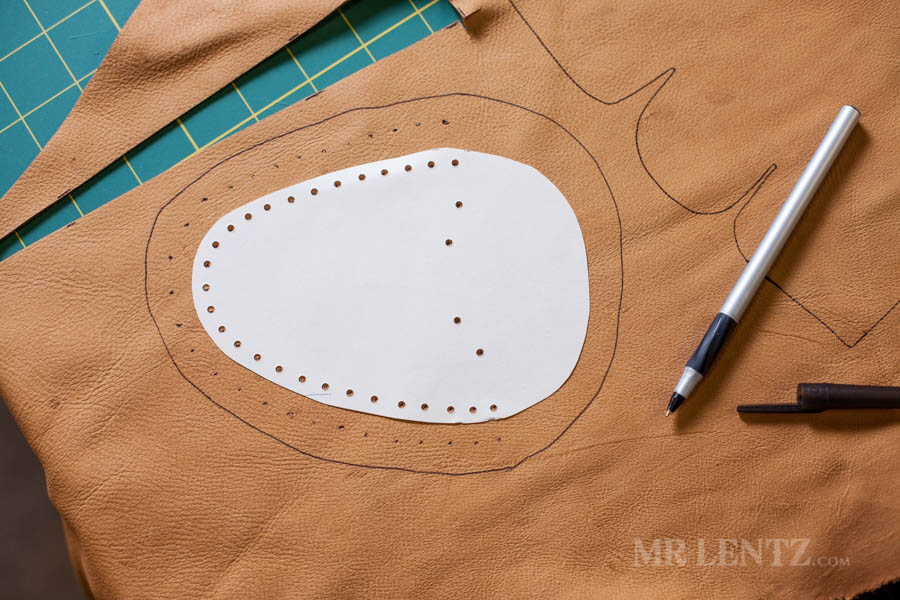
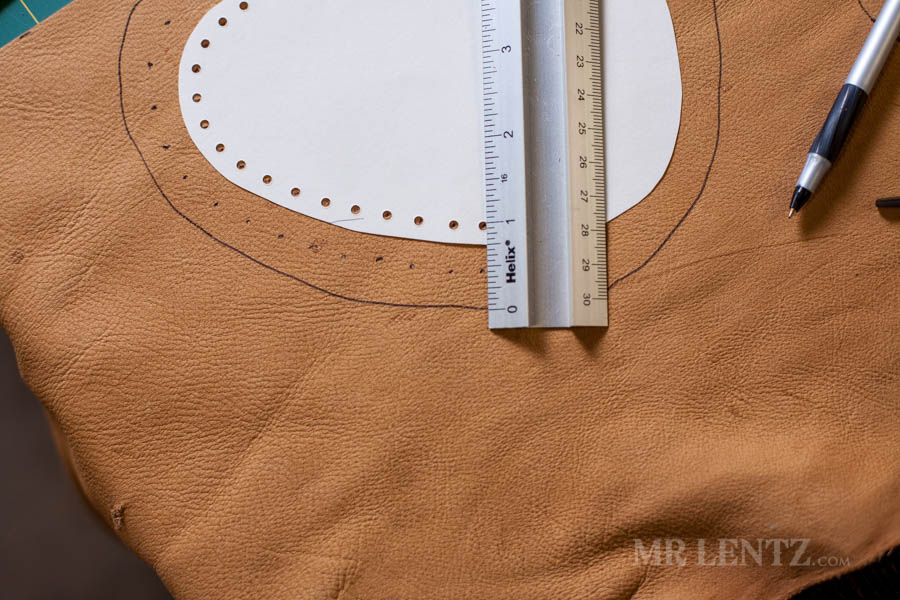
Trace your pattern onto the deer skin. —-DO NOT TRACE THE CURVED TOE AREA WITH ALL OF THE HOLES— You can trace the holes themselves though. I used a pen…but I would recommend something erasable if possible. I was able to cut on the inner edge of the pen line so most of it disappeared in the final piece, but there are one or two spots that show, oops! Next, you will notice that there is an “extension” traced onto the leather that is not part of your pattern. This extension will ultimately wrap around your liner to conceal it. I drew the extension by hand, staying approximately 3/4 inch from the edge of the pattern. I then placed dots for holes about 1/2 inch from each hole in the pattern. At the first and last hole I extended the pattern by 1/2 inch and drew a line to connect to the original traced pattern.
Above is the result of the modified tracing and extension. Notice how there is no line where the pattern was around the toes? That’ll keep a pen mark from showing on your final moccasins.
For the Upper, place the pattern on the deer skin in the same way, paying attention to the Left side label. —DO NOT TRACE THE EDGE OF THIS PATTERN—– instead, make a line that follows the shap at about 3/4 inch from the edge of the pattern. Then trace all of the holes, then add the extra holes 1/2 inch away from those holes. Again, this extra extension will wrap around your liner to conceal it.
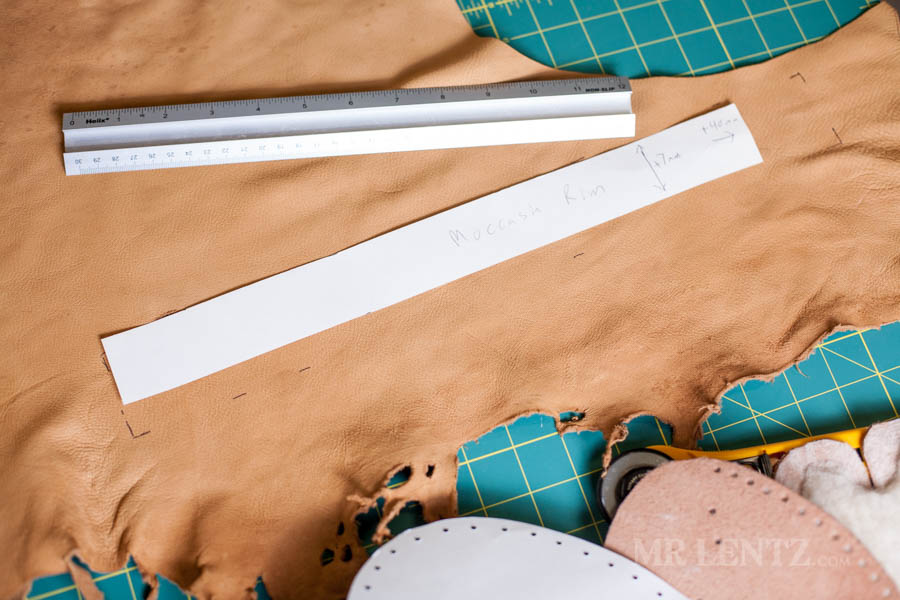
In taking apart your store bought moccasins there should be a long rectangular piece that went around the body to help hold the lace in place. Basically what I did is used that piece and added an extra 1/2 inch in width and 1.5 inches in length. The idea is that you can always cut off extra after you stitch.
Here’s what your cut and punched body piece should look like.
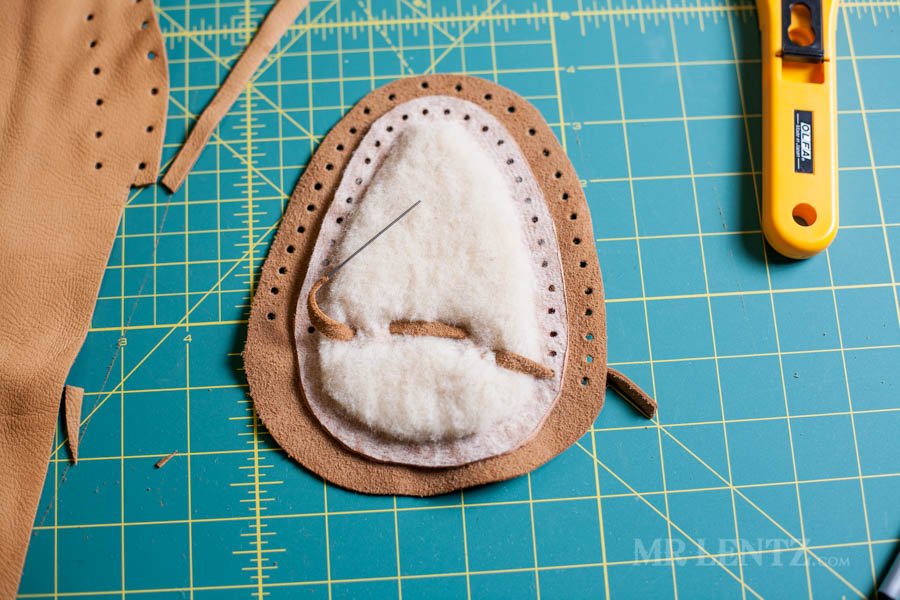
Before we end part 1, we can prepare the Upper for gluing to the lining. I cut a thin strip of deer skin to use as lace, maybe 3/16 inches wide and 7 inches long. Taper one end of that piece to a point. Grab your lacing needle, open the pronged side and push the smooth side of the deer skin into the prongs. Use the pliers to clamp the needle back together. This will set the leather into the needle so that it grips it nicely. Feed the lace through only the 4 holes in the middle of the upper. This helps align things for when we go to glue and stitch.
Alright, that’s about enough to get a good start on this project. Next up we will be cutting ‘darts’ into the curved edges of the deer skin so that when folded over on itself it will not bunch up. Then we glue and stitch. Please feel free to post questions below so I can answer them to everyone’s benefit.
Part 1 Part 2 Part 3READER'S FAVORITESVIEW ALL


Very clear, graphic instructions. How about for double sole moccasins with 8-13 oz. leather? Is that possible to do? Probably would require some strong lacing and very tight pulling to hold the pieces tightly together for outside use.
And what might you suggest for preserving/waterproofing outdoor sole-less moccasins? Bees wax?
Thanks for the good instructions
Hi George – great questions! After I made this pair I did consider making another with a thicker cowhide sole in between the outer deer skin and inner liner. I didn’t get around to it though as I time ran a bit thin. I would say it is possible to do, but you will probably only want the thicker sole…not thicker leather all the way around. It would be almost impossible to work with. As for preserving these moccasins for outdoor use, a good oiling and wax should work well. I have not tested mine outdoors yet to see how the bottoms would hold up, so I can’t say for sure. Deerhide is known for strength and flexibility though and you can get it wet and wring it out. Though the lining may not like getting wet. Many years ago people used to use tallow to help preserve their leather for outdoor use. Try a search on that if you are interested in a old-school method.
Goose grease works good as well.
use mink oil for preserving and waterproofing
Thanks – I actually tend to stick with Neatsfoot oil. It’s oil from the cow’s shin bone and is a byproduct/waste product of the meat industry.
Love your tutorial
Thank you Linda! hope yours turned out well!
AMIGO MÍO: yo soy RODOLFO VALDÉS CARREÓN soy Ingeniero Civil Retirado y Pensionado por mi gobierno de MÉXICO . Estoy siguiendo paso a paso tus instrucciones que me parecen excelentes. Muchas Gracias por todo tu apoyo. Mi meta inmediata es tener mi primer par de mocasines para antes de Navidad, quiera Dios que así sea.
Hi Rodolfo! I am glad that you are doing well with the tutorial. I hope that you have some nice moccasins before Christmas as well! – Saludos Rodolfo, Me alegra que te esté yendo bien con el tutorial. ¡Espero que tengas algunos buenos mocasines antes de Navidad también! ~ Mr. Lentz
I’ve been wearing Minnetonka’s since I got my first pair for my 16th birthday. This year I bought another pair and the quality was poor at best, so I went looking and found your tutorial— thank you for all your hard work. By next Christmas I hope to have a pair for the house & a driving moccasin using leather soles I purchased from the Amish — who suggested I glue the sole to the bottom. Again, thanks for sharing
Thanks Nan, glad you found the tutorial! I’d love to see some photos of your finished moccasins!
About how much Square footage of leather did you use? I’m getting ready to order my leather from a local tribe and I want to make sure I order enough. I have to order by square footage.
Hi Crystal, one deer hide should be plenty for two moccasins and some room for error. Deer hides aren’t always perfect either, so you may have to cut around holes and other blemishes. The more square footage you can get, the better so my advice is one full hide.
Great tutorial! I’m making one with a white deer hide (a 10 footer I got for $15!!! from Springfield Leather Company). Can you share the dimensions of the pieces? I don’t have an old pair to work from and I planned on just tracing my foot and giving a 1/4-1/2″ seam clearance for the bottom. Thanks!
Good question – I was actually looking for the template pieces the other week (I’m planning on making a pair for my lady). Unfortunately I may have tossed them during a move. Which is bad news for me too! What I would suggest is rough it out on a piece of white paper. Cut it and fold it up against your foot to see if it is working or not. Then you can re-draw, re-cut and repeat until you have something close. Then do a test run with the leather – you have quite a lot so that shouldn’t be a problem! Anwyays – that’s what I plan to do for my next pair too.