Everything, Leather, Tutorials
How to Make a Leather Knife Sheath (Part 3 of 3)

Oct
This is part 3 of my tutorial on making a leather knife sheath. If you found yourself here and would like to start at the beginning follow this link to Part 1. If you are mid-way through the tutorial and want to view Part 2 it can be found here.
In this final segment of making a leather knife sheath we will be applying the finishing touches to the sheath that help transform the look from a roughly put together item into a slick looking beautiful keepsake. Let’s get this project finished up.
At this point you should have your sheath all sewn up. You will then dampen the edges of the blade protector and grab the edge beveler #2.
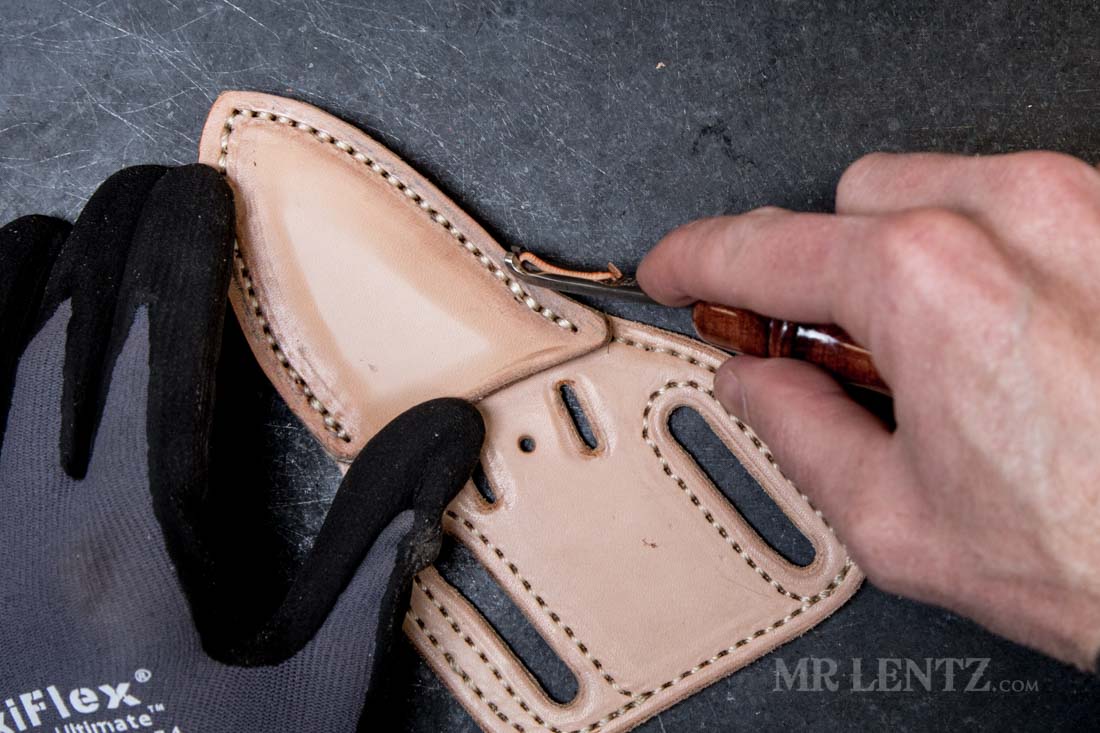
I bevel the edge of the blade protector area. Go slowly and use a good angle that allows the tool to do its job without jumping around. Usually this is 45 degrees tilt and 45 degrees drop.
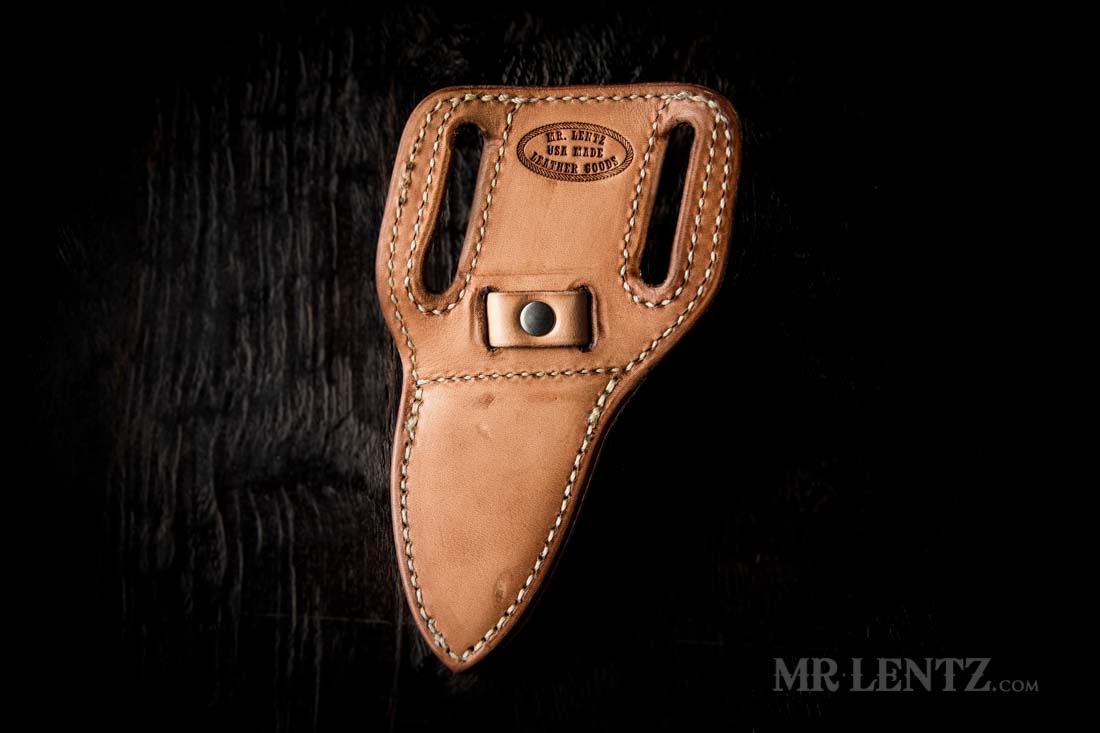
On the back side I wet the area where I will be placing my makers mark. You gotta lay claim to these things!
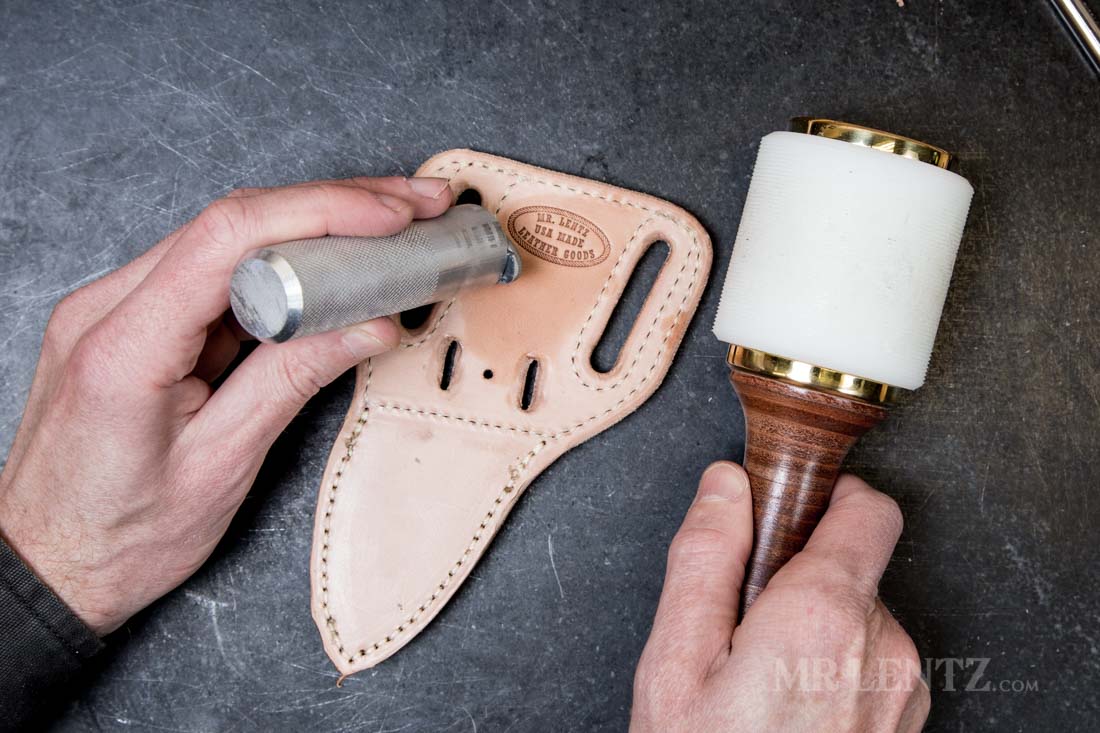
To stamp the makers mark I use a weighted maul and strike once. This makes one solid impression. Hammering more than this may cause the stamp to slightly jump and give a double impression.
Next dampen the edges of the back of the blade protector and go forward with beveling this edge as well.

On the front side I dampen the top edge of the blade protector area.

Using a Dremel with a small cocobolo burnishing attachment I burnish the top edge.
It’s a good idea to slightly flare out this edge as well. It will help when placing the knife back into the sheath.
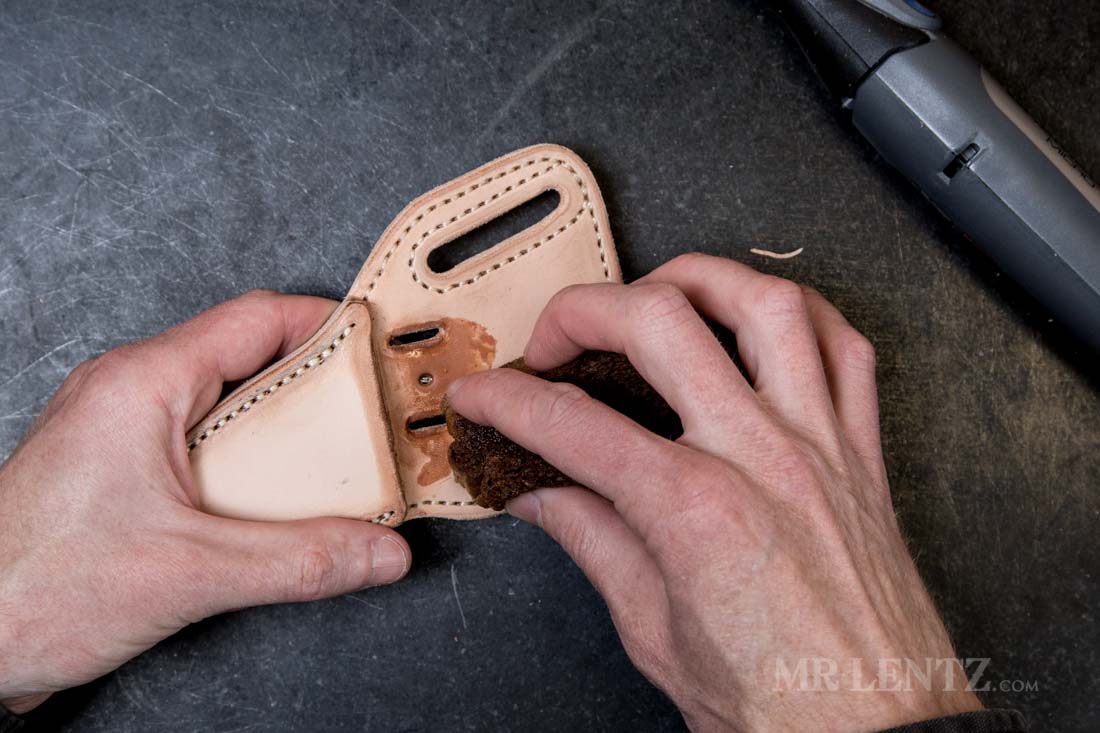
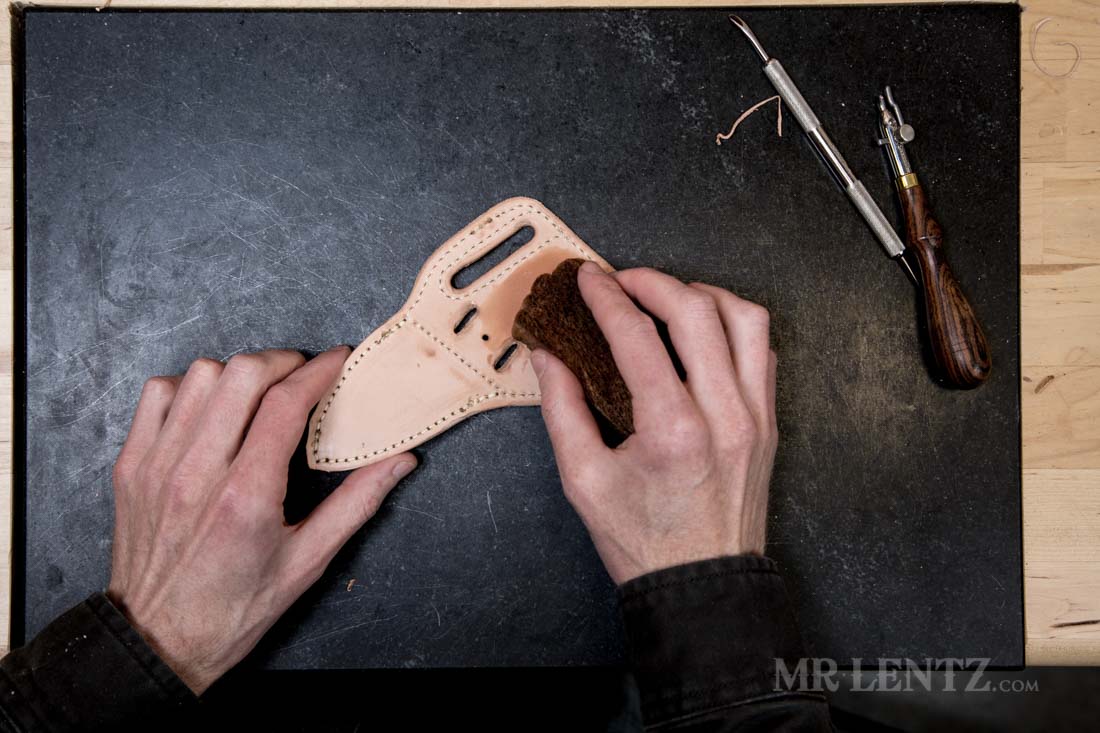
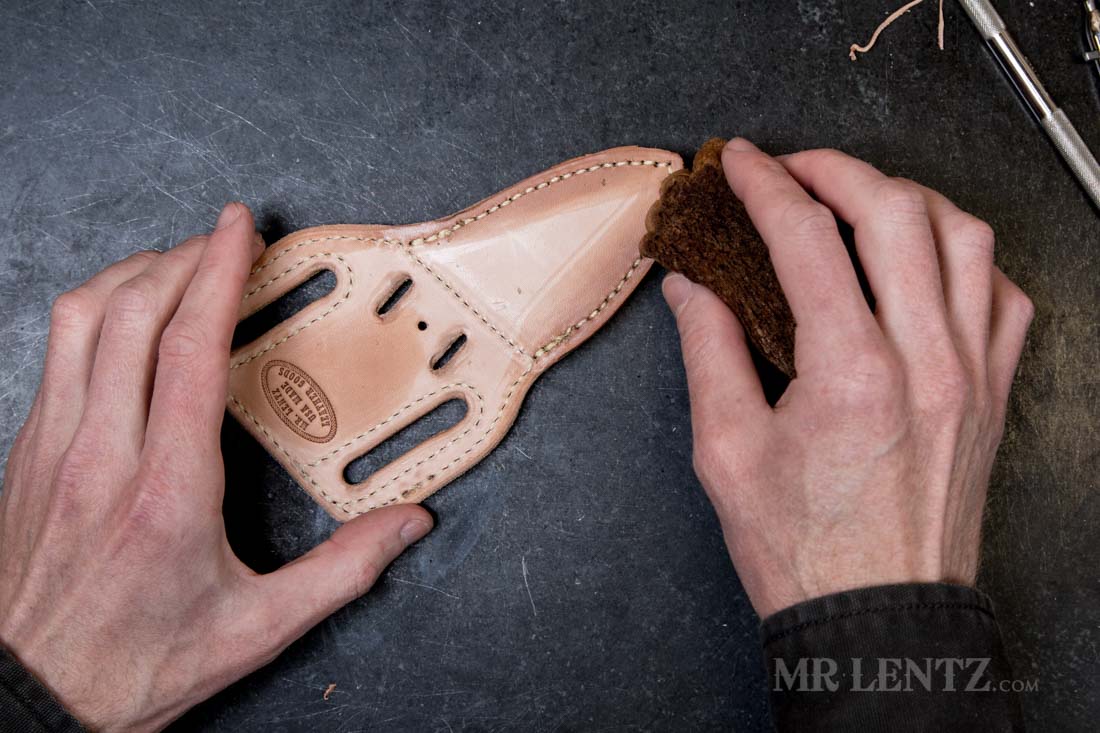
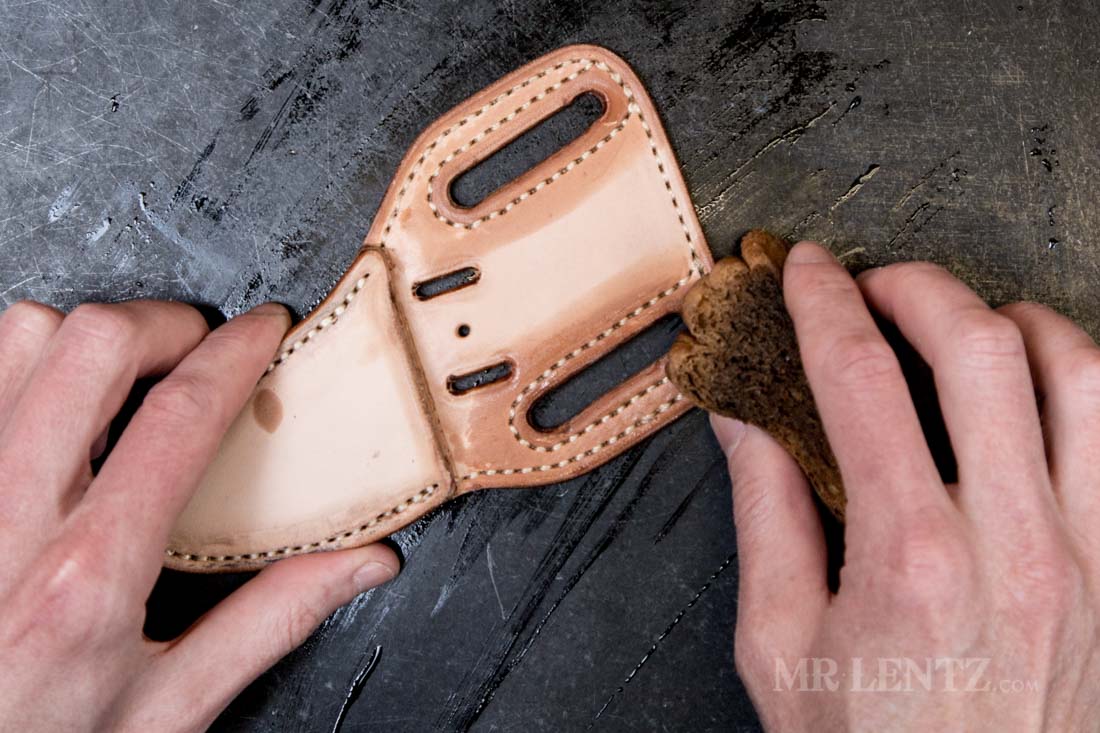
Dampen all slots including the bigger belt slots.

Using the Dremel I burnish the slot edges on both front and back. You can also use a small dowel for this and rub by hand.
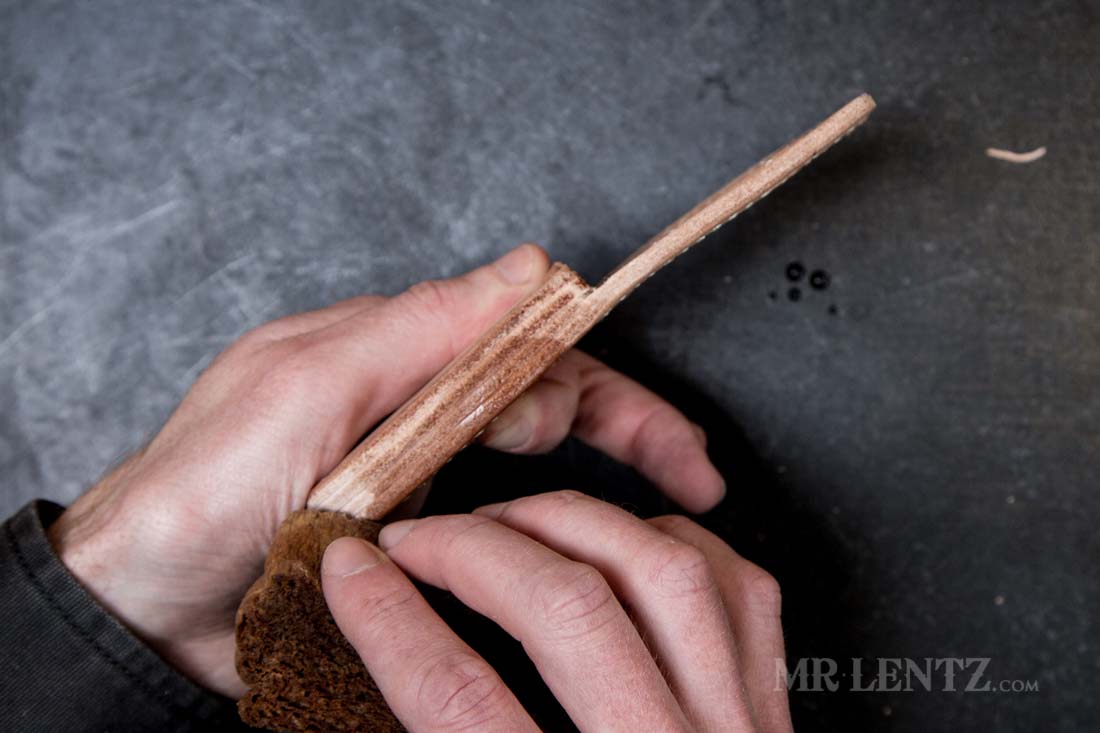
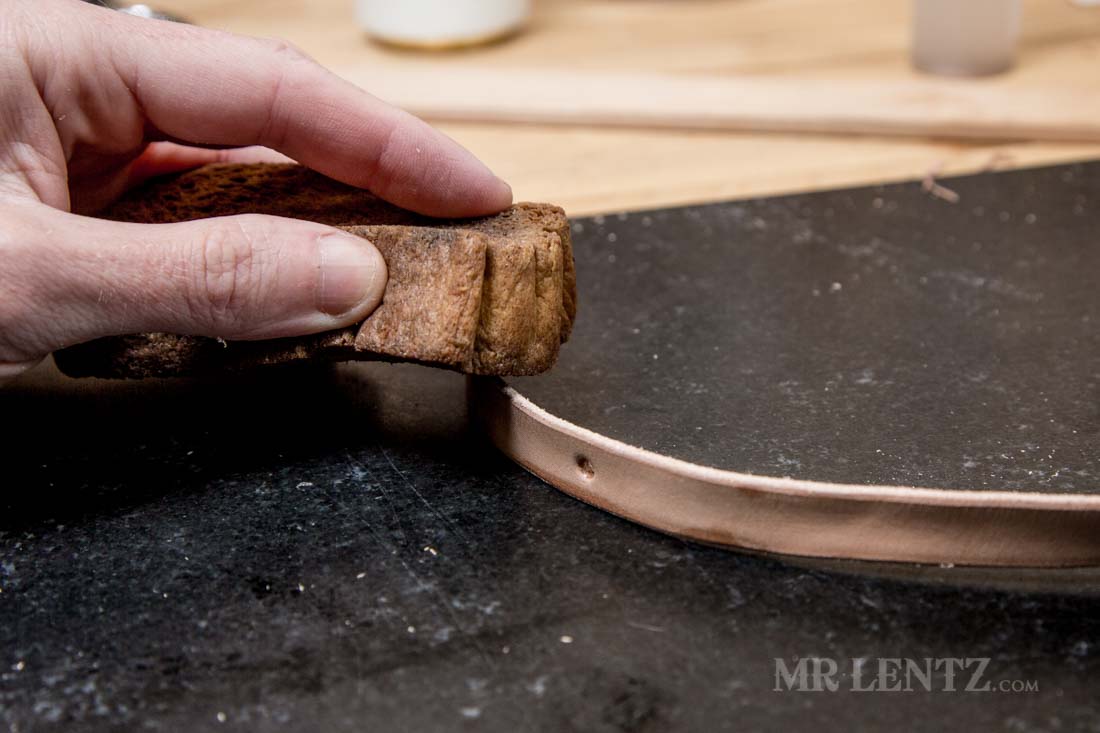
Dampen the edge of the entire sheath.

Here I am burnishing the edge using an electric motor with a large cocobolo attachment. It makes life a bit easier. Alternatively you can use a handheld cocobolo stick or even a piece of old jeans or canvas cloth and rub the edge quickly.
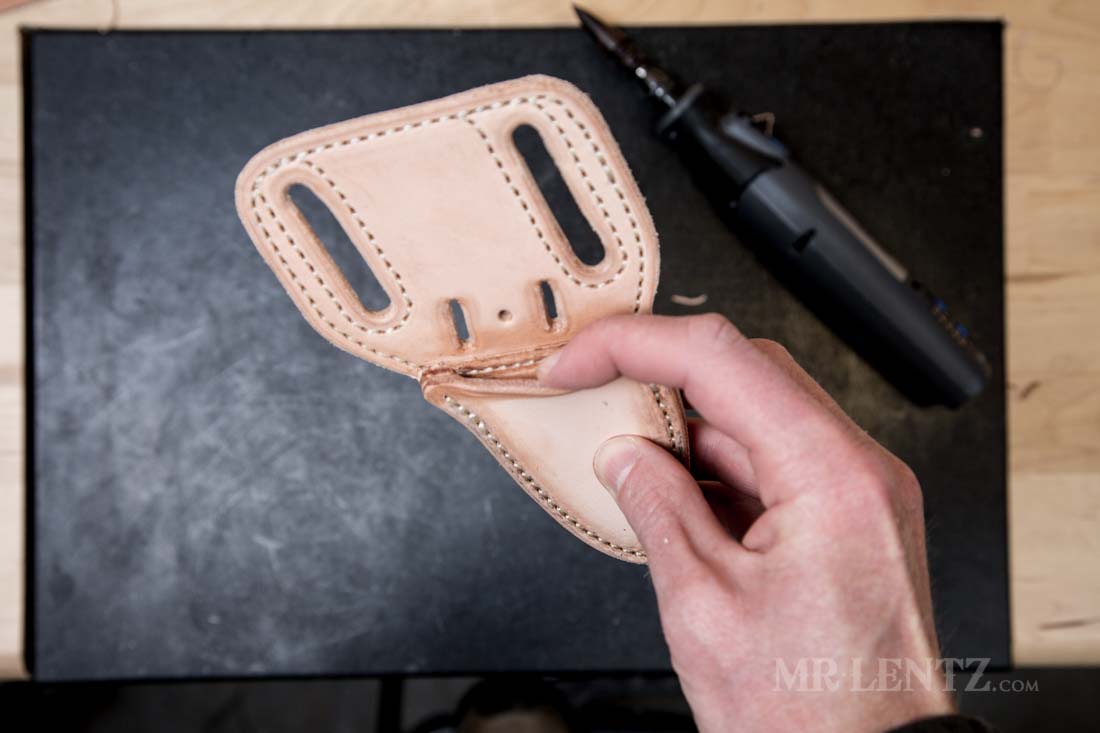
Next I am going to prep the belt slot area for shaping. For this I dampen the area around the belt slots.
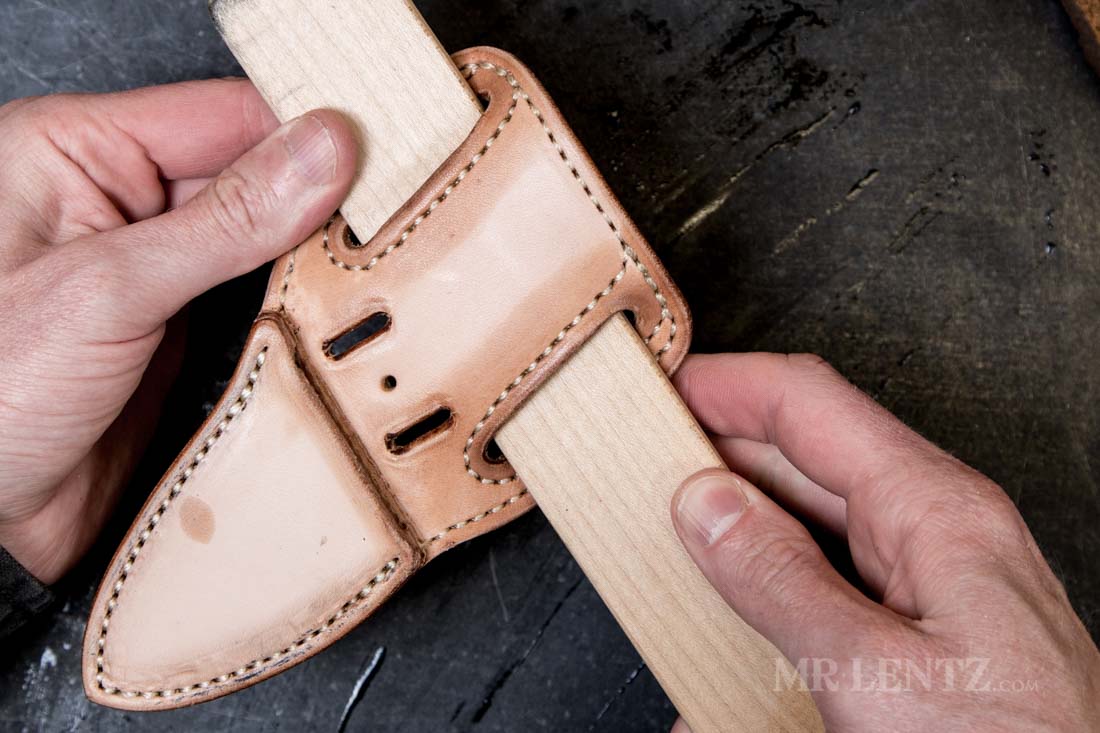
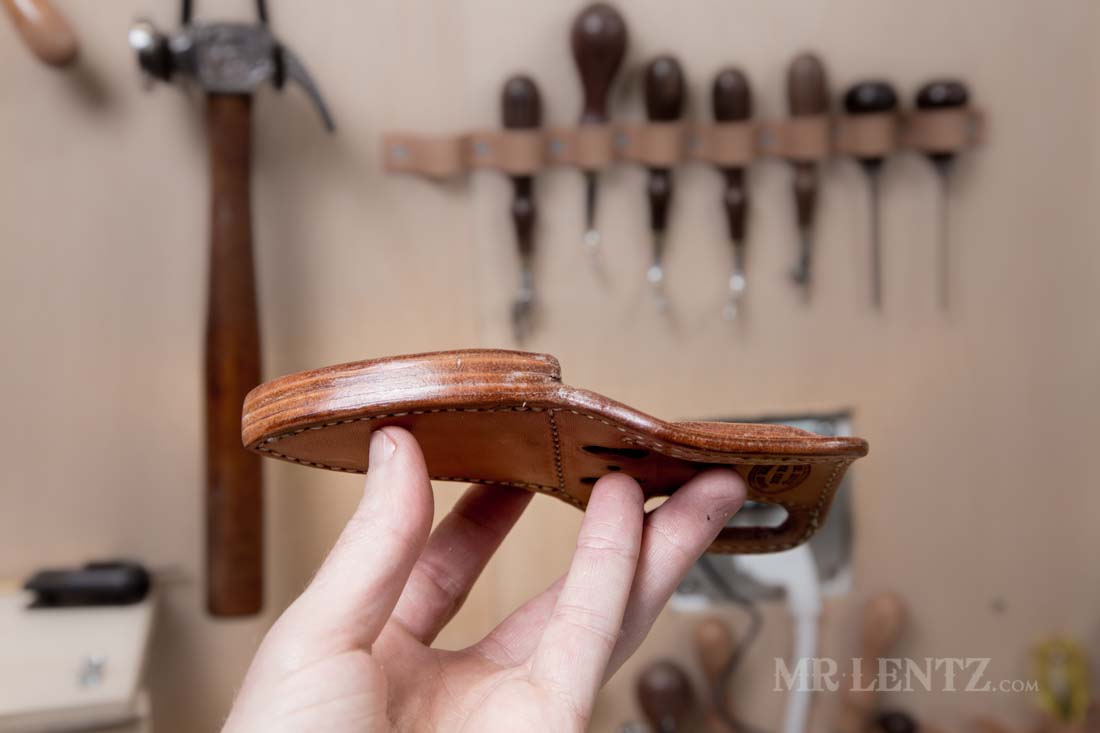
Using a piece of wood that is about 1/8 thicker than my normal belt thickness and around the same width, I slide it through the slots. I then work it around a bit to stretch the center area forward and the outer sides of the slots backward. This simple task makes it easier to slide your belt on and off later on.
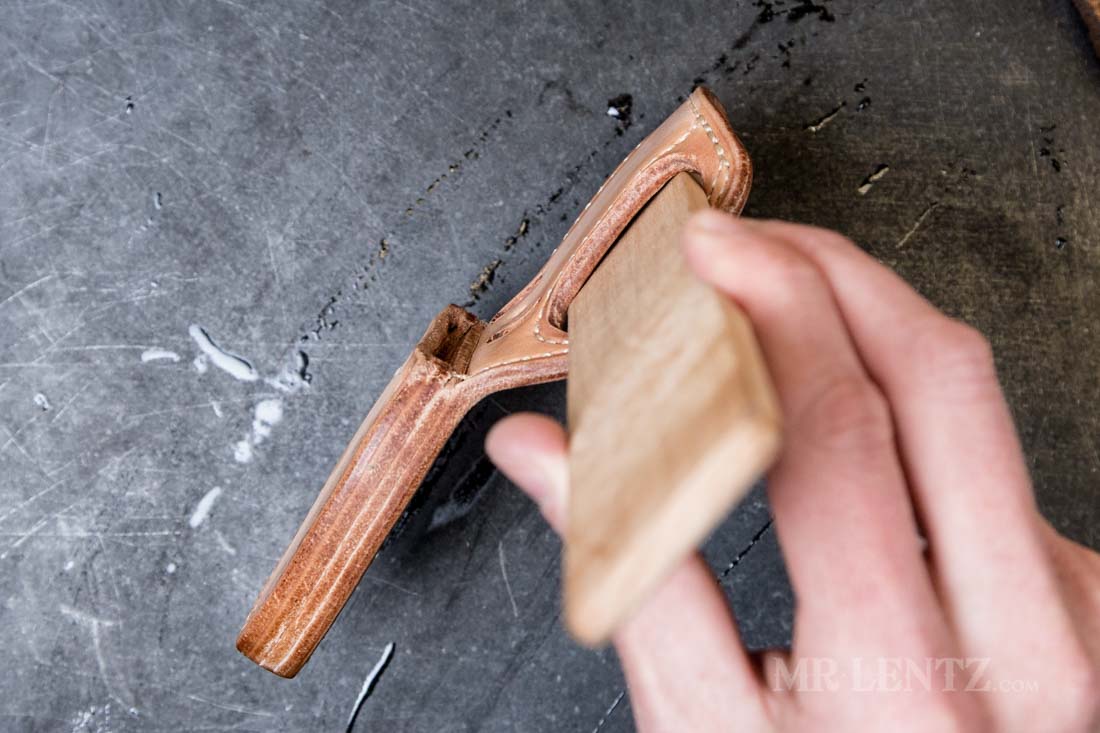
I also gave it a slight S-curve just above the blade protector area. The reason being – the handle is much thicker than the blade and this gives it a bit more room to slide into the sheath straight. Another way to do this earlier in the build would be to build up the leather under the blade so that the blade can be slid directly into it’s sheath. I decided against it since it would make this thing way too thick.
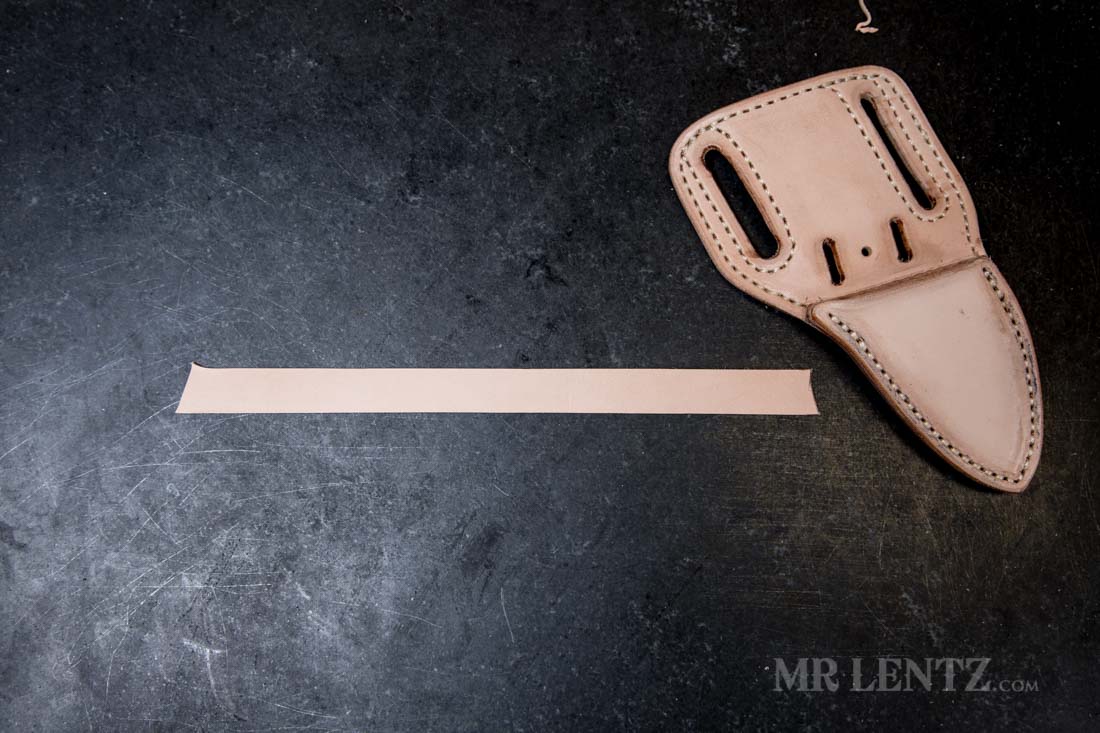
Now it’s time to finish up the retaining strap.
I dampen the strap a bit along the entire length.
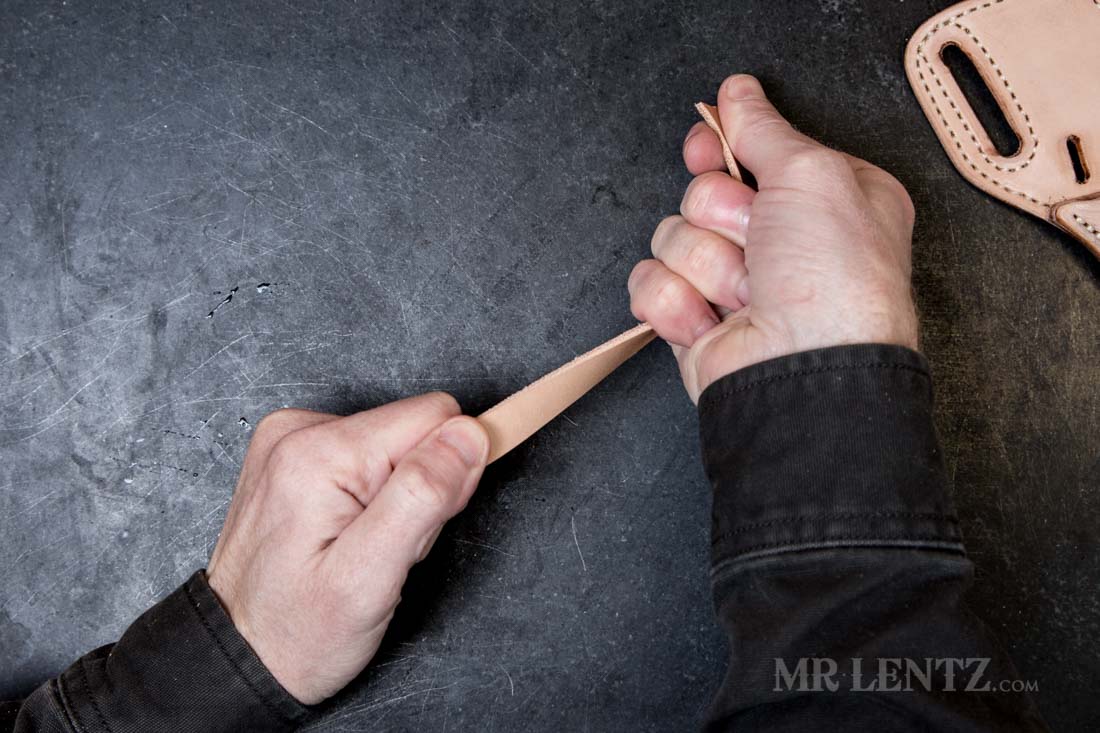
I then pull on each end to pre-stretch the strap. Leather will stretch naturally over time so this step helps the retaining strap not stretch as much as you use it.
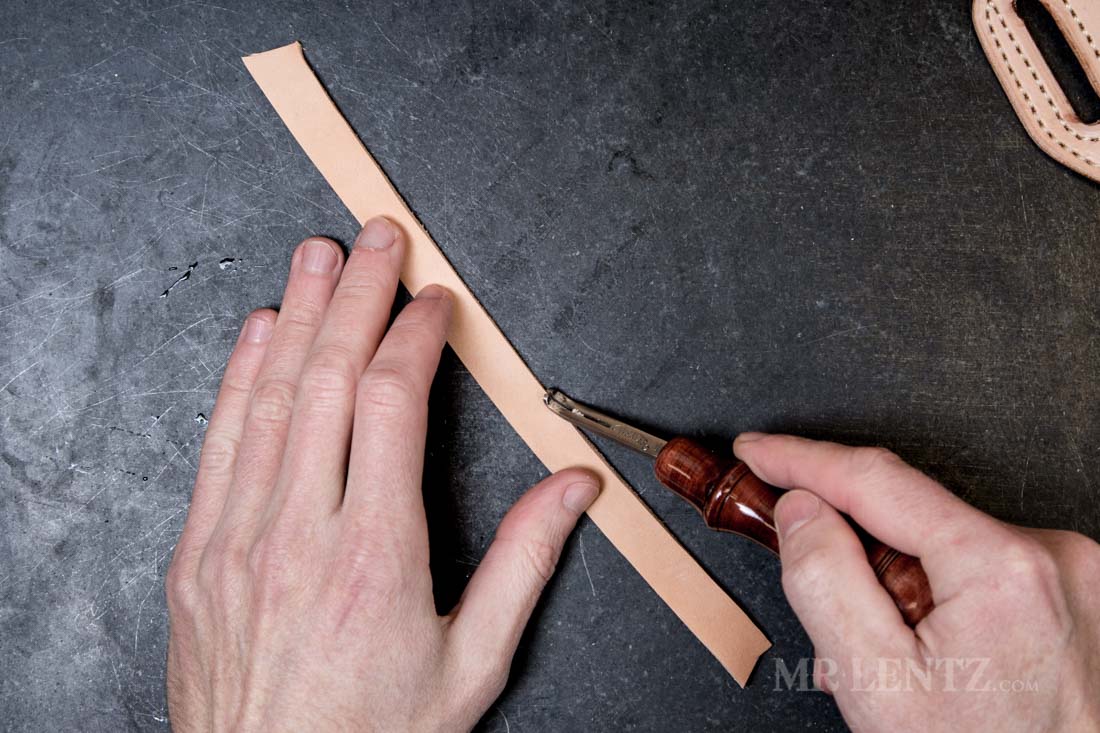
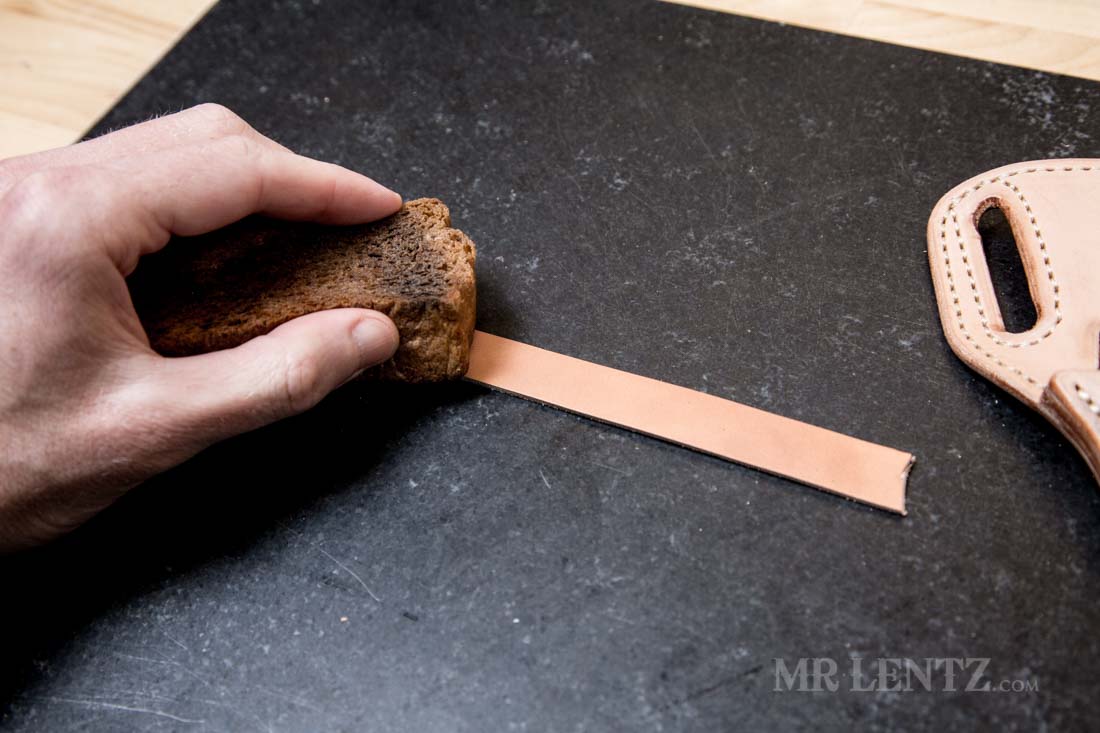
I then bevel the edge on both sides of the strap using a #1 edge beveler.
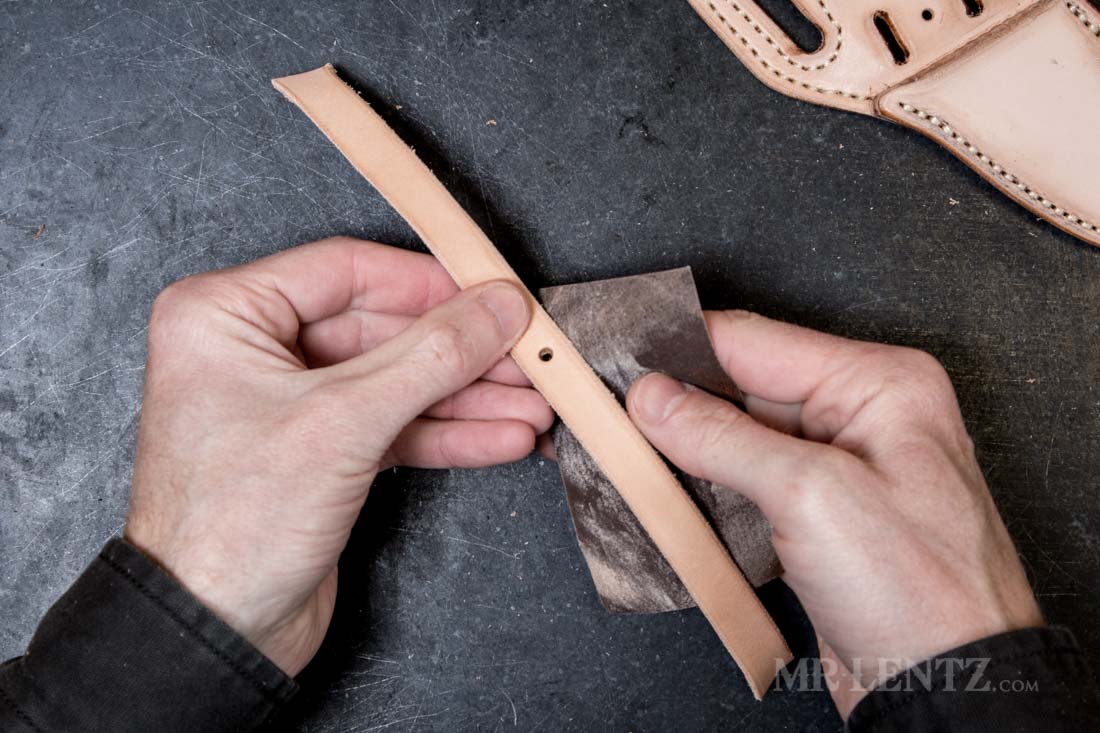
In the center of the strap I punch a hole that will fit the rivet. I then use a 600 grit sandpaper to lightly sand the edge – it has a bit of the furries left on it, so I wanted to take care of that.
I then re-dampen the edges of the retaining strap.
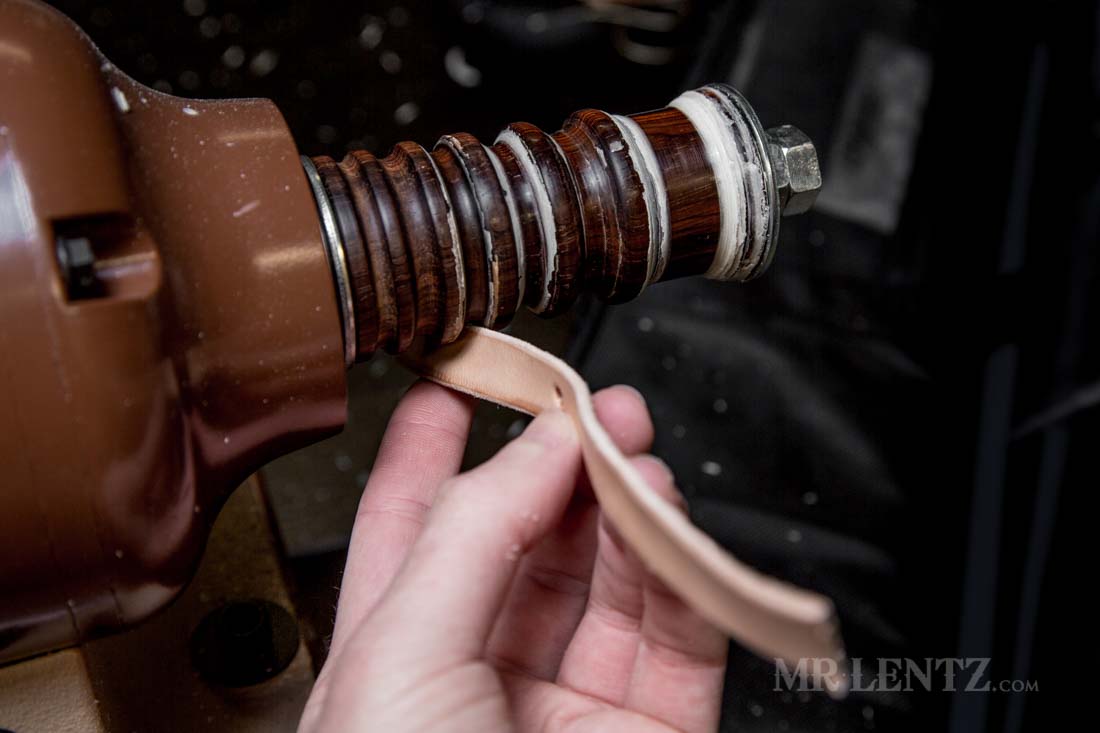
Using the burnishing machine I burnish those edges for a nicer slick feel.
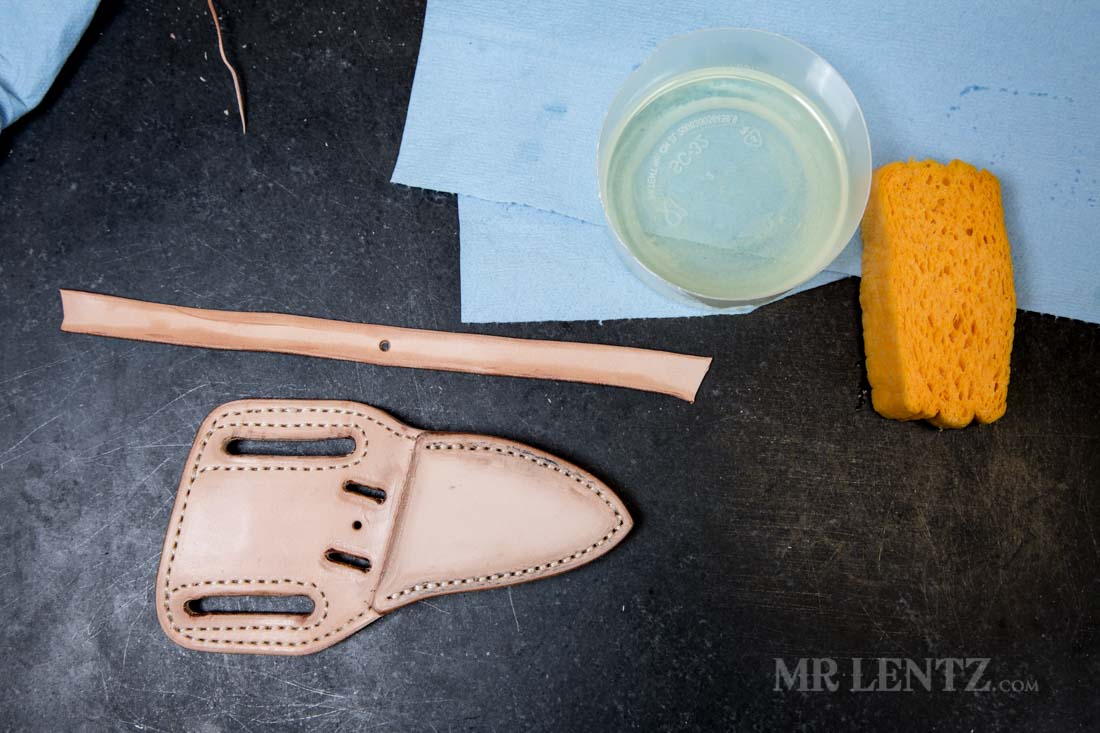
Leather like this that has been wet, tooled and handled needs a bit of oil added to it to recover. The oil helps to lubricate the fibers so they bend instead of tearing. I use Neatsfoot Oil that is 100% pure (not the compound which has other ingredients). Neatsfoot oil is actually a byproduct of the meat industry and works really really well. It comes from the cow’s shin bone and stays in liquid form even in cold temperatures. Don’t bother with any other oils out there, this one works and is not harming the environment or animals since it is technically just a waste product.
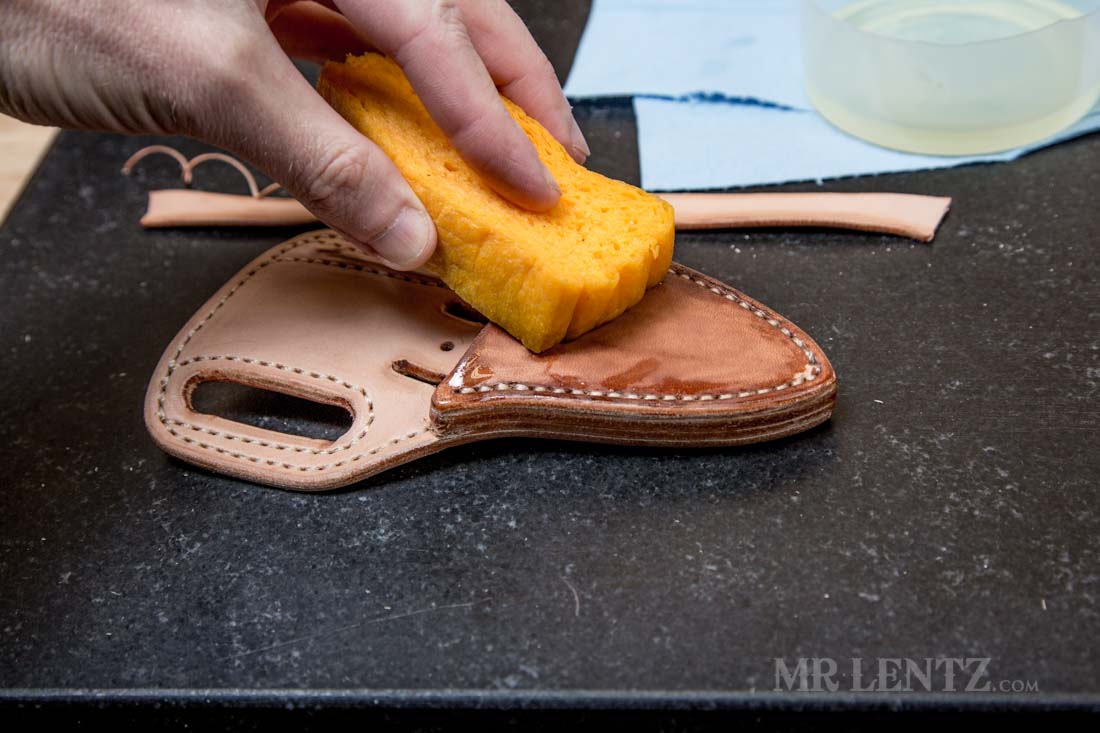
Using a sponge I put a medium to light coating of oil on all exterior surfaces of the sheath and retaining strap front only. That’s all that is needed really – too much and your sheath will be over saturated and a bit floppy. It will at first appear much darker, then after a few days it will have spread out evenly in the sheath and lighten up a bit.

Next this knife sheath needs an outer coating to help protect it a bit more. I actually make my own leather conditioner in the shop from all natural ingredients called Spiff N Shine. The key item in here that we need is the beeswax which will coat the exterior and provide some weather resistance. You can also use a resin based product called Bag Kote, but since I am not certain of the ingredients and their effect on the environment and my own health – I always opt for the natural option. This conditioner can be used monthly or bi-yearly, or often if you tend to be in the rain a lot.
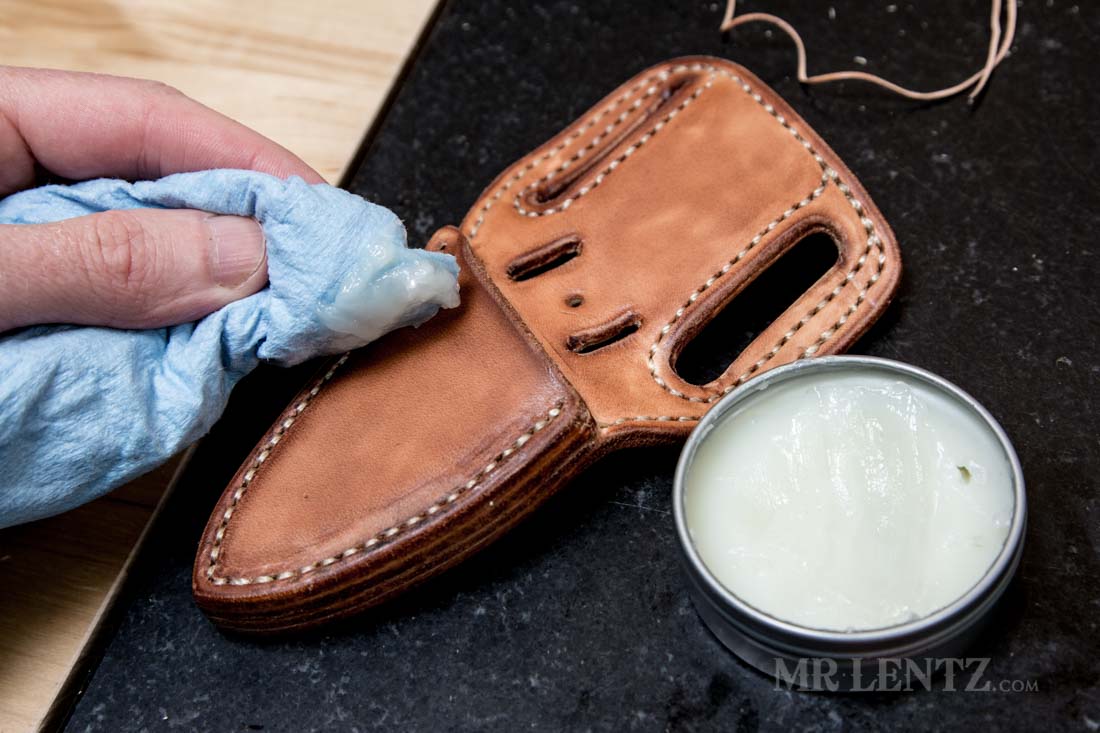
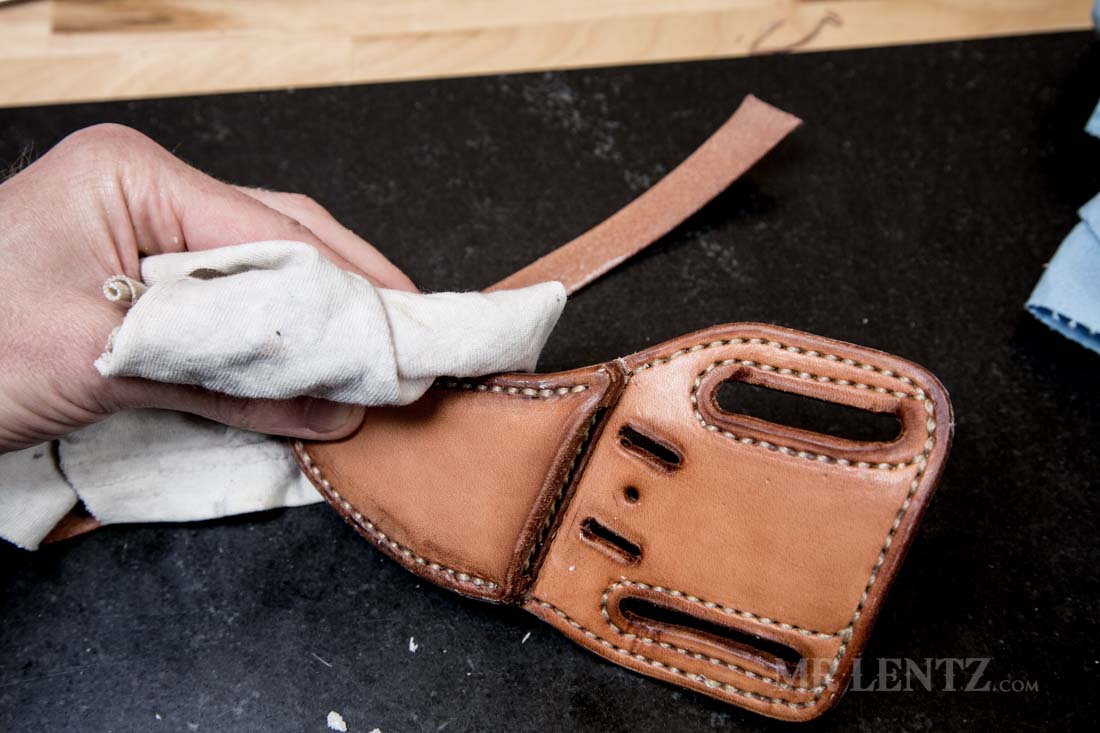
I use a paper towel to spread an even coat on the exterior of all exterior surfaces and the front only of the retaining strap. I then let it sit a few minutes and buff it with a dry part of the paper towel.
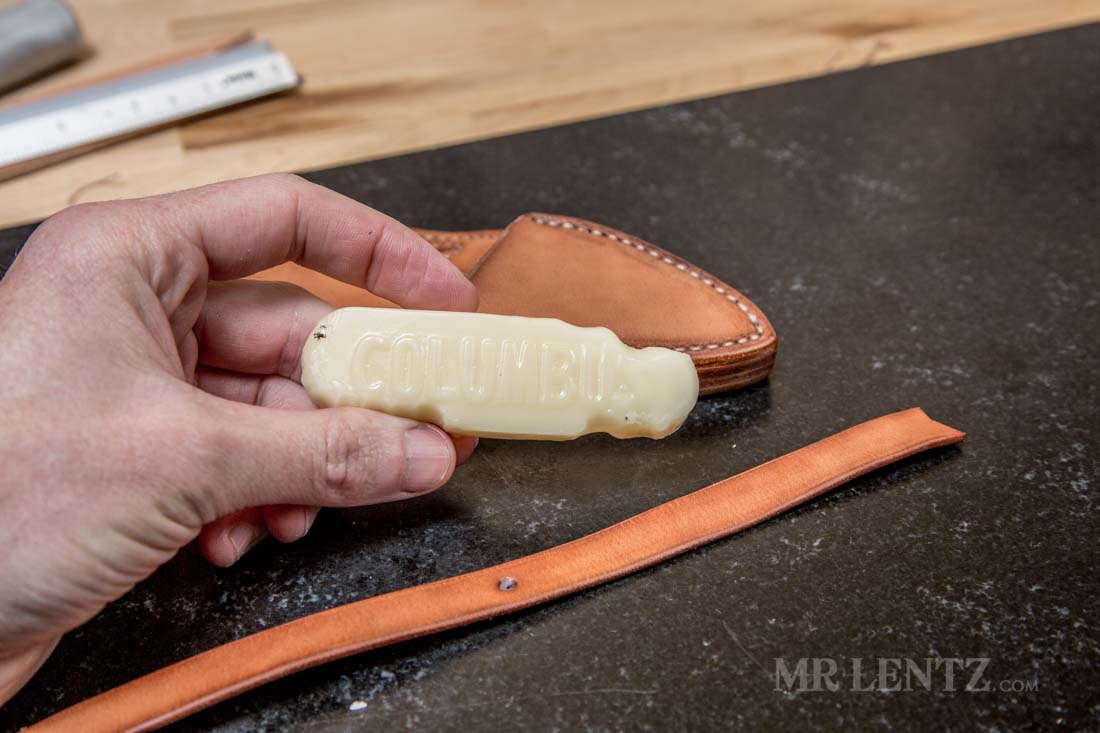
For a nice glossy looking edge I use Columbus wax. It is a very hard wax that shines up nicely.
To get the wax onto the edge you very quickly rub it back and forth to generate heat, causing it to melt off and onto the sheath.
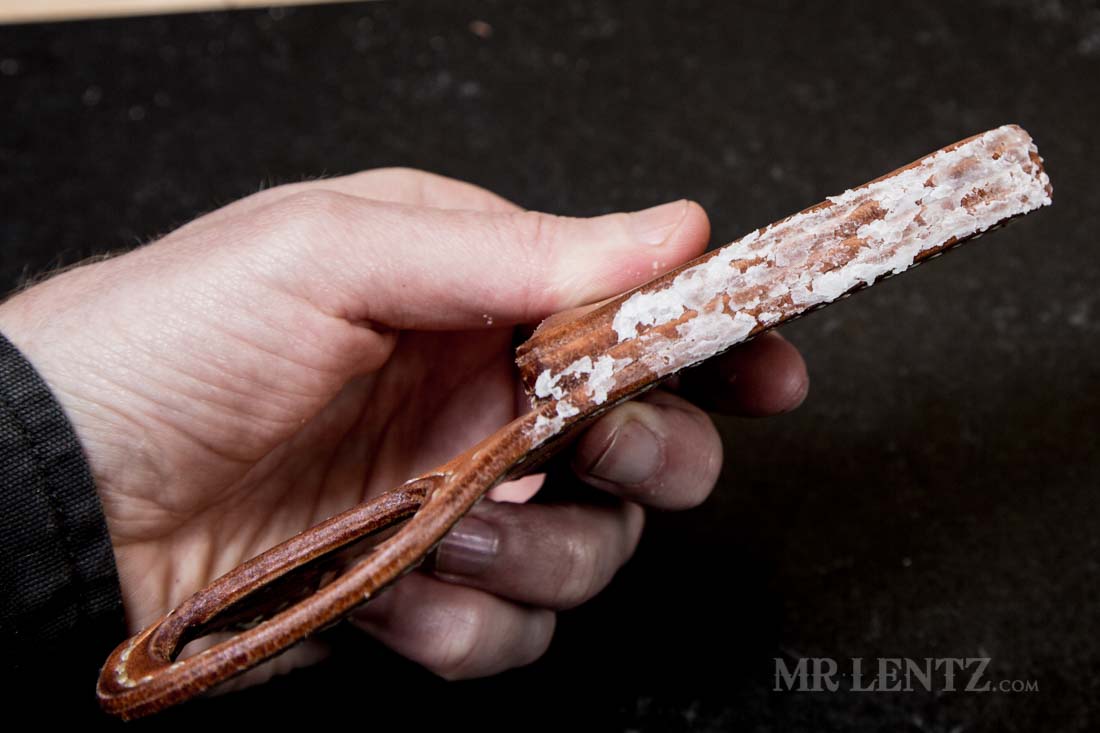
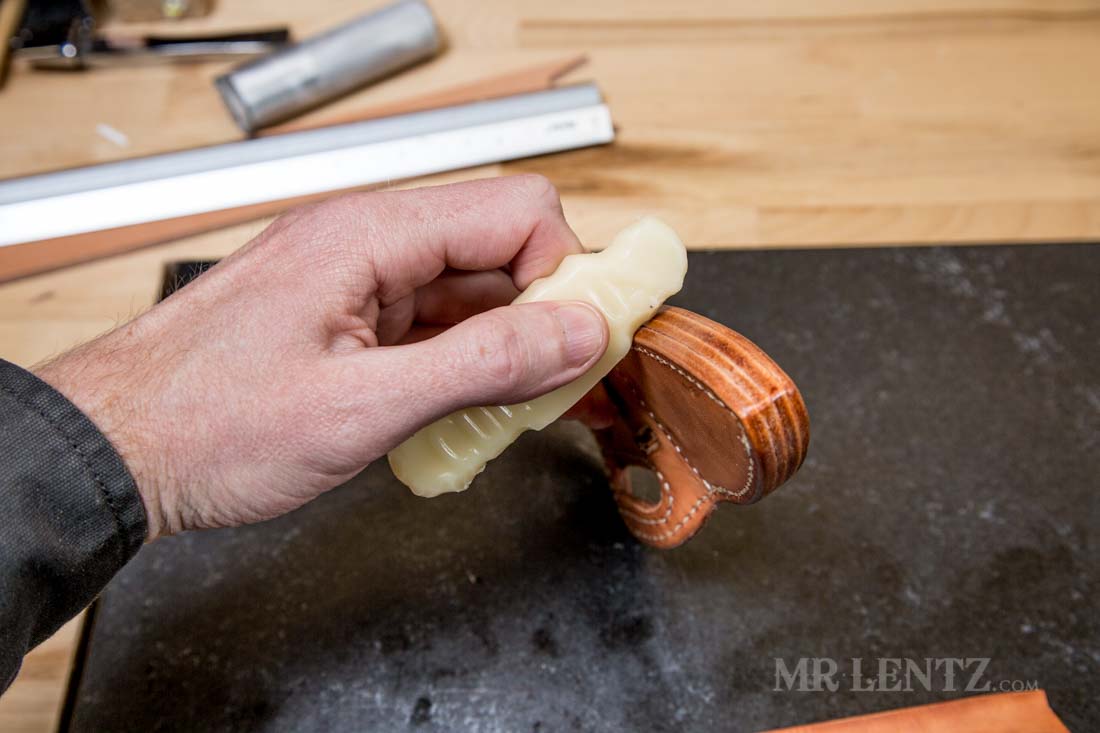
After some vigorous waxing, you might have something that looks like this or less dramatic. This is way more wax than it needs, but when using the power burnisher, I can melt it into the edge and even it out. Make sure not to forget that retaining strap too.
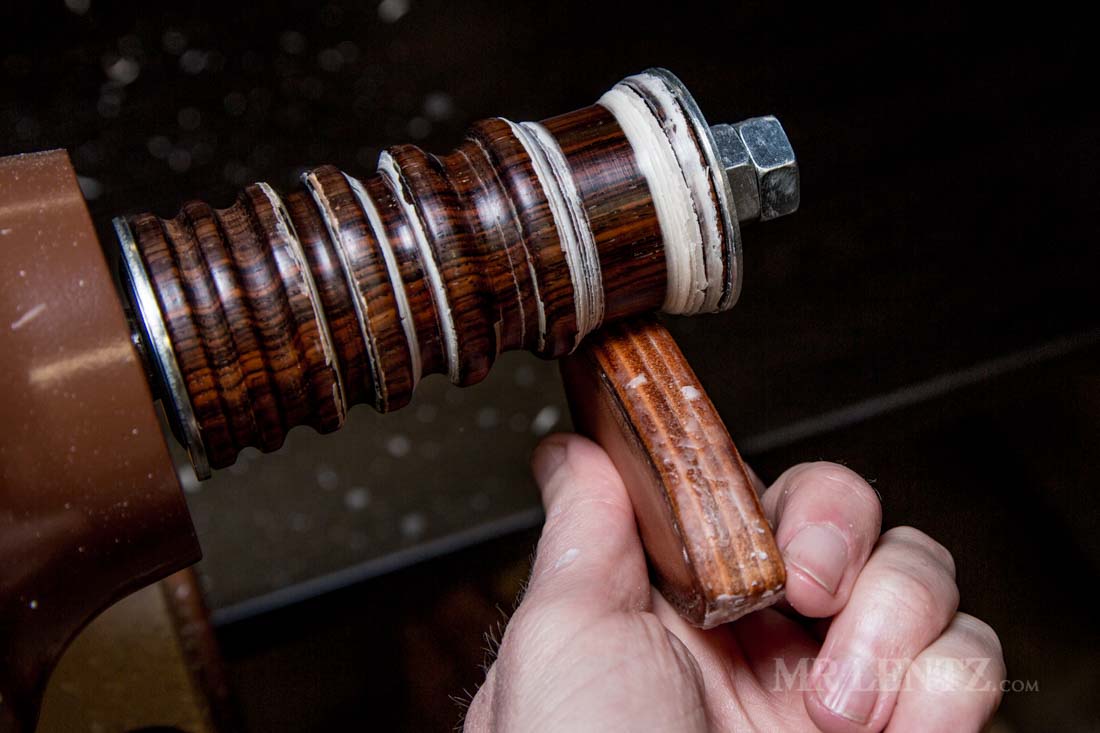
Using the burnisher I do exactly that – go back and forth while the wax melts and gets pushed into all edges.
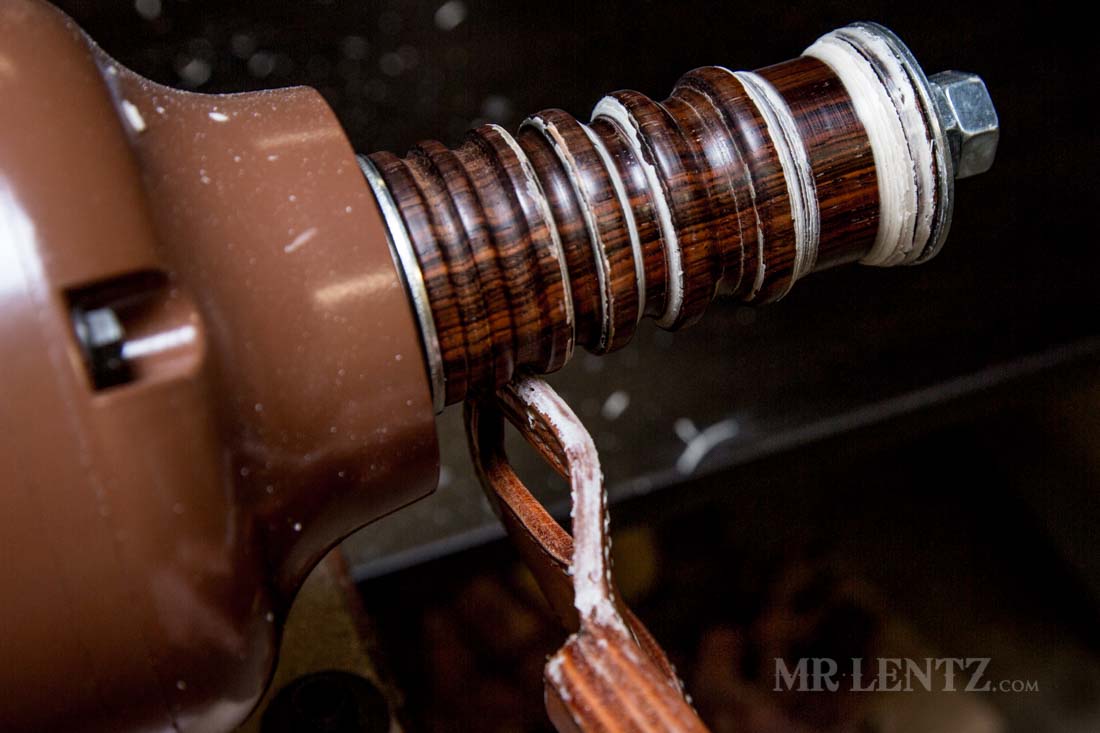
To finish up you will polish and buff the edge with a soft cloth. Not much force is used and you will get a glossy look.
A nice shine on the edge, the wax will also help protect the edges from absorbing water – which this area will do faster than others.

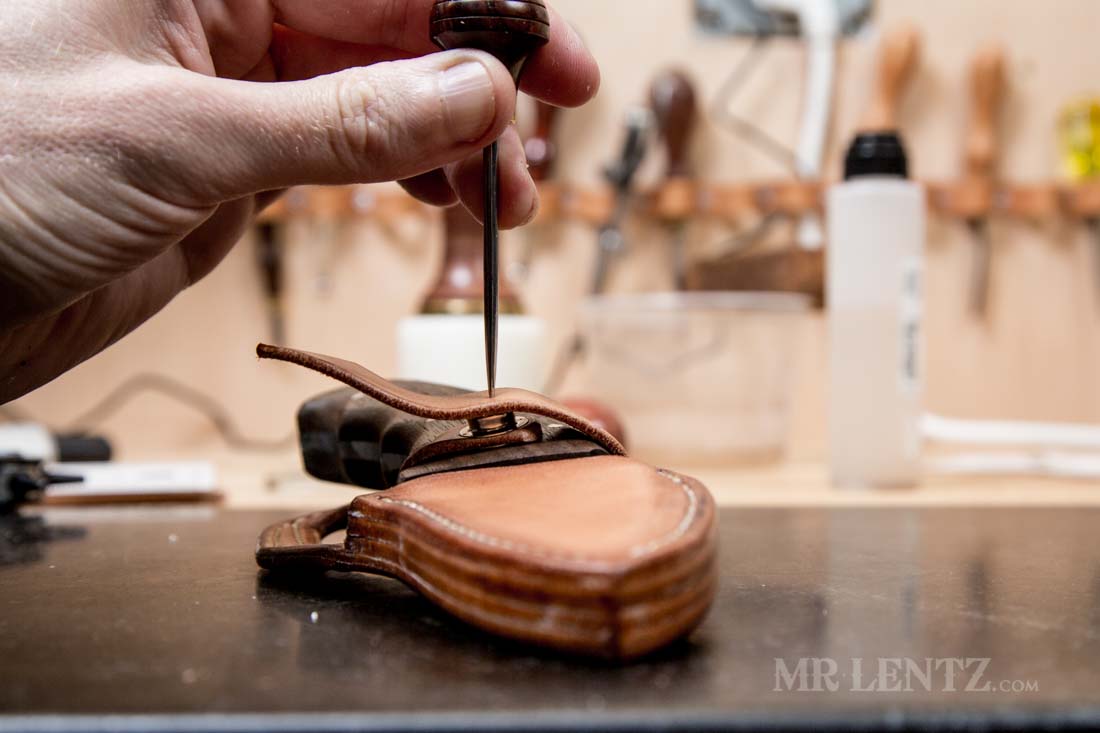
Next I slide the retaining strap into the slots and rivet it in place. There are various ways to set a rivet, I use a foot press, but they also make hand presses and even a way to hammer them together.
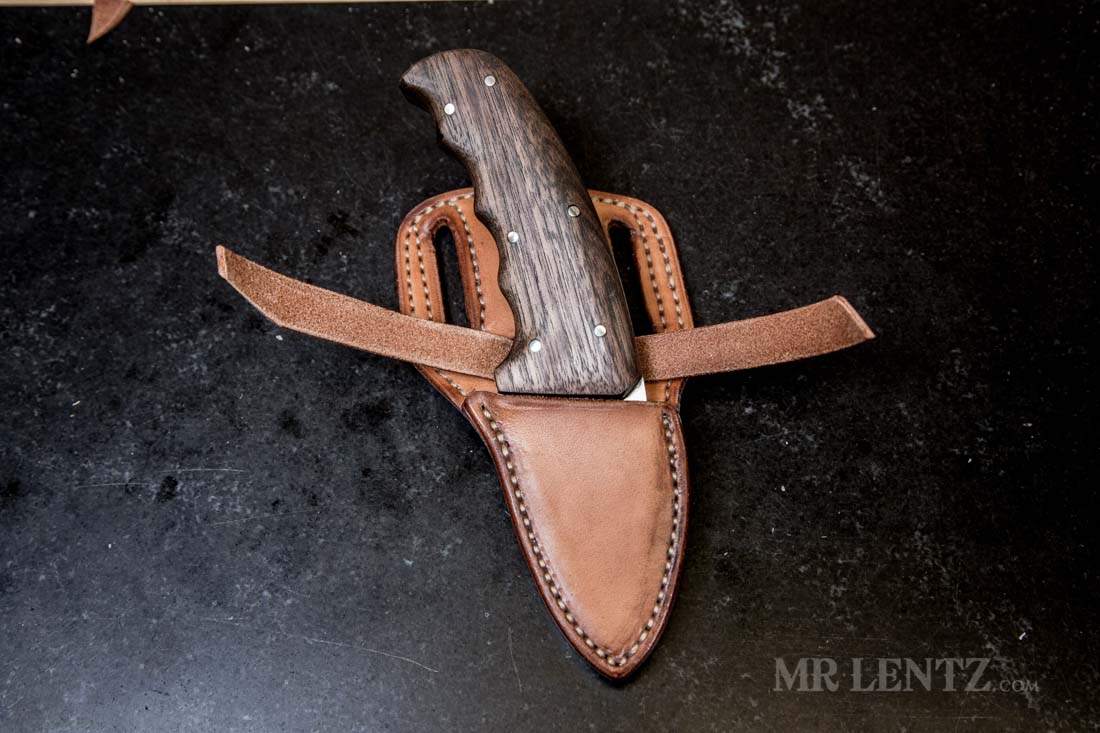
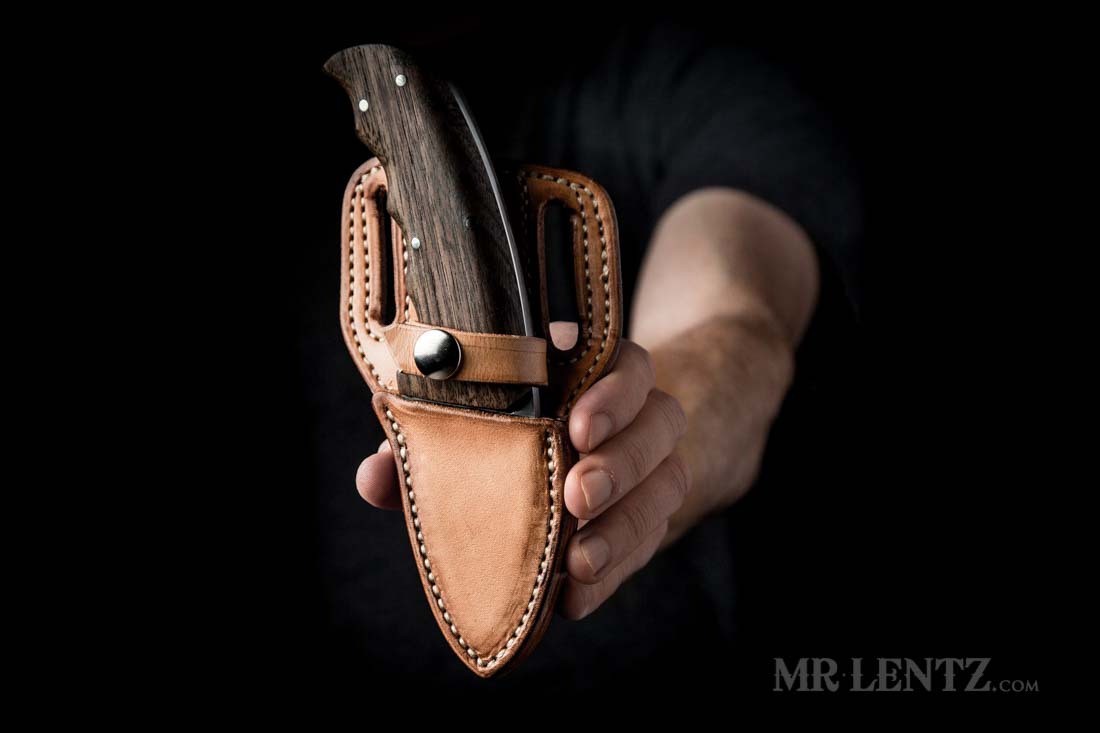
Oh have we test fit our knives yet? Usually I do this much sooner…after each piece is glued together and definitely after it it sewn in place. If you made an accurate template you should have no problems at all. Go ahead and place the knife all the way into the sheath. You may have to finagle it a bit since it is not yet broken in.
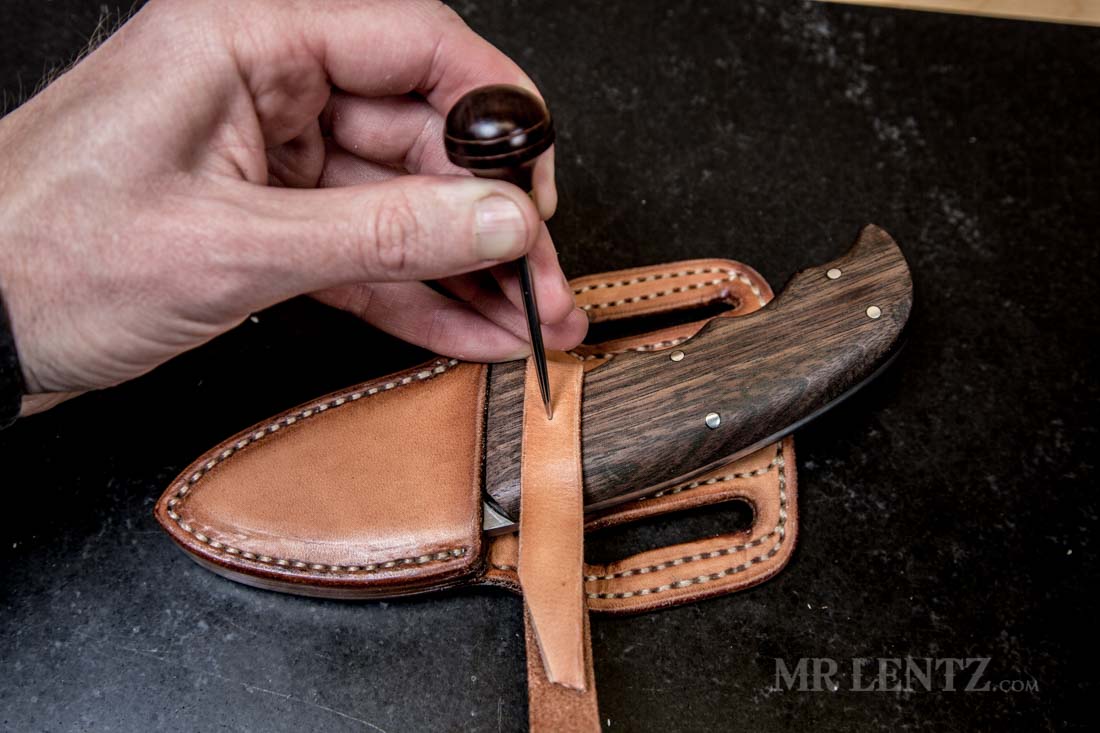
Since I will be wearing this on my right side I want the retaining strap top piece to face back so it is less likely to catch on things. So – first I take the left side and tightly stretch it over the knife handle. I then make a mark where the strap meets the center of the handle.
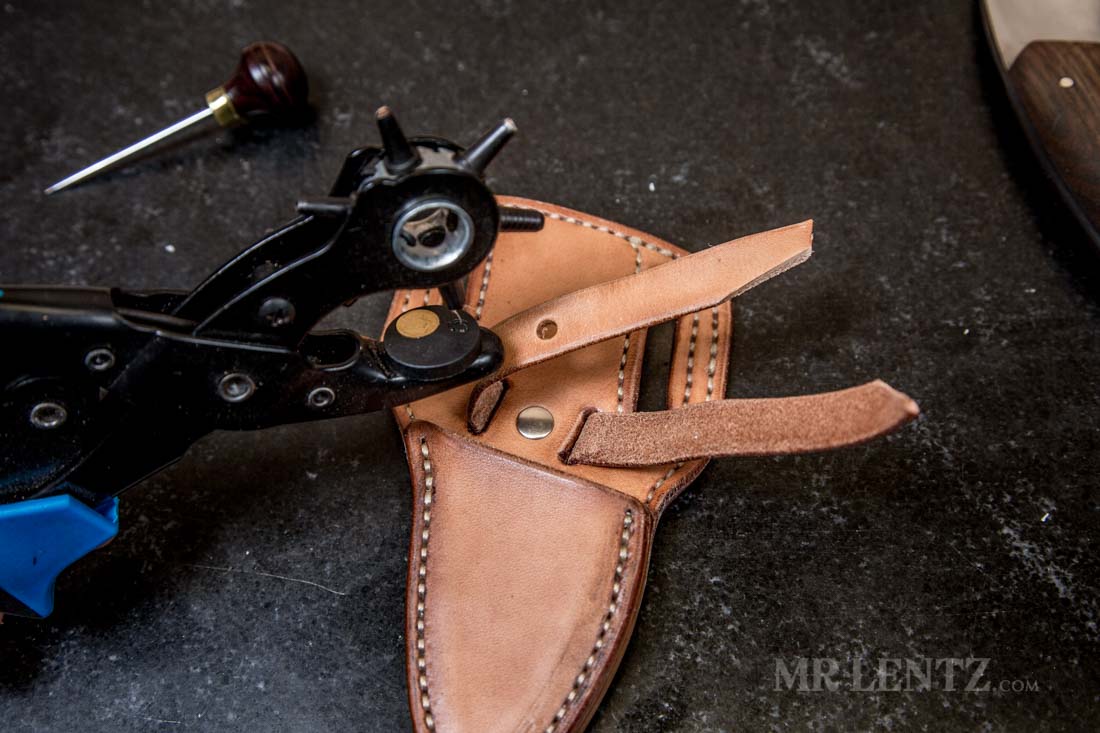
Punch a hole at this mark that will fit the male piece of your snap hardware.
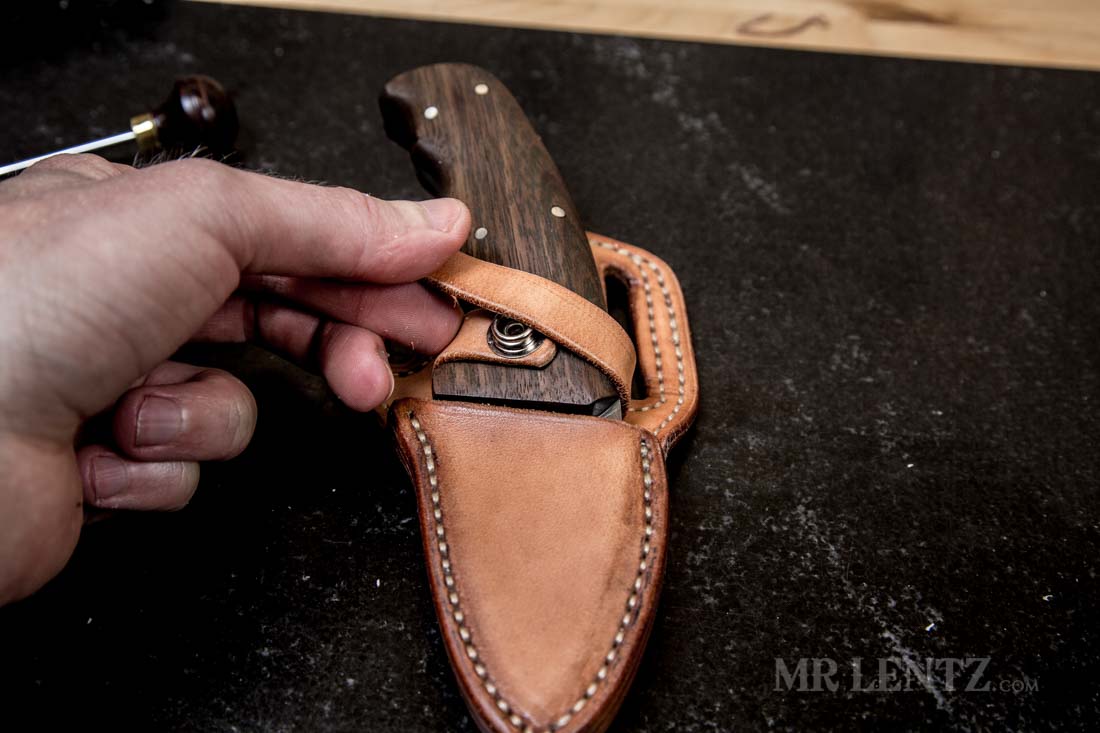
Go ahead and install that male piece using your own tools you have and then cut the excess leather off. I cut a curve around it leaving about 1/8 inch margin. Then you can bevel that curve and burnish. Next pull the right side strap over the other.
Tightly holding the right strap over the other, make a mark about 1/16 inch to the right of being centered over the male snap. This helps tighten things even more. It is very important to make sure both straps are very tight when making this final mark, otherwise your strap will be slightly loose. Go ahead and punch the hole and install that female snap. Then when cutting off the excess take care to leave extra room that your finger can fit under when unsnapping. Also consider the shape you want that extra tab of leather to look like. Cut it, bevel it and burnish it and for extra points, wax and polish that edge too!
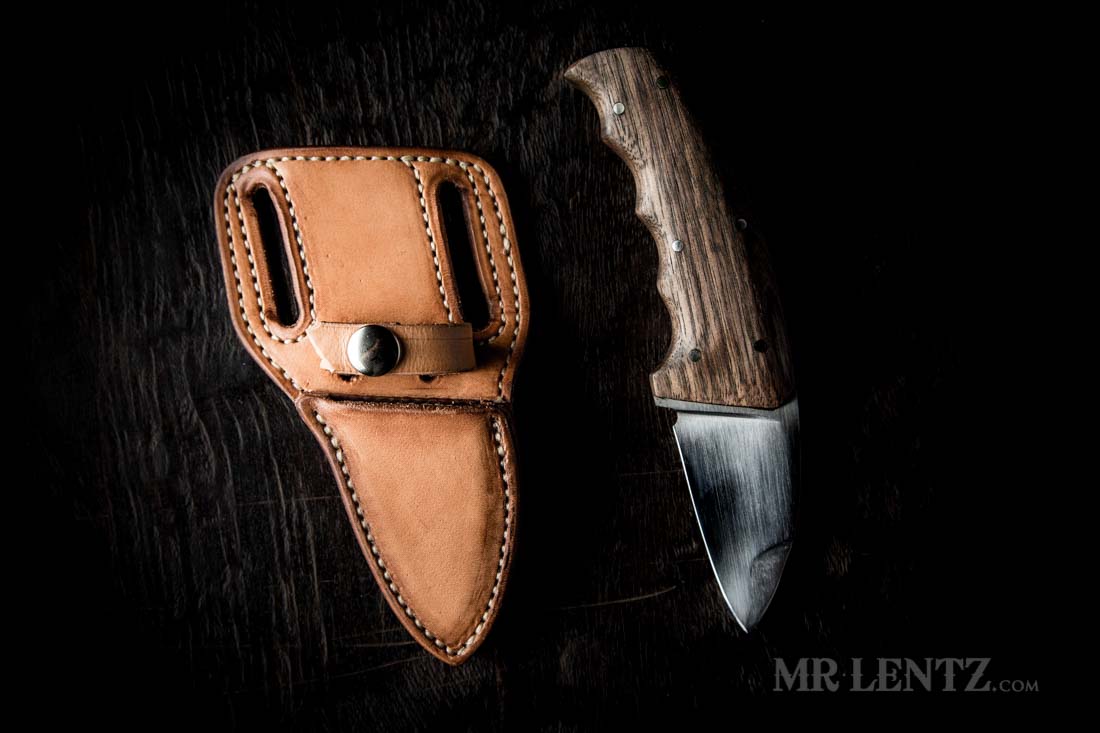
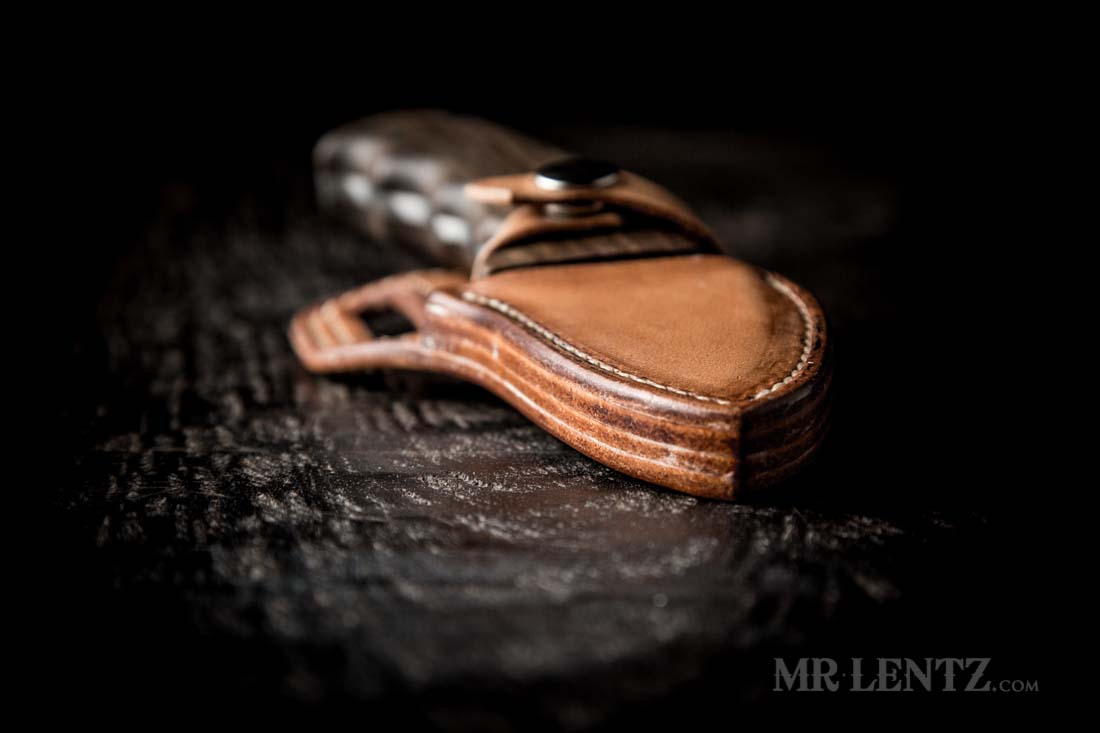
Alright – now we have a finished leather knife sheath with a retaining strap. After putting this thing on – mine was spot on to the outcome I intended. This doesn’t always happen and sometimes you will need to hit the drawing board again to revise the design. This is not a bad thing – you only get better with each that you make. I had actually made a different version of this sheath right before this tutorial was made. It was a cross-draw style worn in the front. After I got through the stitch up of it all and tested it out, I realized that that style worn near the natural curve around my side caused the handle to stick out wayyy to far. So – I rebuilt it to solve the problem
I think I may end up making another version of this sheath with a different style of belt attachment. This one is quite comfortable, but I realized that I may need the ability to easily put it on and take it off of a belt. The next design will use a sewn in belt clip traditionally used in holster making. That way I can unclip easily in a car and reclip quickly and without looking like I am taking my pants off!
I hope you enjoyed this tutorial, it was a pleasure to write and share this knowledge with you. If you would like to see more extremely detailed how to posts like this, I just ask one thing – consider making a small purchase from my leather goods shop. It’s just a small token of thanks and I do much appreciate it!
Until next time. Or check out my other tutorials here.
READER'S FAVORITESVIEW ALL