
Everything, Leather
Knife Sheath Build – Part 1
Mar
At the beginning of every new year I tend to crave a new skill or two. For those that have been readers of my blog for the last 8 years, you have probably seen the pattern ( cigar box guitar, old school cattle whip, leather sewing machine use, wood joinery techniques, deer skin moccasins, and on and on).
Side note: for those looking for my well detailed Knife Sheath Tutorial, you can find it here.
Typical to running a leather goods business is the fact that time is in short supply. So getting around to acquiring new skills (something that takes an exorbitant amount of time), tends to challenge me every year. What most people tend not to realize is that leatherwork is a very broad term for a wide variety of very specialty niches. A good example of that is boot making vs. holster makers vs. saddle and tack. Many skills, tricks and techniques – along with the assortment of specialty tools – is required for every different area of leatherwork. I chose to start out my leatherworking journey around 8 years ago by getting into rustic and minimalist wallet design. I have since branched into bags and belts which is a natural and fairly simple transition.
What I haven’t done in the past several years though, is work my butt off to acquire an entirely new set of skills. Skills beyond which would be required to make a one off item such as my deer skin moccasins (blog post here: https://www.mrlentz.com/2018/03/how-to-make-leather-moccasins-tutorial-diy-1/
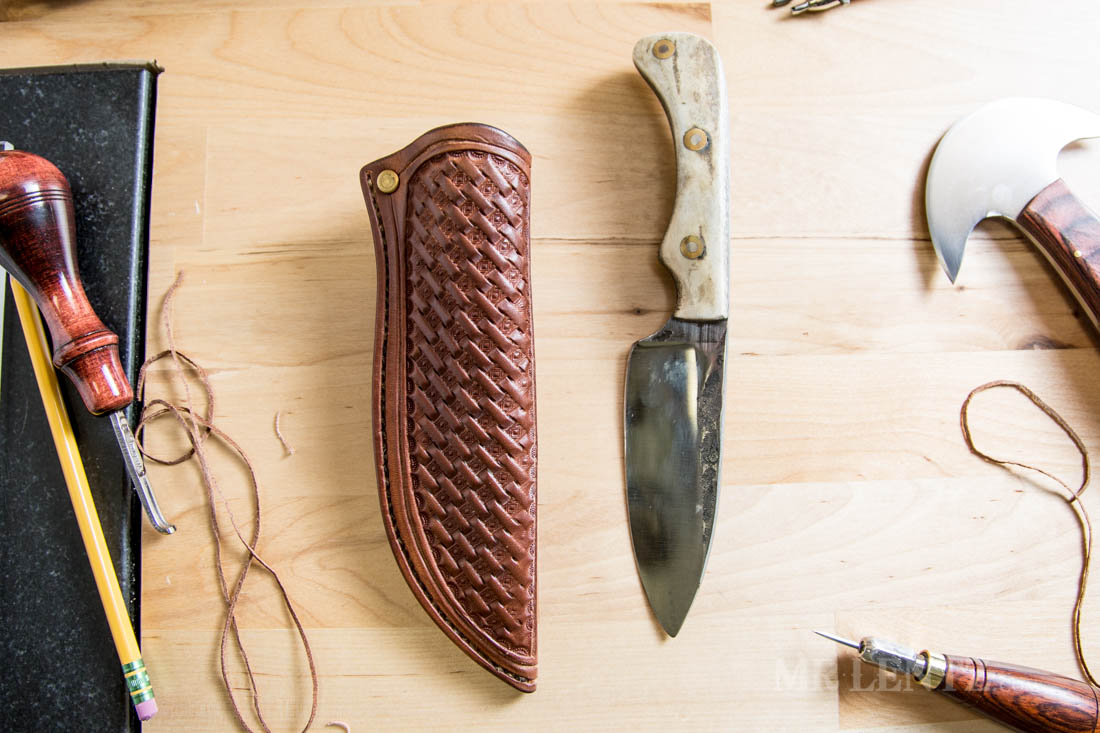
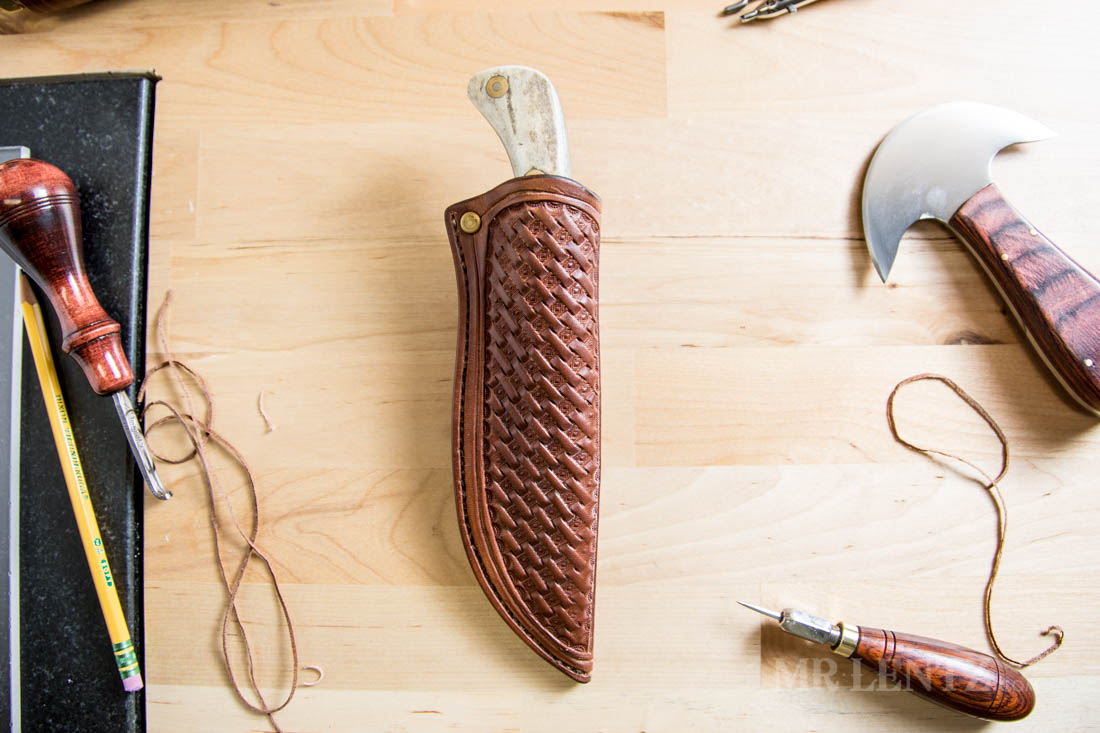
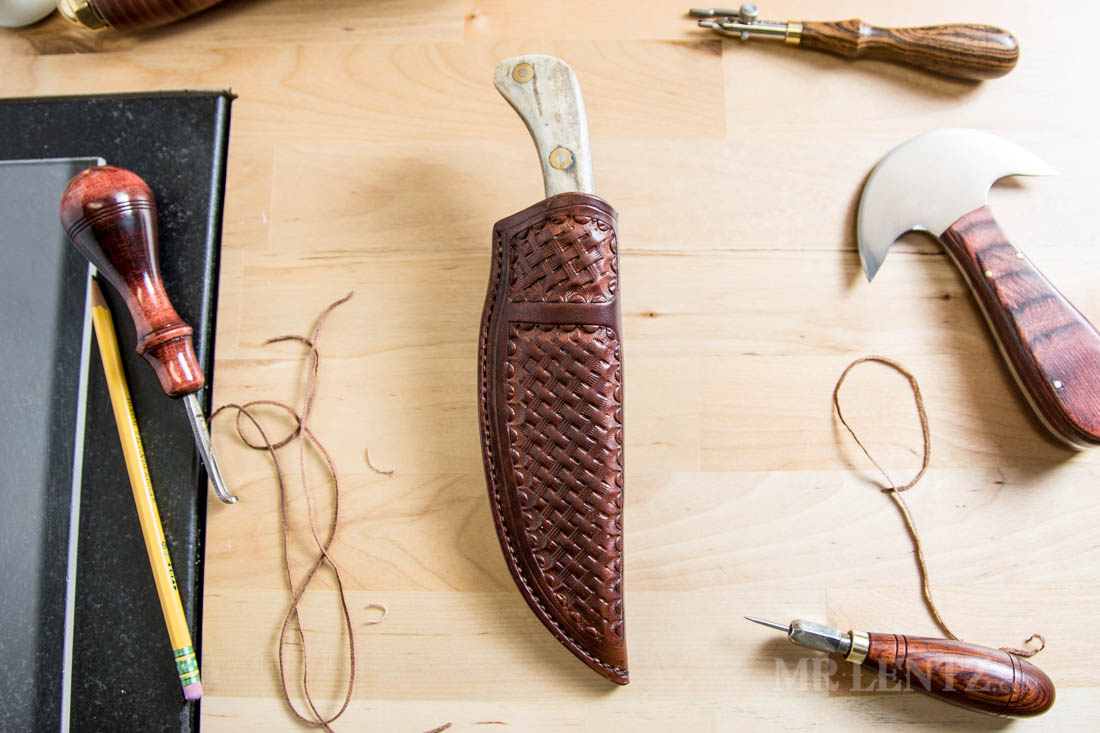
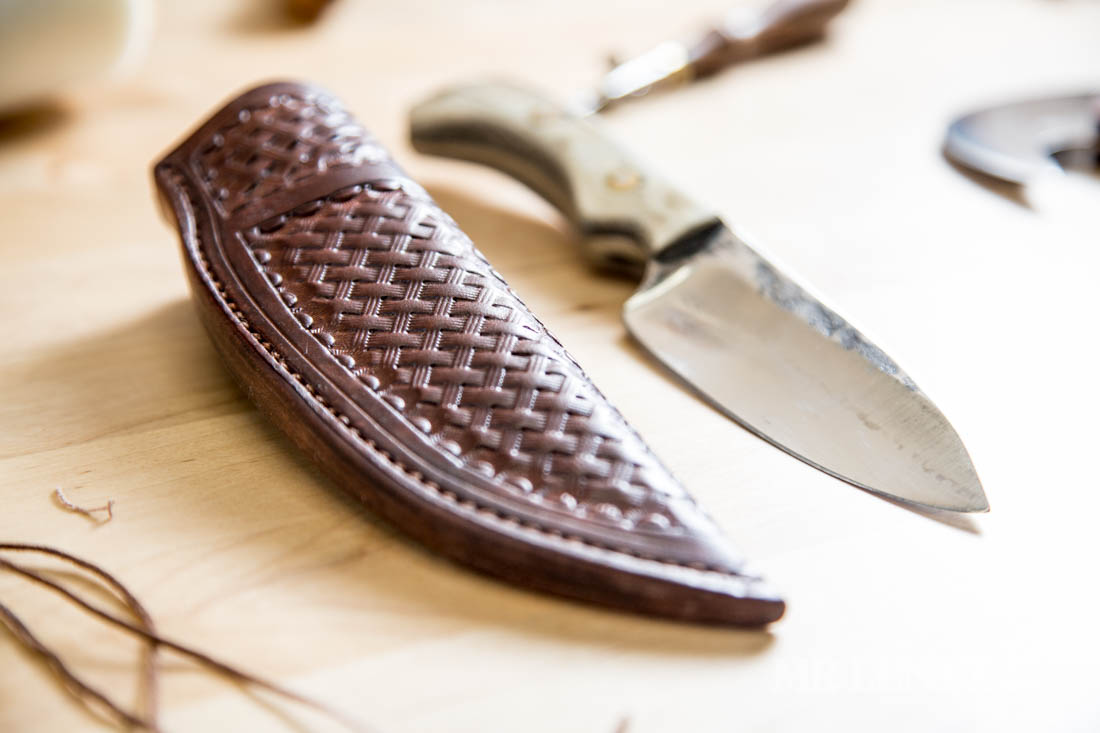
This year I decided to devote some serious effort into learning the world of custom leather knife sheaths. The following is just a simple look into my first round of two sheaths built to fit a knife I purchased a few years back made by maker Jay Bear knives in California.
The project started out by figuring out how to pattern a sheath to fit a specific knife. Most knives made by the pro makers here in the U.S. are generally never quite exactly the same. That mixed with the fact that there are hundreds of styles with even more variety in shape – means every knife will need its own pattern.
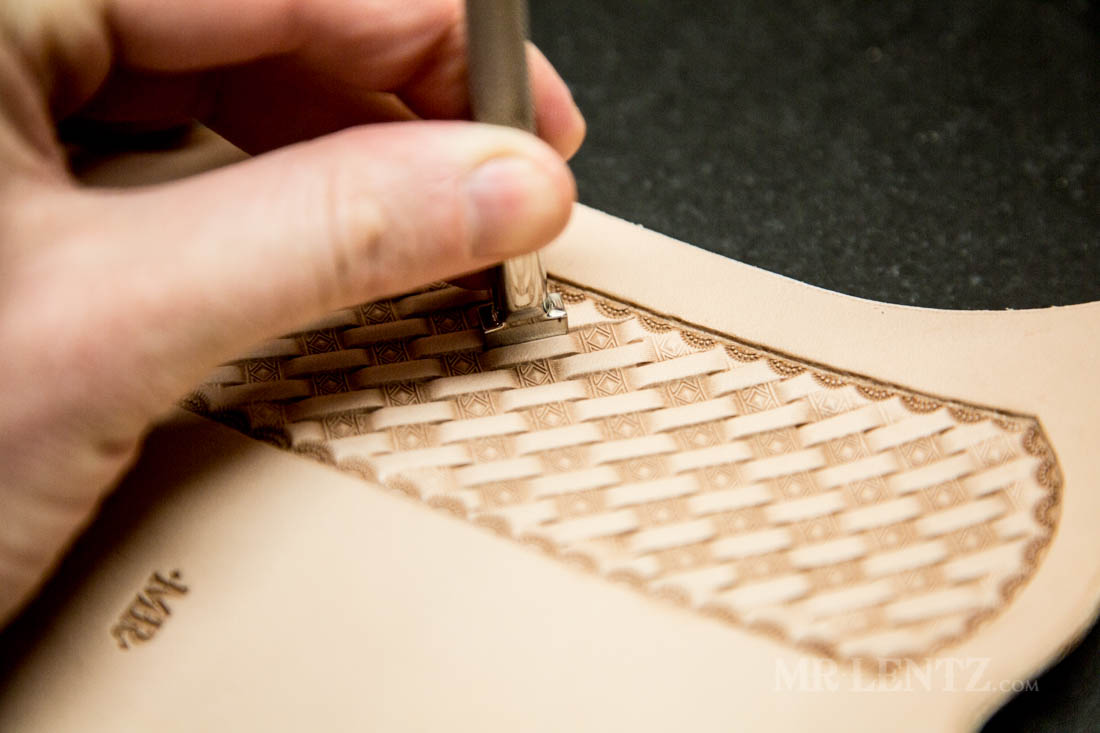
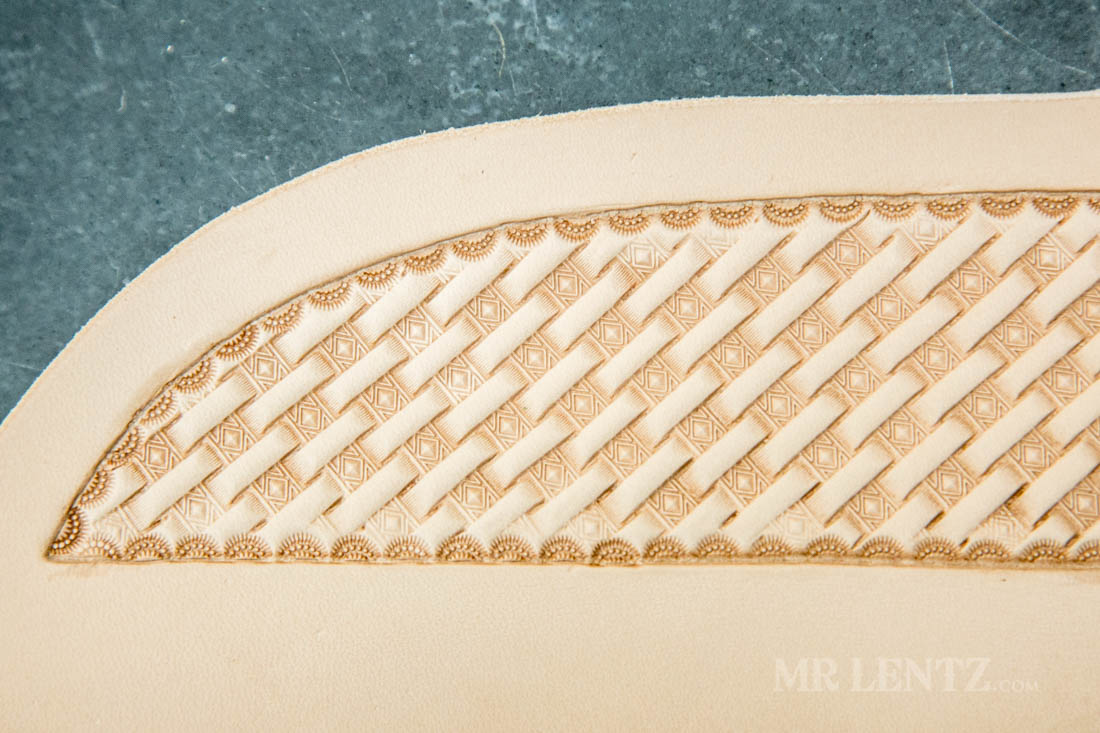
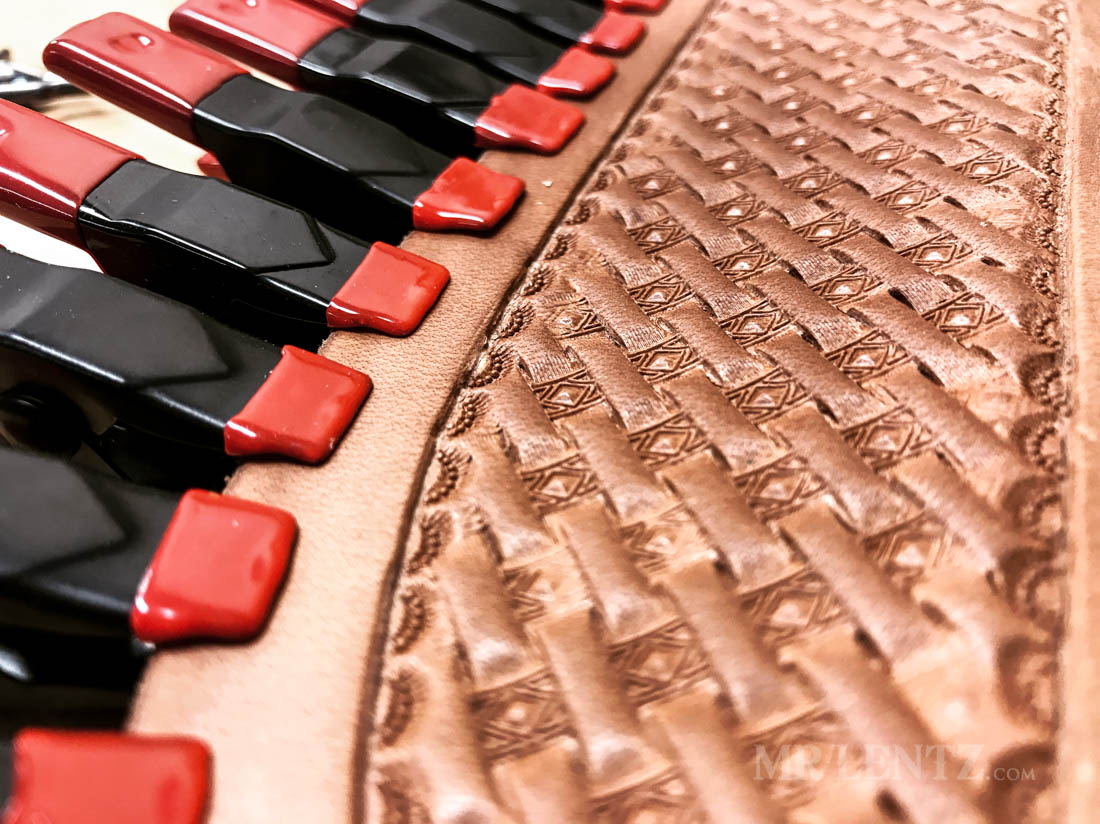
Along with sheath-making I decided to take up the practice of leather tooling. Here is a simple pattern called the basketweave. I am also working on learning how to carve leather just like the old saddlemakers did back in the 1800’s – and still do today. That’s another blog post for another day, so stay tuned.
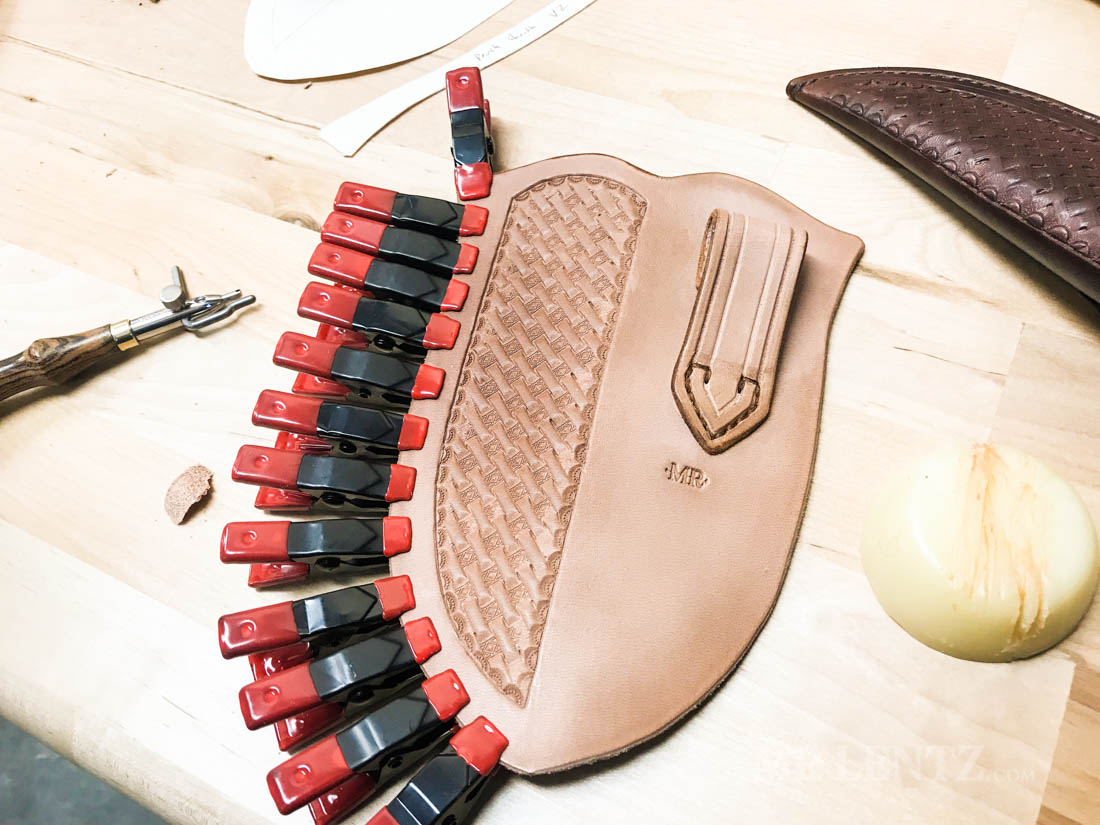
Knife sheaths need to be built with a lot of care and focus on durability. On both sheaths here I am using 9 oz vegetable tanned leather. In order to cut leather this thick, even more skills are required as far as the cutting tools used and how to sharpen them. Razor blades and scissors tend to struggle to get through the thickness of 9 oz. leather.
*** Little known fact – you can actually sharpen a razor blade to be sharper than razor sharp. It’s true, I’ve done it and it works.

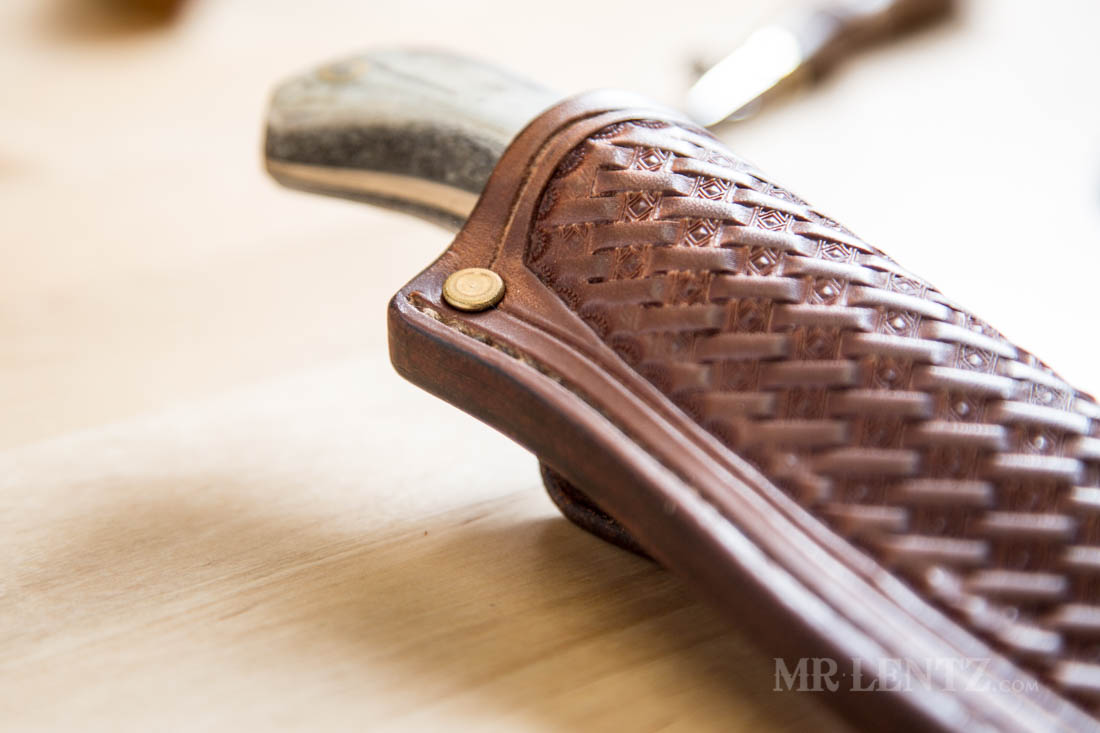
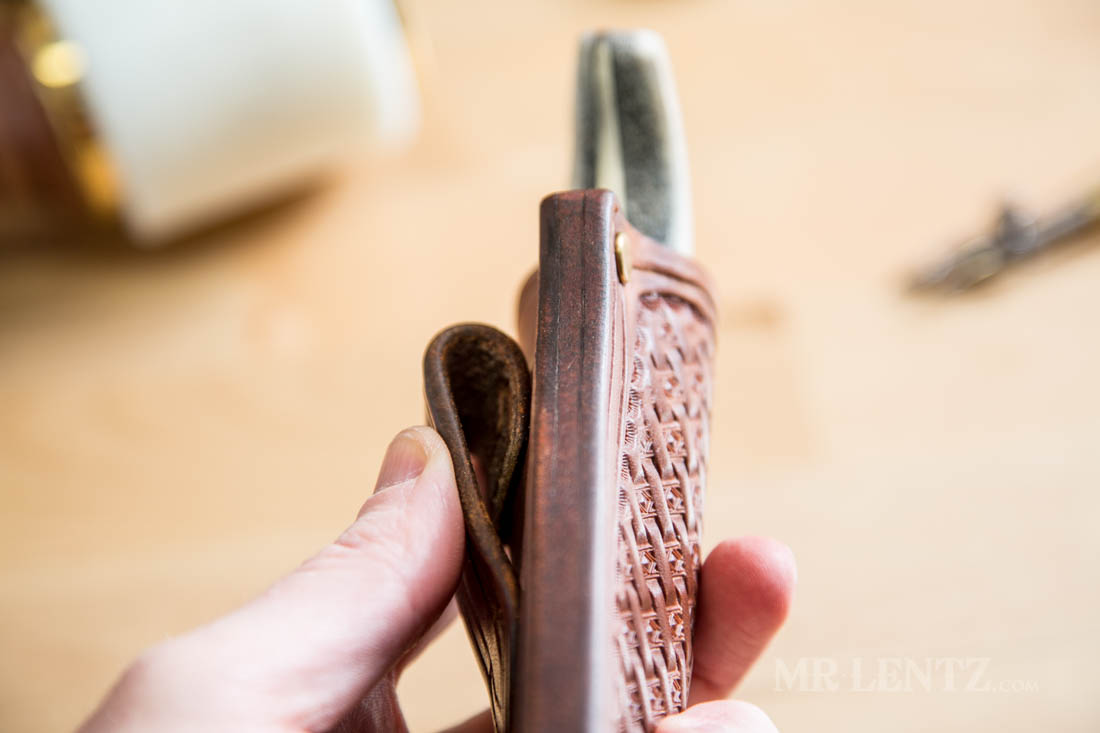
On a good quality sheath there will be what is called the welt. It’s the slim piece of leather sandwiched in between the outsides and only runs along the edge next to the knife blade. It’s meant to protect the stitching from ever being cut by the blade. Stitching through three layers of 9 oz leather also poses its own problems. I certainly had to practice a bit of patience for this one.
Cutting this sheath and stitching it up requires very sharp tools. As mentioned before – one of the most important skills here is learning how to sharpen different types of tools. I spent about a month researching and practicing this before I could really even begin making the first sheath. I am still learning that part, it takes a while to build the muscle memory.
In the video above I am working the stitching holes open with my diamond shaped awl. It can be tough to pull the needles through the punched awl holes and they tend to close back up after a bit if you don’t work quickly. A proper stitch on leather will use the diamond shaped awl to make the holes (not actual hole punches as seen in cheaper leather goods). This helps to grab the stitch tightly since no actual leather has been removed.

On my second sheath I decided to test out what is known as Hot Wax Dipping. It’s the tried and true method of protecting leather goods from thousands of years ago.
*** Little known fact #2 – leather has been used as armor for a few thousand years. You can harden it to a rock like stiffness with specific heating techniques.
Only recently did makers begin using chemicals to take the place of what wax and oil can already do very very well. Following my ethical responsibility of working with leather with little to no chemicals, I decided to give it a shot and see what happens.
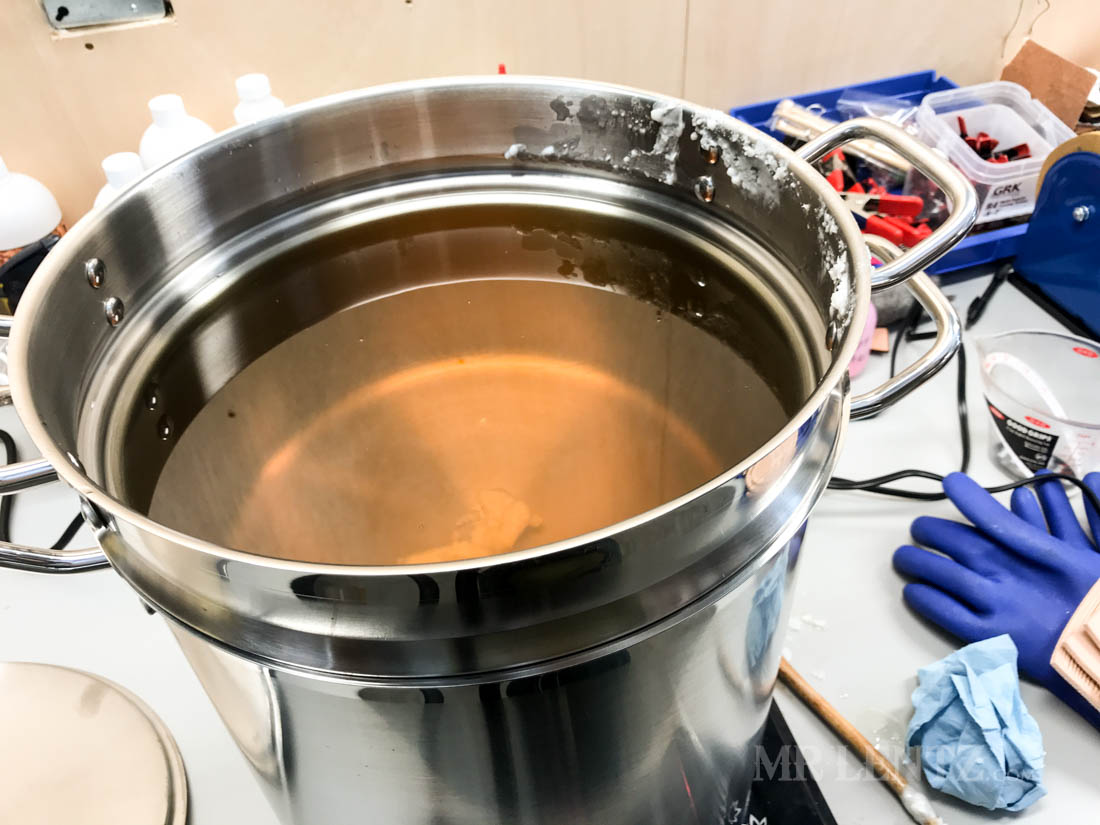
It takes quite a while to heat a pot of wax this large to the melting point. However it also makes it easy to dip larger items in, and I can store the cooled wax in the pot itself.
Above is a short video of the waxing process. It’s time consuming and can be fairly messy…but it uses zero chemicals. The benefits of the hot wax dip method are numerous – your sheath is basically infused with wax making it weatherproof for a long long time. If the surface gets scratched, you can fairly easily rub your finger on it and it’ll blend right back in. Fixing or reapplying wax at a later date is a much easier process than the chemical alternatives. Overall I like the outcome of the first test.
Here’s the second sheath I came out with. This one was hot wax dipped, and I used my own all-natural walnut husk dye before dipping. I certainly made a fair amount of mistakes on it, less so than the first sheath, but that’s how you learn!
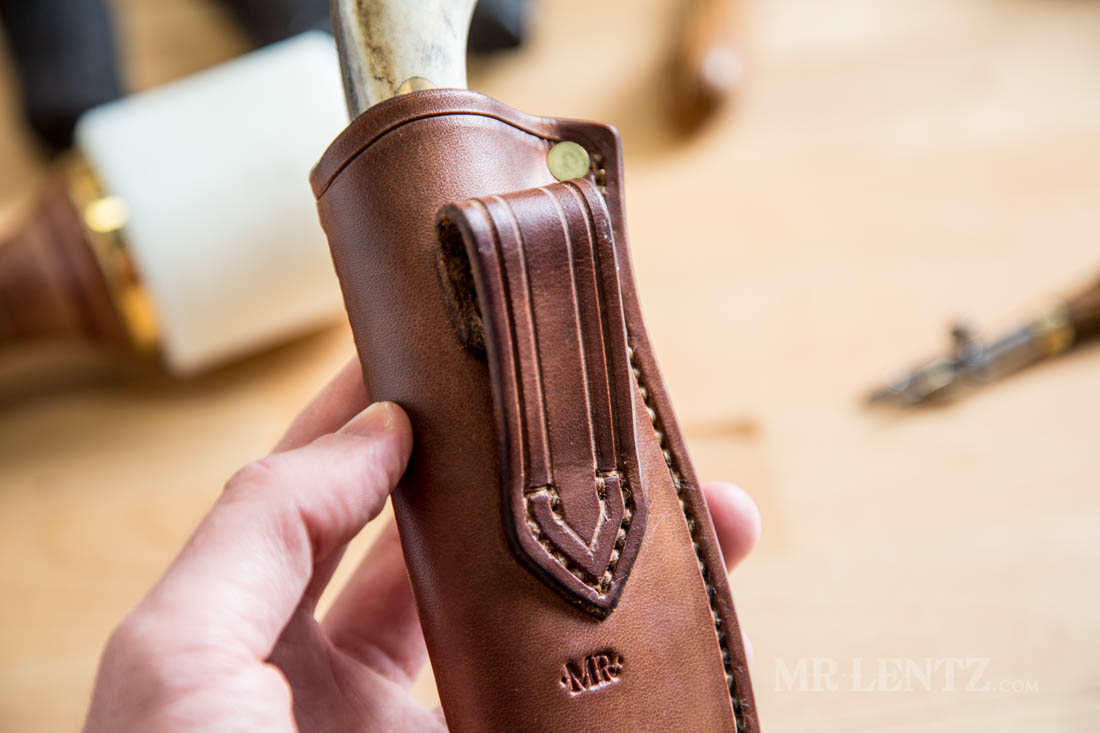
I added a solid brass rivet at the top where most of the pressure lies in the sheath. It’s buried into the welt and well protected from the blade.
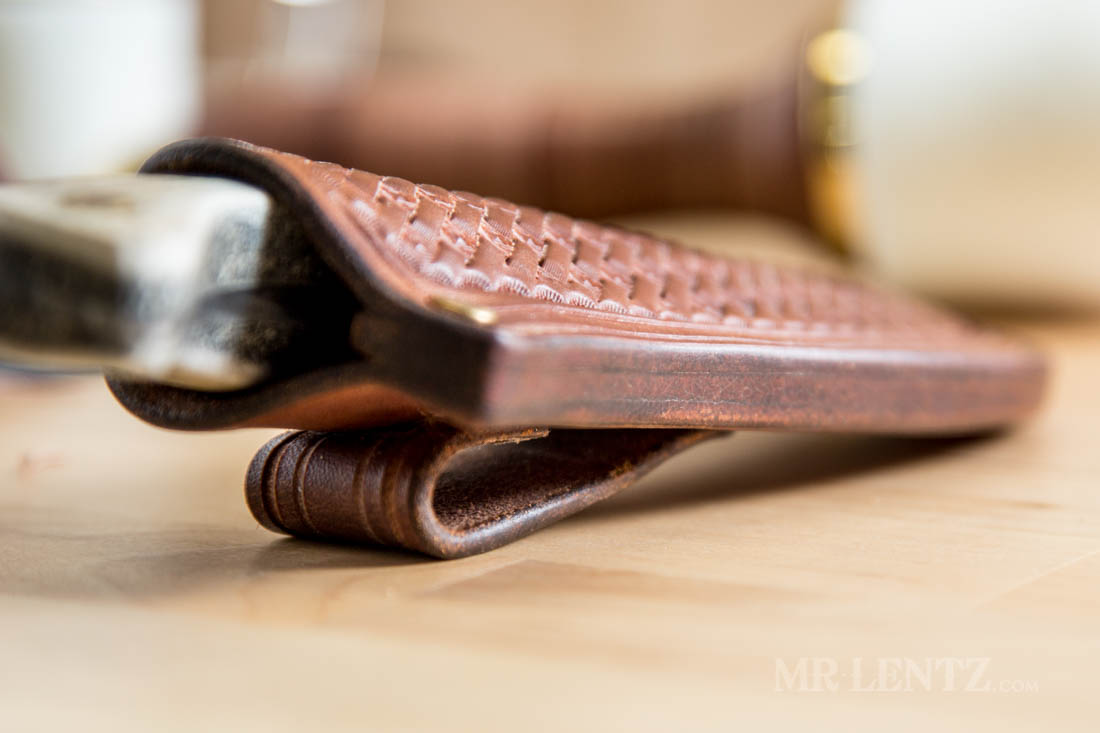
This sheath has only one layer of a 10 oz welt. Fun times cutting that one out!
On the belt loop stitches are doubled up near the pull points. I also sunk all stitching well below the surface on both the inside and outside of the sheath. This protects the stitch from the blade and ensures years and years of life.
This here’s my first sheath, so don’t look too close. I used an alcohol based dye on it and a mild chemical sealant. It came out looking nice, but again – the use of chemicals tends to bother me a bit so I am continuing to experiment with natural dyes and sealants.
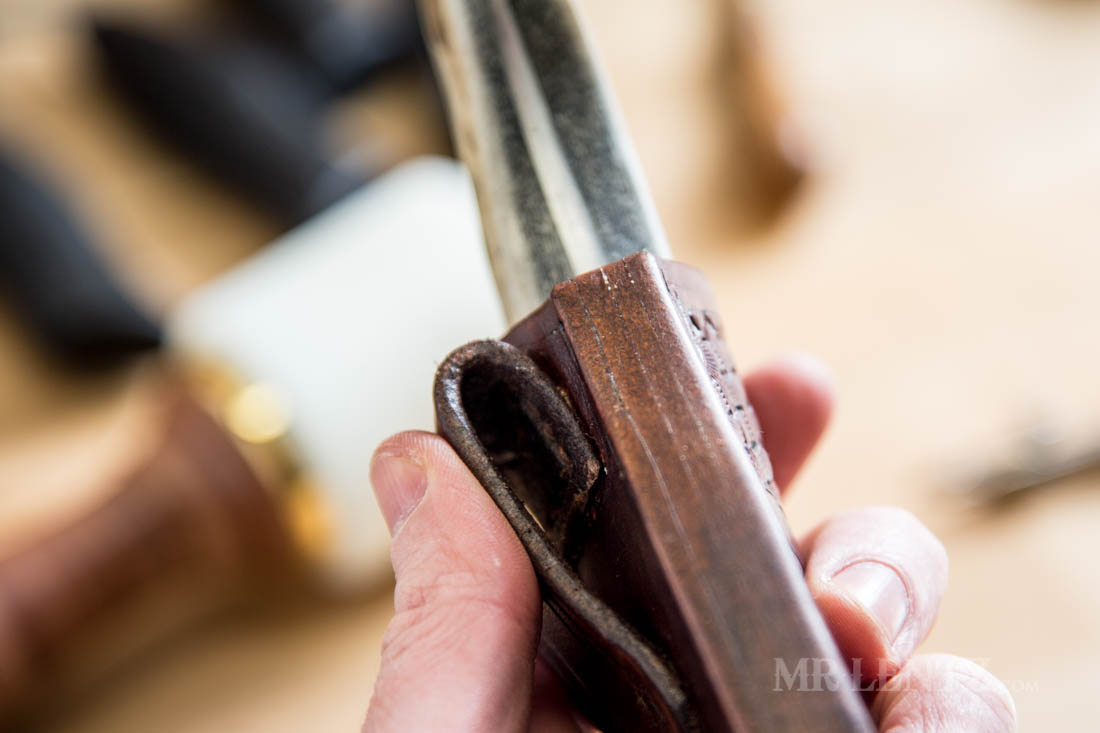
The close-up above shows two layers of welt. I did that initially out of fear that the inside would not be wide enough to fit the knife.
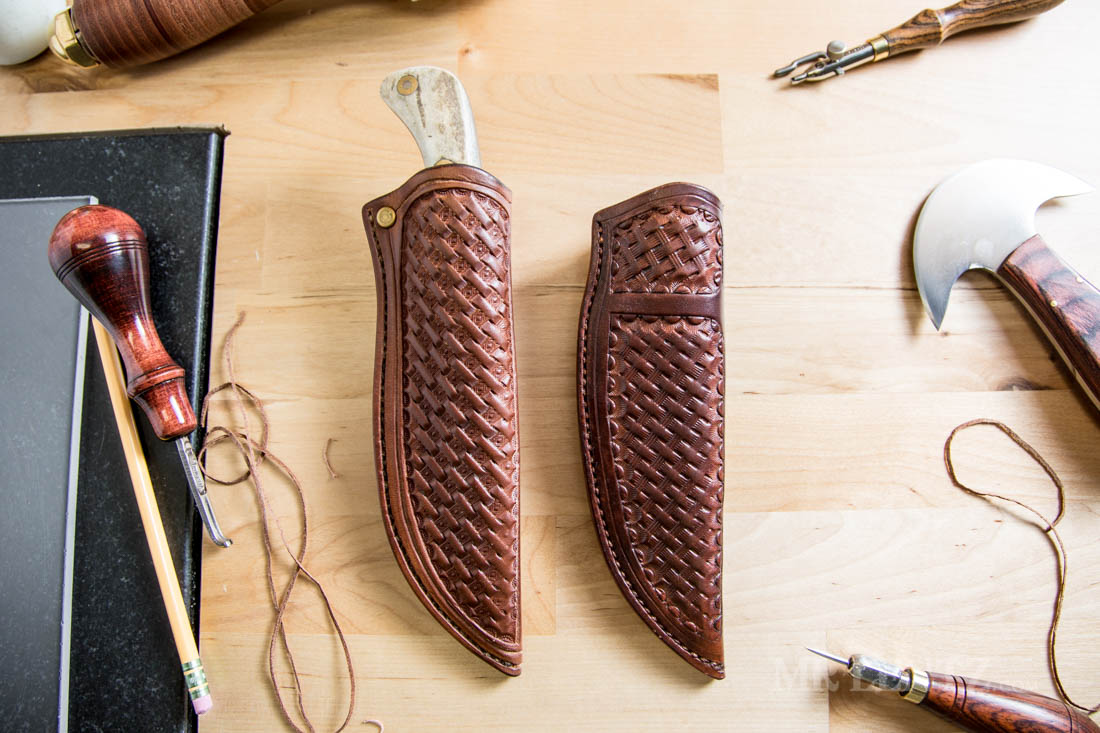
Here are both iterations. Each new one will only get better and I have many many more to go. Anyone out there need a custom sheath made? Write a comment below – I am not ready to offer the service for a while yet, but it would be good to know if y’all have any interest. I will occasionally write new blog posts on this as I continue the journey in sheath making, cheers!
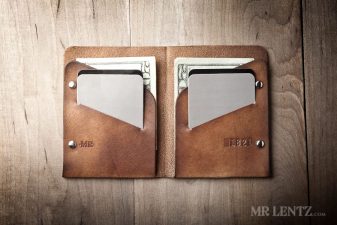
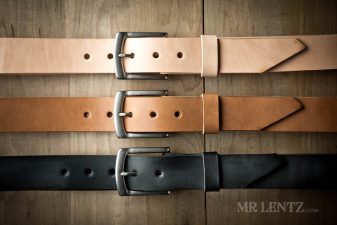
READER'S FAVORITESVIEW ALL


Thank you for your video on how to hot wax dip holsters in beeswax. My question is this. After placing my holster in hot beeswax they become quite dark. How can I prevent my leather from going to dark when dipping in hot beeswax? Any help with this would be greatly appreciated. Thank you
Hi Lute – That’s one drawback of the hotwax dip. It’ll darken leather very significantly. So – I tend to use undyed hides for it. Good luck!