
Everything, Leather, Tutorials
How To Make A Leather Keychain
Dec
Every holiday season I like to put together a little DIY leather tutorial. This year i’m going to teach you how to make a leather keychain. I put together this step by step guide with photos of everything below, as well as an easy to follow video. Last year I posted how to make a wallet or belt. You’ll be workin’ that leather into a keychain in no time! Every major section has a little link to jump to that part in the video, so if you need a better idea of how I did it in motion, click the link and go up top to the video – it should start playing right at the point you need. Well, let’s get on to it!
If you use these links below, you can jump to that specific part of the video. This way you can watch any step below if my written explanation needs more visuals.
Cutting Leather @ 0:23
Marking Stitch Stop Points @ 1:41
Stitching Grooves @ 1:56
Edge Beveling @ 2:37
Edge Sanding @ 3:27
Burnishing @ 4:08
Hole Punching @ 5:20
Personalizing @ 12:18
Oiling and Waxing @ 13:12
Stitching @ 14:06
Reverse Stitches @ 20:09
 First off there’s the tools you will need as the bare minimum, and the tools you might prefer to use if you want to make this an easier task. The tools to the right of the ruler above are about the bare minimum you’ll need. The tools on the left help to make things easier. The tools that help make it prettier are shown in use later on.
Tools Needed
- Ruler
- Pencil
- Scissors or razor
- Stitching awl
- 2 leather needles
- Waxed thread
- Stitching Pony (or table vise if unavailable)
Tools To Make Things Easier
- Leather Scissors with micro serrated lower edge (easily grips and cuts)
- Rolling Blade (quick work cutting a straight edge next to a ruler)
- Strap Cutter (perfectly sized straps every time)
- Belt Tip Punch (for nice rounded ends)
- Craftool Diamond Punch with 6 punch head (much easier than stitch awl)
- Mallet
- Stitching Pony
Tools to Make it Prettier
- Edge Beveler (Size 2)
- Stitching Groover
- Fine and Extra Fine Sandpaper
- Cocobolo burnisher for Drill Press (burnishing those edges)
- Leather Letter Stamps (personalize it?)
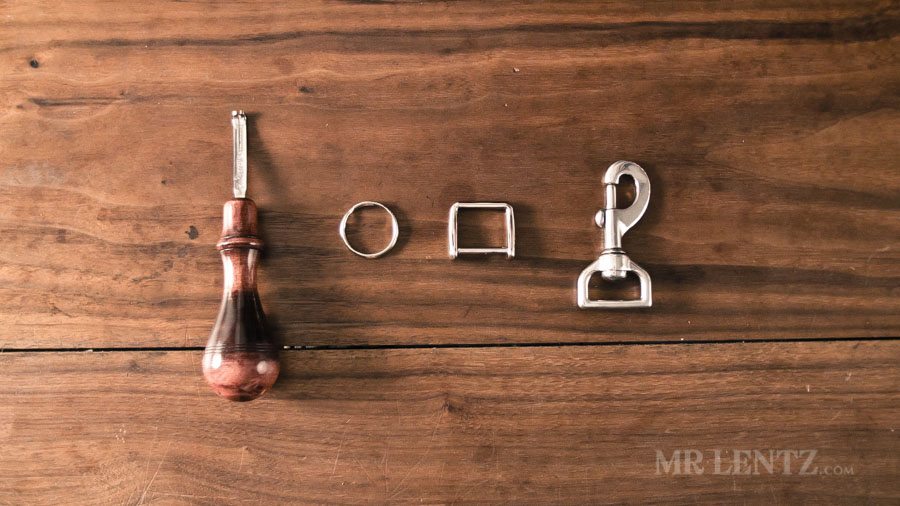 You will need some hardware for this. The easiest option it to find an old key fob and take it apart to recycle the hardware. Just keep in mind your keychain width may change depending on your hardware. I had the above available in the shop, on the left my edge beveler seems to have made it into the shot.
Like this post so far?
I spend most of my free time creating tutorials like this to help those like yourself get into leatherwork and woodworking, or get better at it. If you'd like to support my efforts, consider checking out my handmade leather goods shop and purchasing a gift for yourself or a loved one. It's readers like you that help keep a small U.S. business like mine going strong, so -thank you!
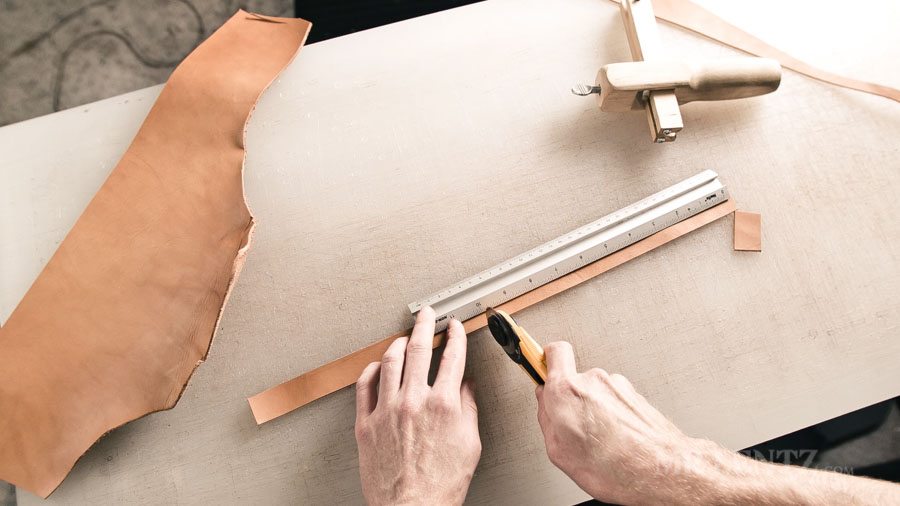
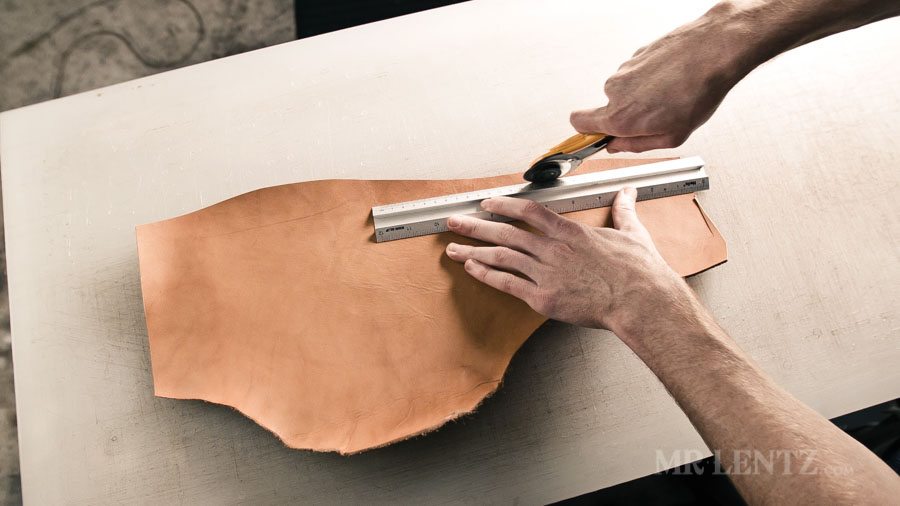 Find a good piece of leather to use. I had a scrap piece of Full-Grain Vegetable Tanned leather laying around, it’s a 6/7 ounce and makes just the right thickness for this keychain. You can find scrap leather on ebay or even a local Tandy Leather store without having to buy a whole hide. We don’t need much for this as you can see. The first step in making this leather keychain is to start with a straight edge. I am going to teach the way I would do it with my tools, but you can certainly improvise if you don’t have all of the tools seen. I took my ruler and rolling blade and cut a nice straight edge on this scrap piece. To jump to that point in the video, click this link and scroll back up to the video: Cutting Leather @ 0:23
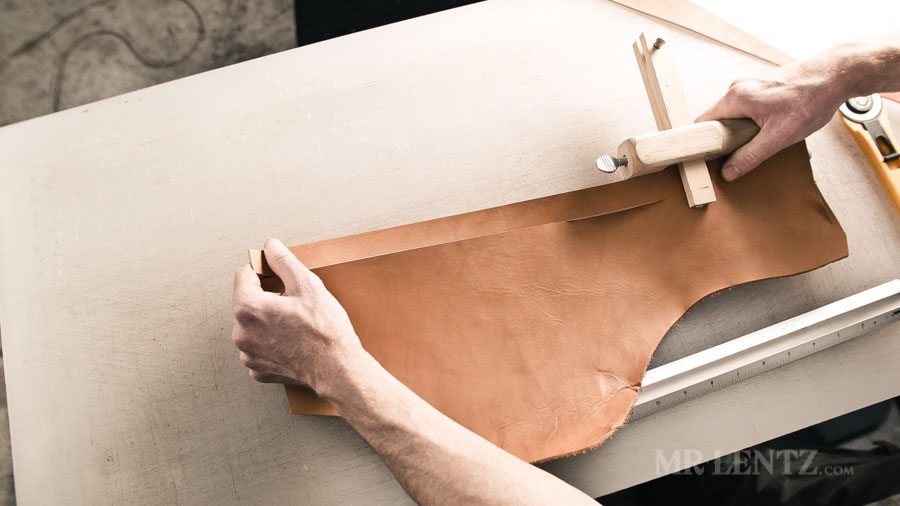
With the strap cutter I set the width to 1 inch, since this is the size that will fit my hardware. Make sure you have a nice sharp razor in there and it’ll cut through the leather like butter.
 I measured out 10 inches, as this seemed the optimal length for the keychain after it was folded into three parts.
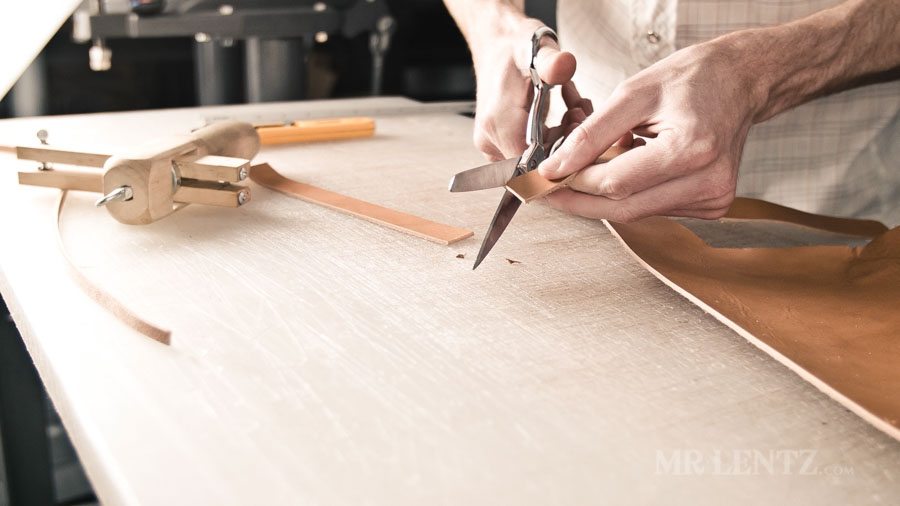 With the scissors I rounded the edges. It’s the small details that count in this project – so make sure to cut some corners! You could also use the belt tip cutter here for a different look.
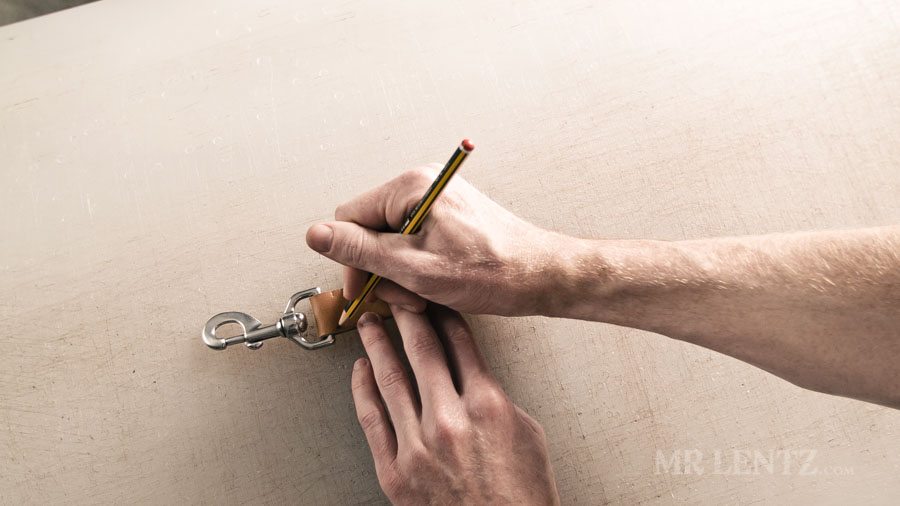
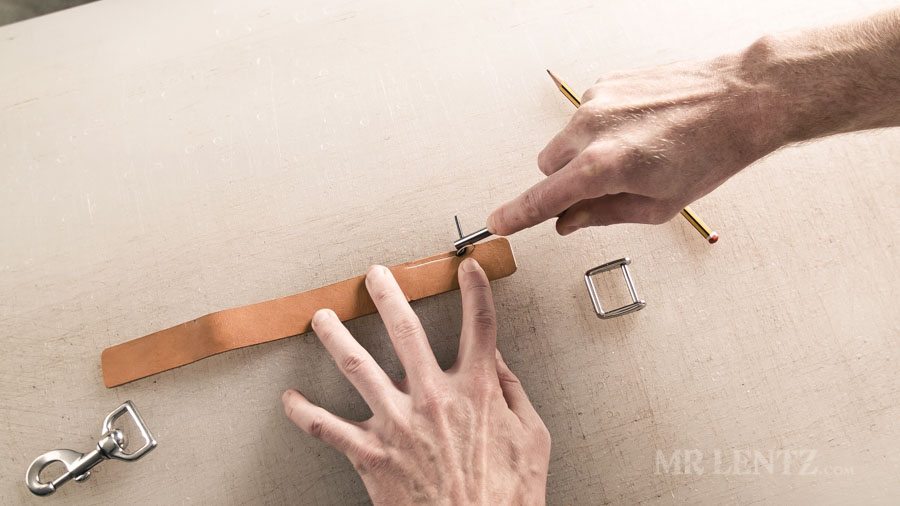
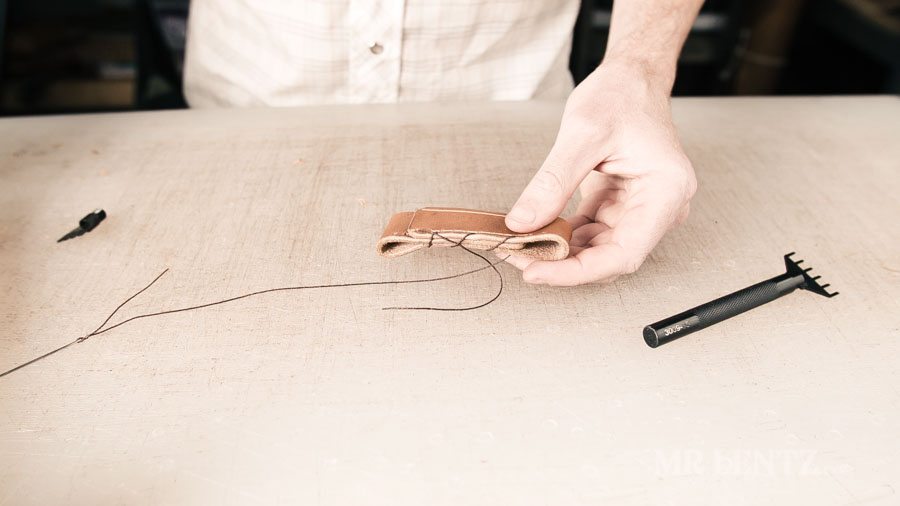
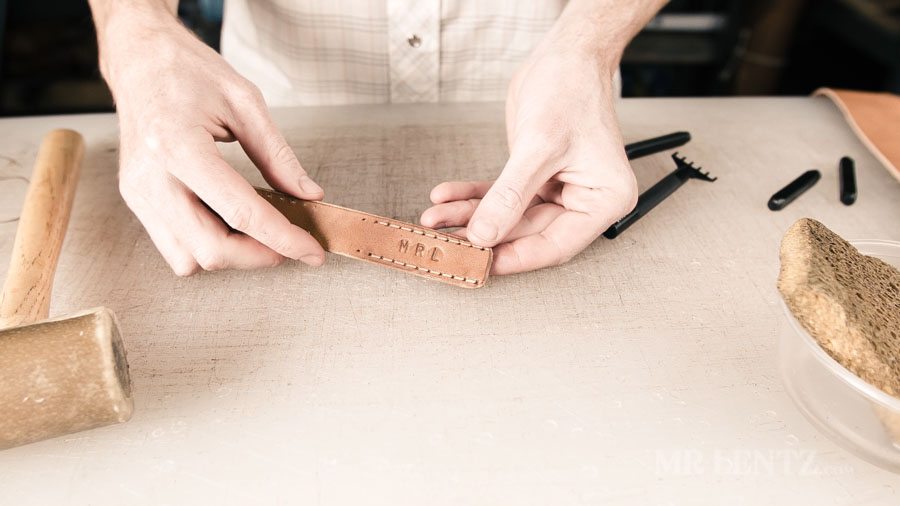
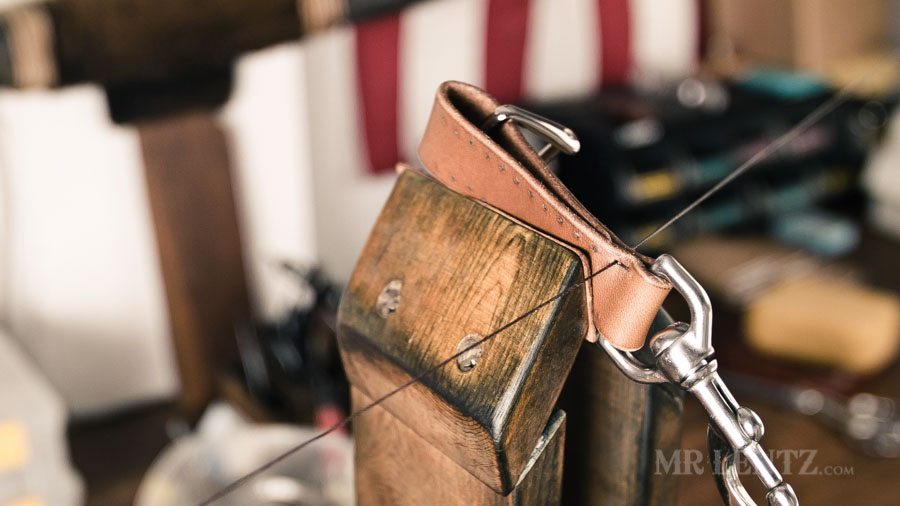
 Then, I put the hardware into place and folded the leather together.
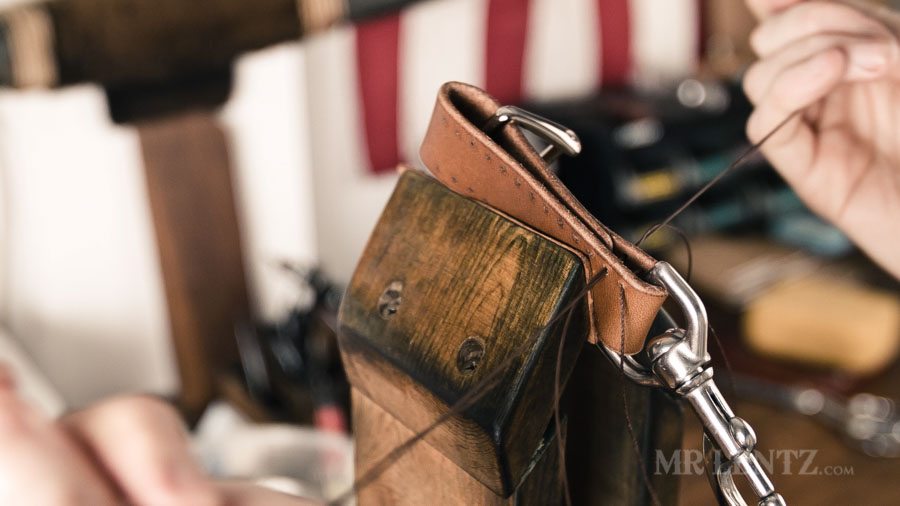
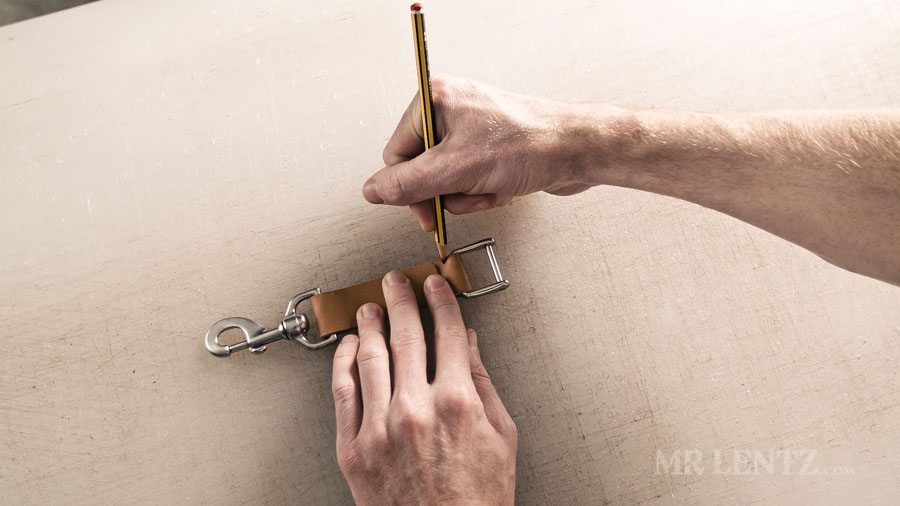 Making sure to mark where I think the stitching should end. This will help me when I punch the holes for the stitches – so I don’t go too far. If you are using a regular stitching awl, you can do a similar thing here, knowing that the holes will be punched as you are actually stitching the piece up. Marking Stitch Stop Points @ 1:41
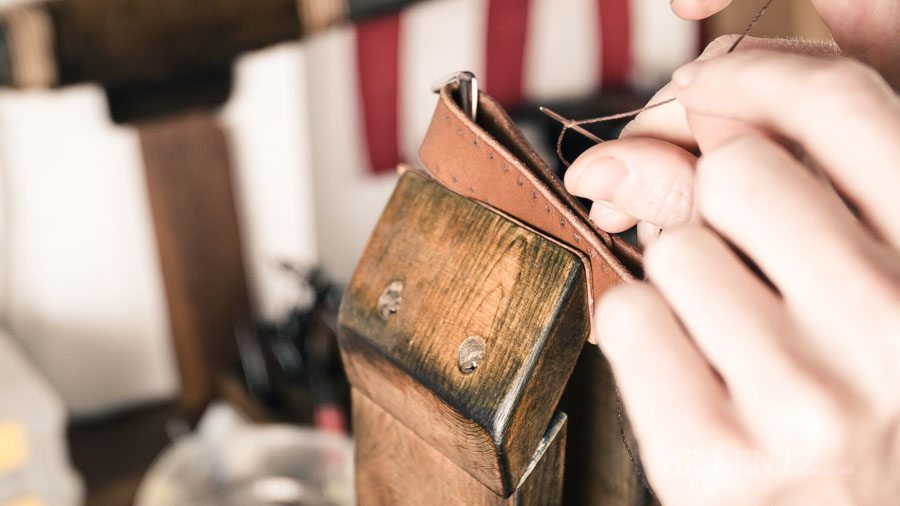
 When stitching leather you want your thread to sit low so it is more protected from abrasion. In the shot above I am using a stitching groover only on the front part of the first fold of leather. Stitching Grooves @ 1:56
 I made grooves on both edges – only on that front part of the keychain. For those using the stitching awl later on (I didn’t) – you can now mark your spacing between stitches with a stitch wheel. That’ll help make sure your stitches are spaced evenly. Since I chose the craftool method with prespaced awl punches, it made it a lot easier.
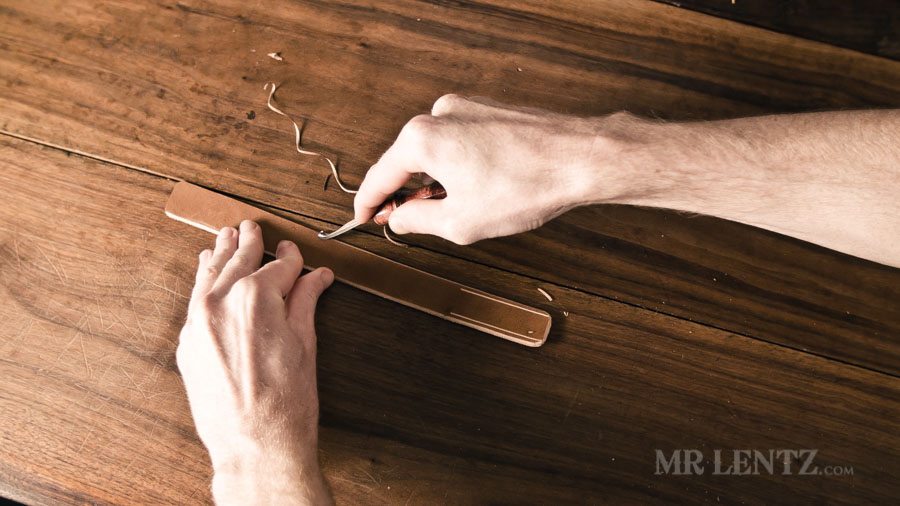 Using the edge beveler I beveled all edges on the top ‘Grain’ side of the leather. There’s no need here to bevel the back ‘flesh’ side of the leather since this leather keychain is sewn together and only one edge is exposed. It’s a good idea to bevel edges on leather as it actually helps the leather resist wear. A rounded edge can take a beating and still look good, it’s one step many leatherworkers forget! Edge Beveling @ 2:37
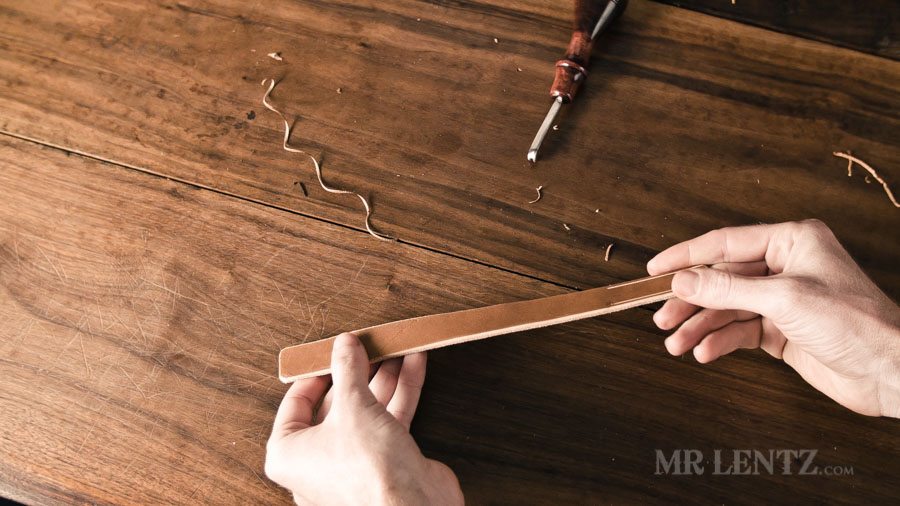
 I decided later that this part was a bit overkill. I used a fine grit drum sander in my drill press to make the edges of the leather even finer. Instead, you should just hand sand the edges with fine grit, then move to extra fine grit like 320 to finish it off. This is a key step if you are burnishing the edges. Getting the edge fibers sanded down finely will help them look even smoother and polish better. Edge Sanding @ 3:27
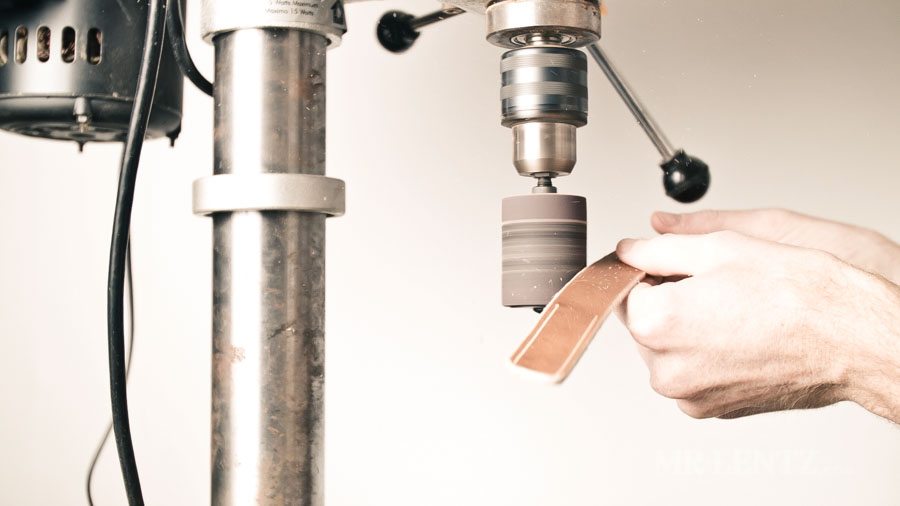
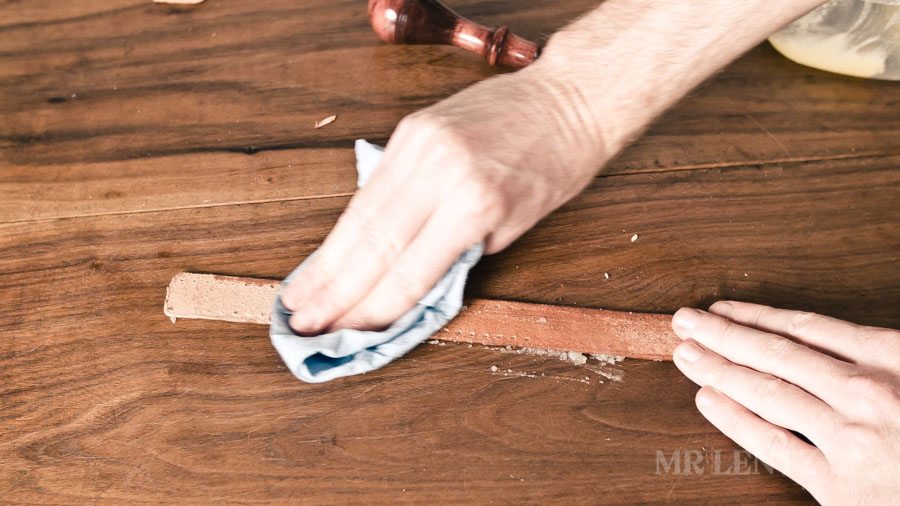
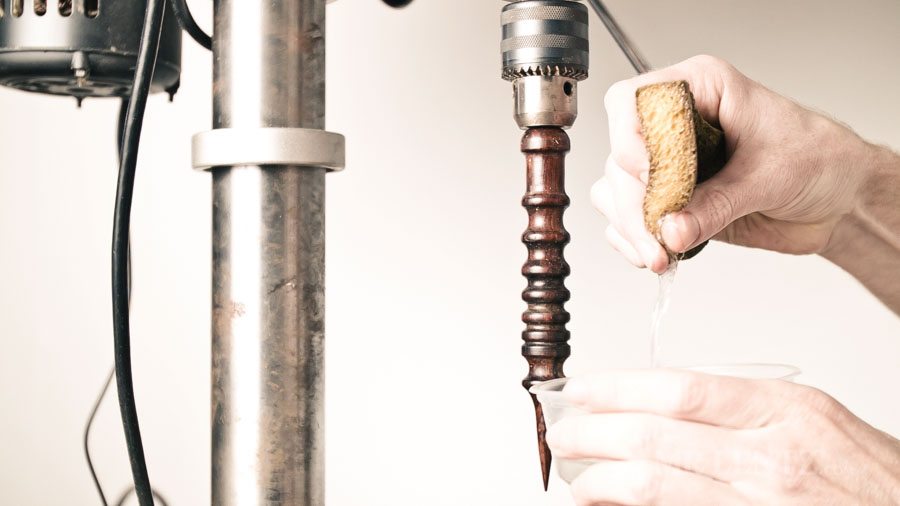 Then I wet just the edges of the leather with a damp sponge. Don’t over-wet as it makes it impossible for the next step. That tool in the drill press is the cocobolo wood burnisher. Cocobolo is a type of African wood that can withstand high heat without cracking. This is why they are used in making burnishers.
 Spinning at high speed, the leather is then pressed firmly against the burnisher. Take your time and get that heat to build up on the edge, this is what gives you a nice slicked edge. Some choose to also coat their edges in Gum Tragacanth which is basically a form of clear glue derived from tree sap. It does help the edge look even smoother, but I find it also wears off within a few days of use. I don’t bother with the stuff anymore. Burnishing @ 4:08
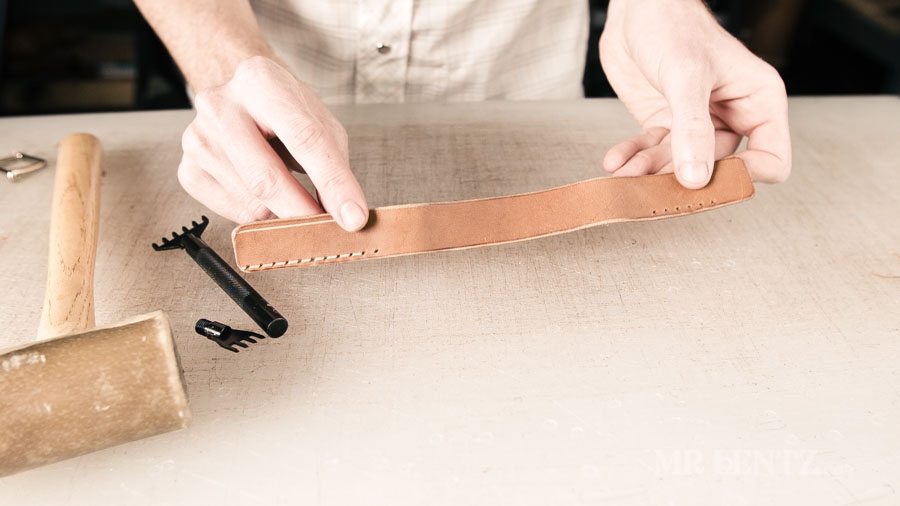
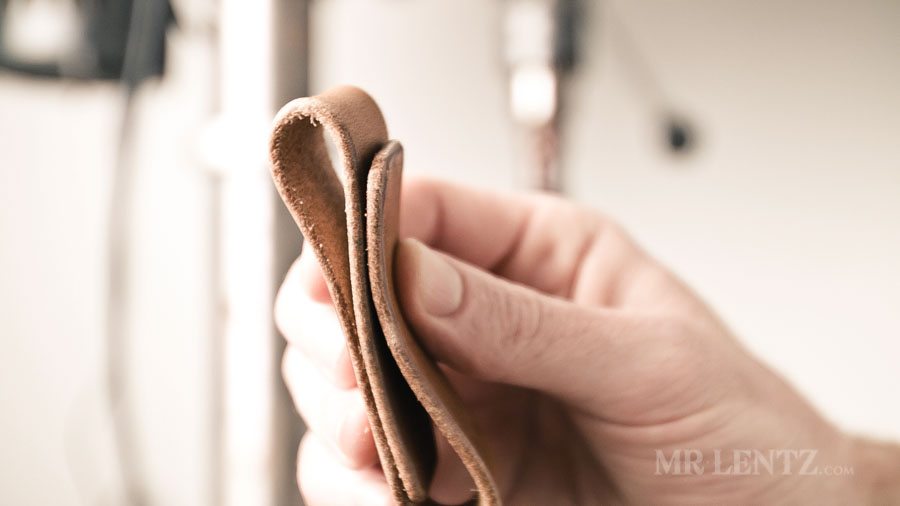 It’s hard to see in this shot but all edges are burnished and smooth. If you use too much pressure or hold the leather in one spot for too long you can burn the leather, just fyi !
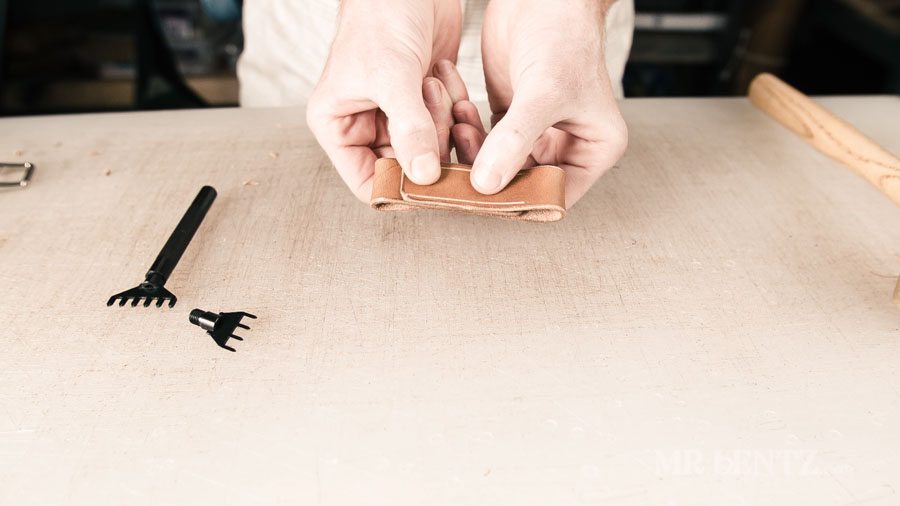
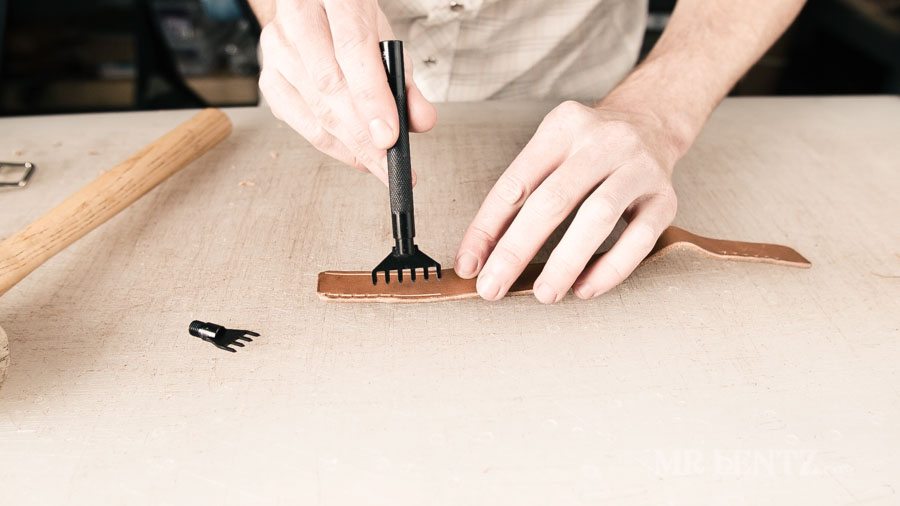
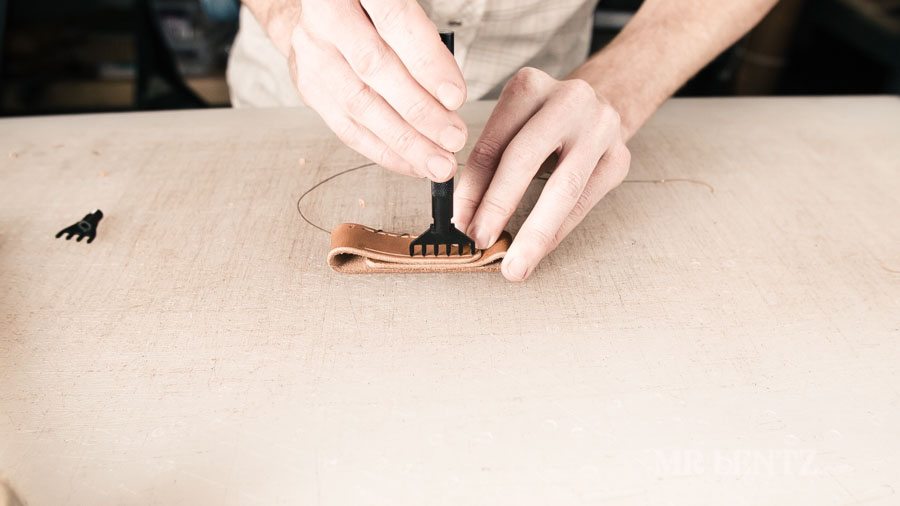
 Here I’ve folded the leather up so I can punch the holes in it for stitching. I used to use a regular stitching awl and punch as I stitched, but I found that this tool makes everything look perfect every time, plus you end up with less holes in your fingers! The only trick here is that punching through three layers of 6/7 ounce leather is a bit much for this tool. I did what I could, then as you will see further down – I had to repunch the lower piece of leather where the tool only went partially through. Hole Punching @ 5:20
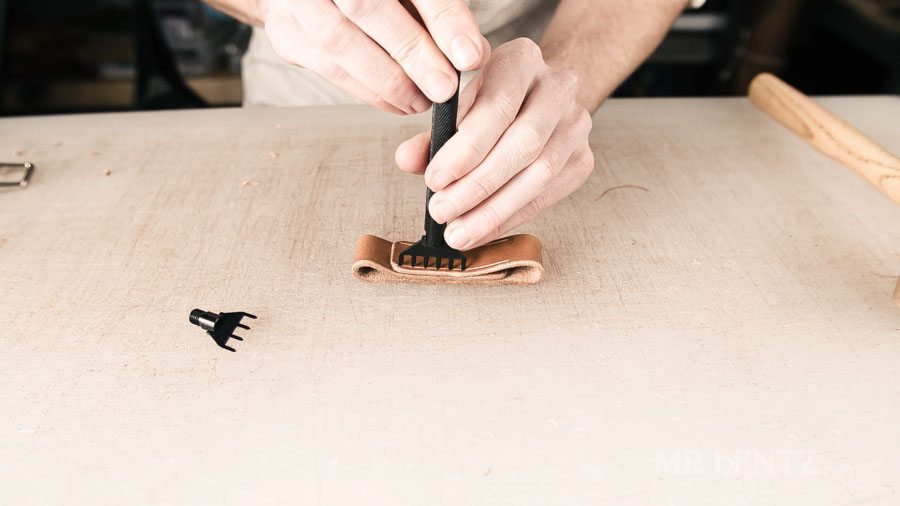
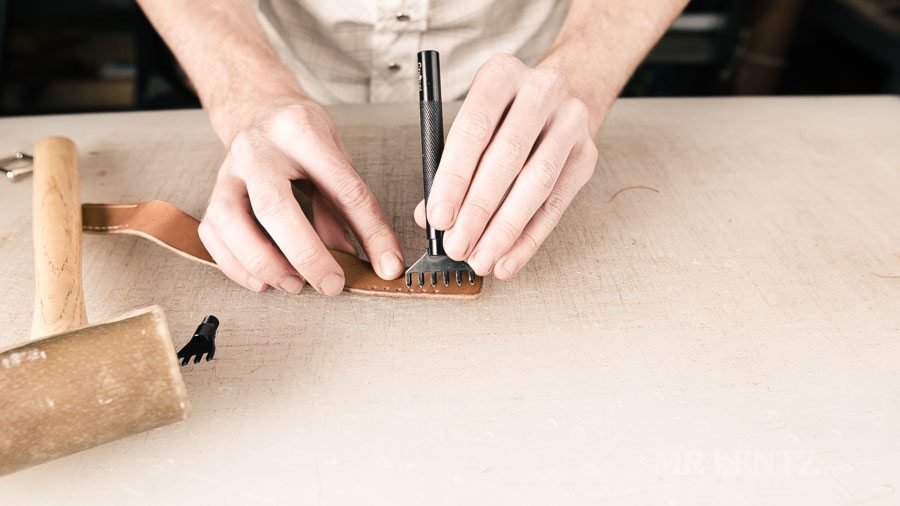
 Setting the punch in the last two holes will make certain that you continue a nice straight line when adding more holes.
 For this part I added 2 holes past the stitching groves. This gets the stitches close to the hardware for a nice tight fit.
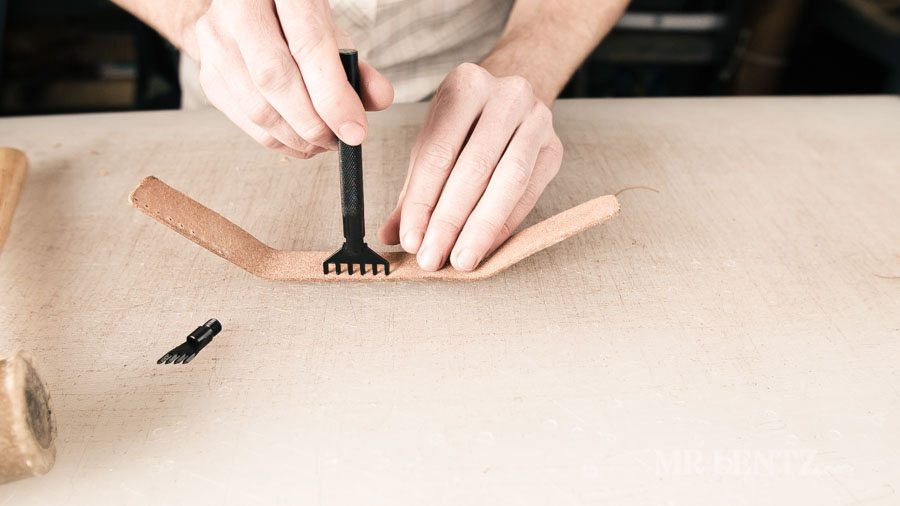
 For the rest of the punching I made my way down each section, making sure to punch the same amount of holes in each part of the leather so that everything lines up.
 Here I am re-punching that bottom piece since the tool couldn’t quite reach all the way. Since the punch awl makes a diamond shaped hole in the leather at a certain angle, you must continue to punch from the same side. If you flip the leather, it will also flip the direction of those diamond holes.
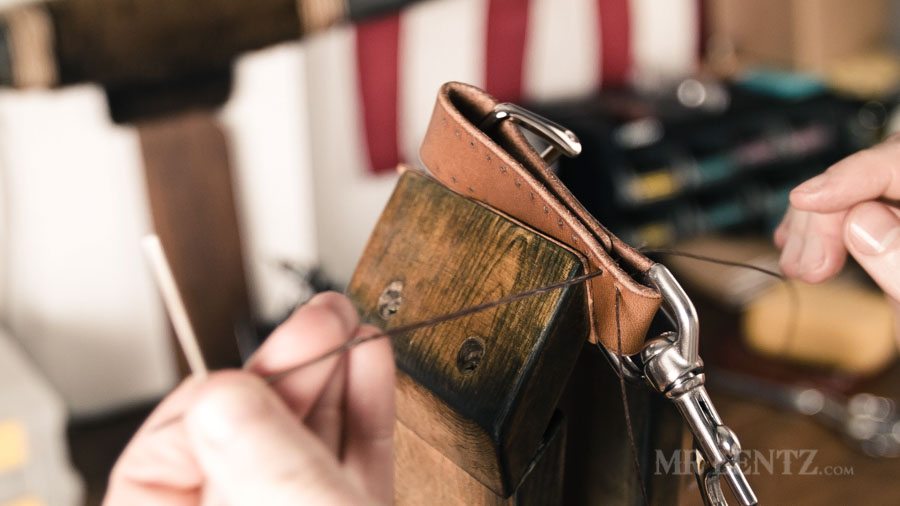
 After punching one side, I quickly wrapped some thread in the holes to hold everything together while I punched the other side of the keychain. This step makes sure that things align properly and the leather doesn’t slip while punching.
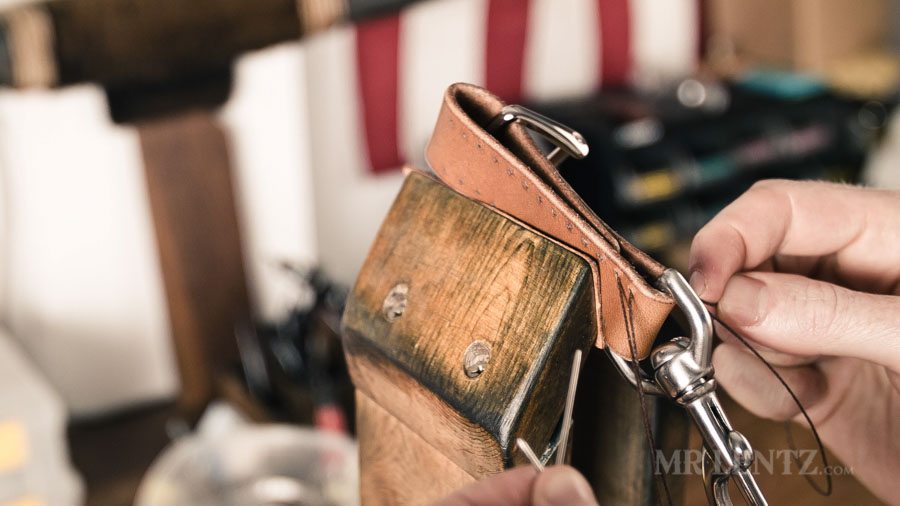
 Here I basically continued punching the other edge in just the same manner.
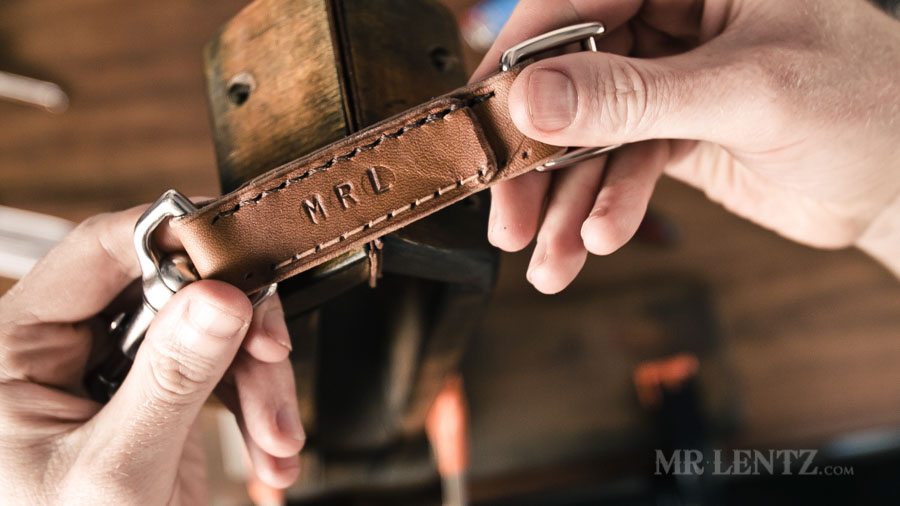
 If you want to add a personal touch to the keychain, you might consider buying a set of letter stamps. There are a ton of cheap ones out there, this set I am using below is a 1/4 inch tall character. You will want to lightly dampen the leather here, this helps to make an impression in the leather that will stay. Personalizing @ 12:18
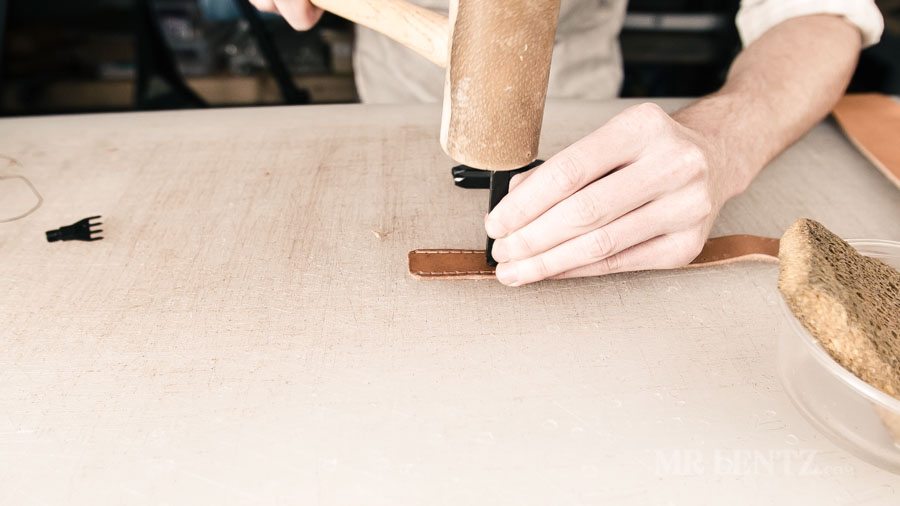 Hold your stamps firmly or they will hop when struck with the mallet.
 M R L, I guess that stands for Mr. Lentz!
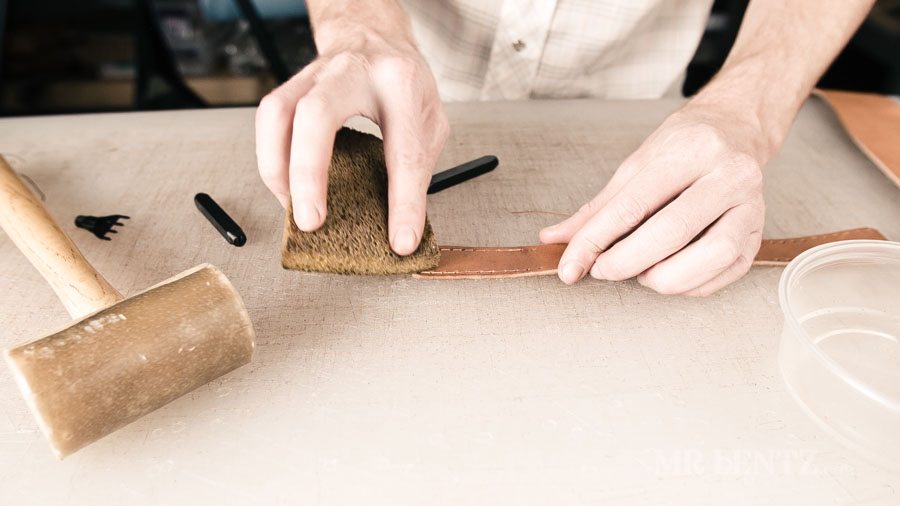
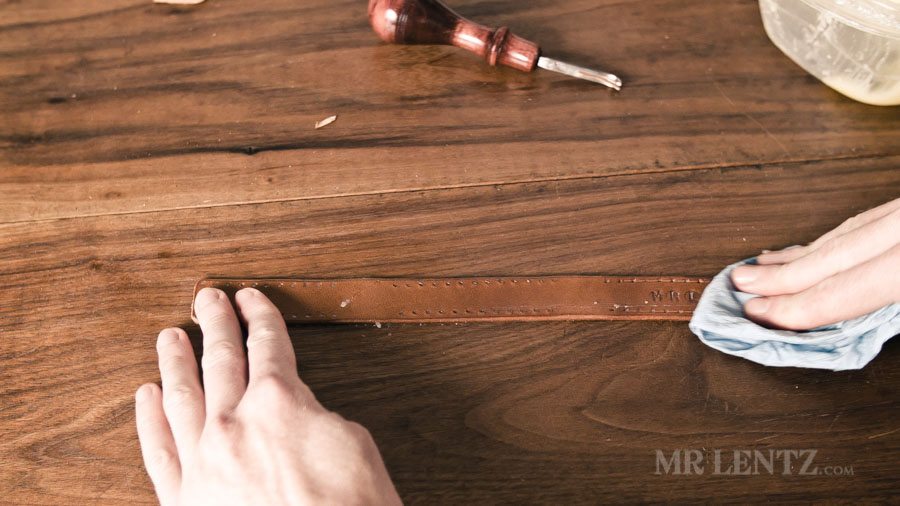 With Vegetable Tanned Leather it’s a good idea to oil and wax it. This step helps to lubricate the fibers so they don’t dry out and tear. I use my own handmade mixture of Extra Virgen Olive Oil, Beeswax, and a third extra ingredient that sets my leather goods apart from most. You can experiment with what works best for you, but keep in mind that some oils can actually break leather down, and some can go rancid. Oiling and Waxing @ 13:12
 I put a light coat of oil and wax on the back side as well. The back side tends to absorb more at a faster pace, so you don’t need much there. Oh – I just realized I recently made a short video on how to condition leather, check it out here.
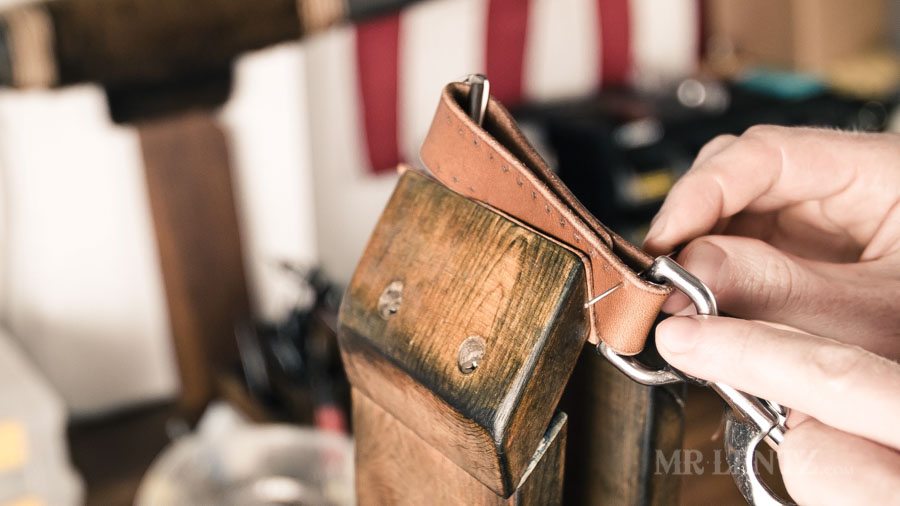
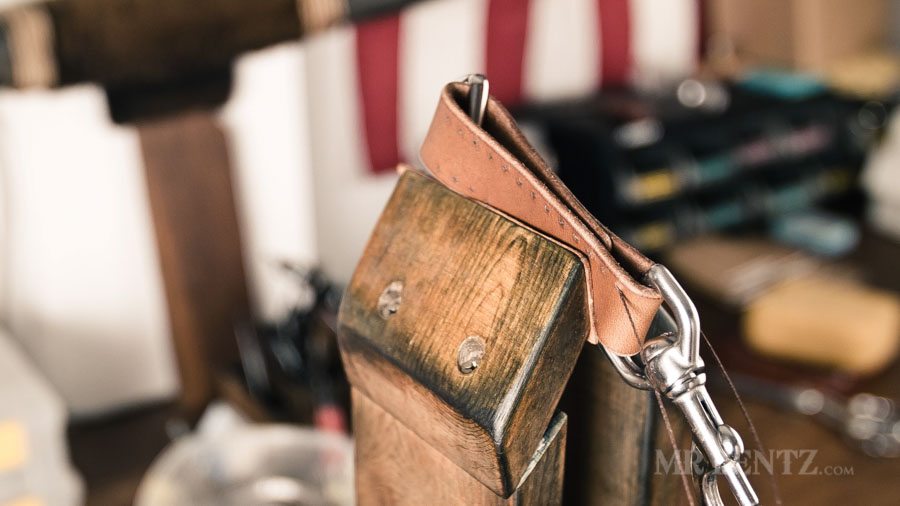
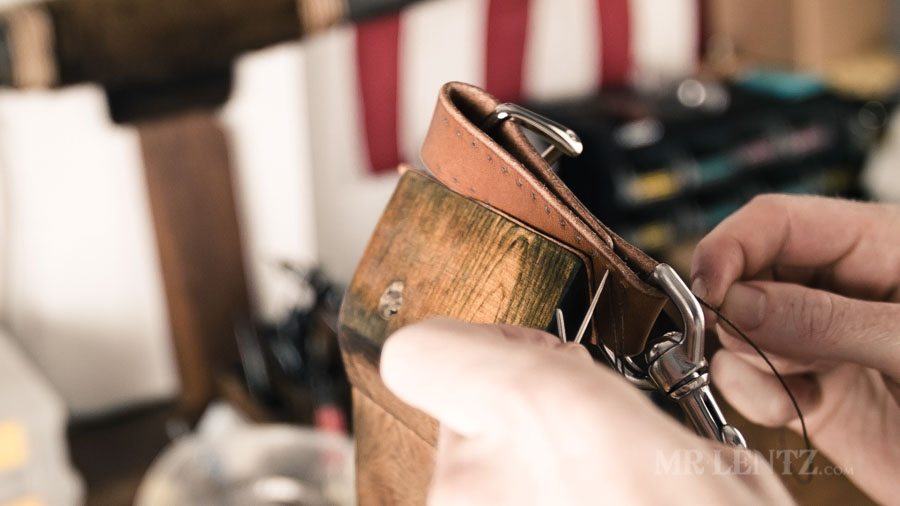
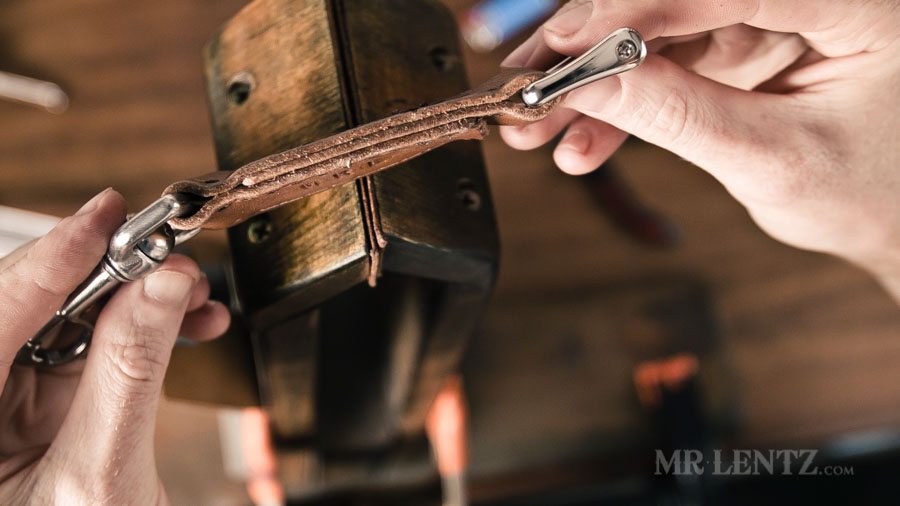
 Next I aligned the punched stitching holes, placed in the hardware and put the leather keychain into the stitching pony. Stitching @ 14:06
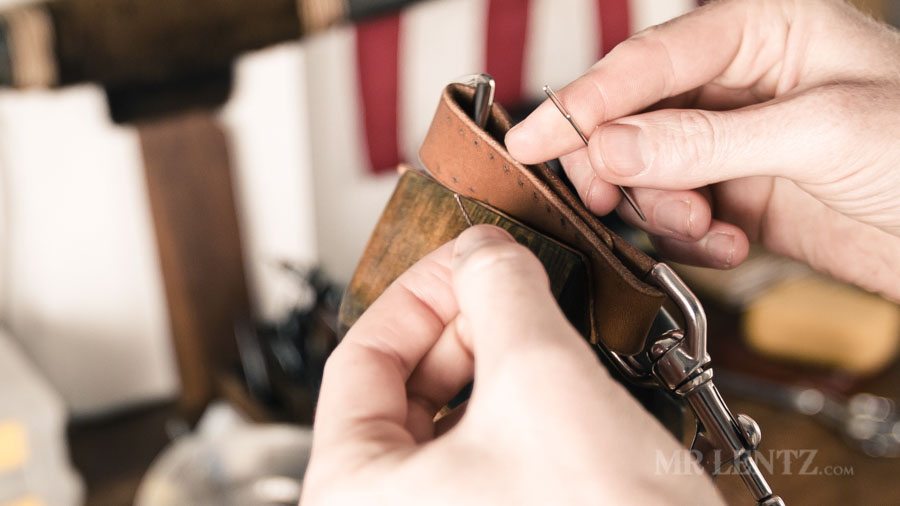
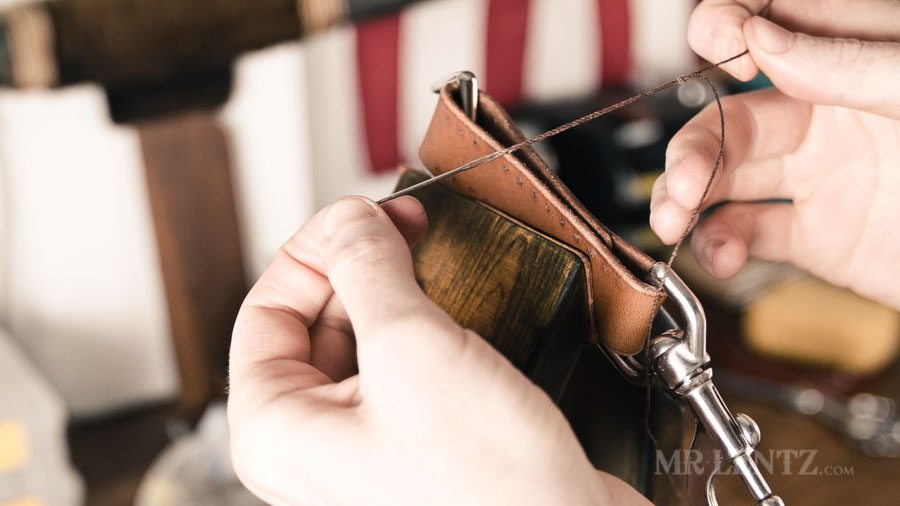
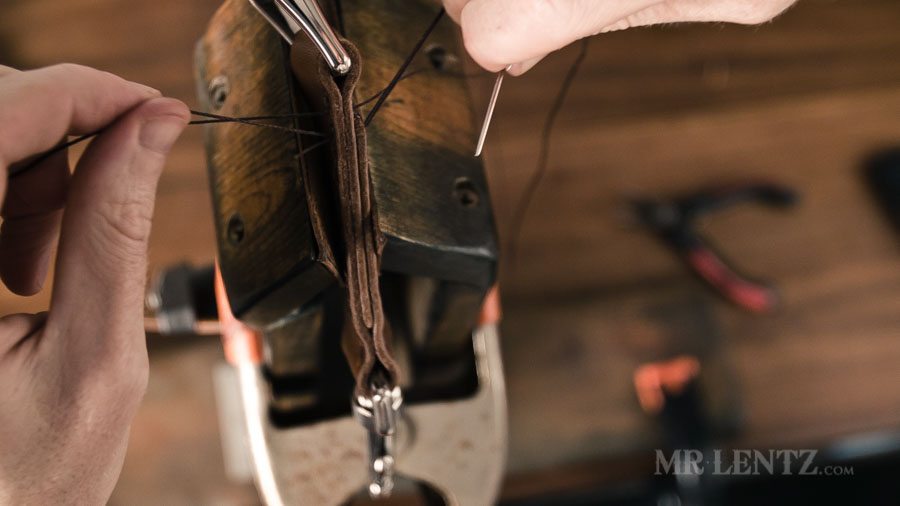
 To make a proper saddle stitch you will need two leather needles (they have rounded ends), that are threaded on either end of one piece of waxed thread. Stick the thread through the eye of the needle. I used about 2 feet of thread for one side of stitches.
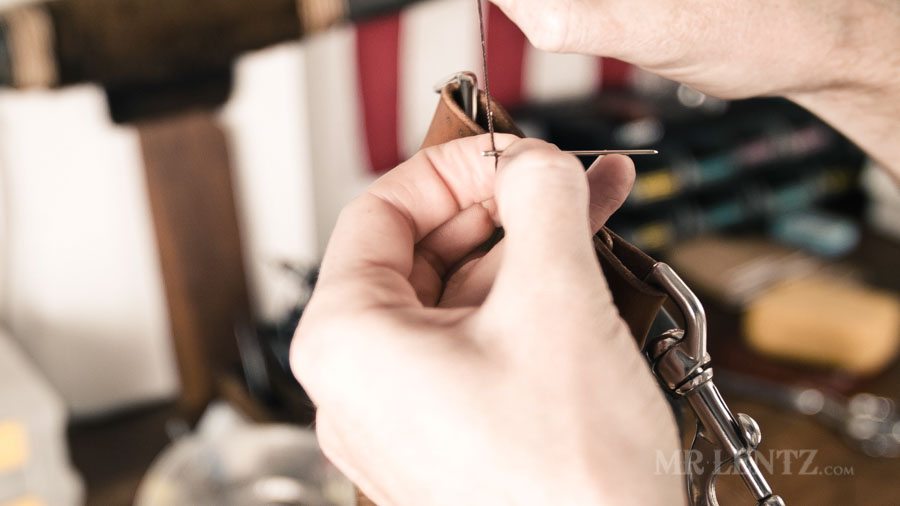
 Then with the pointy end of the needle, push it through the thread, piercing it.
 Then pull the thread so it locks back down towards the eye. This method makes it easy for the thread to pass through the punched holes in the leather without getting stuck. Go ahead and do the same with the second needle to the other end of the thread.
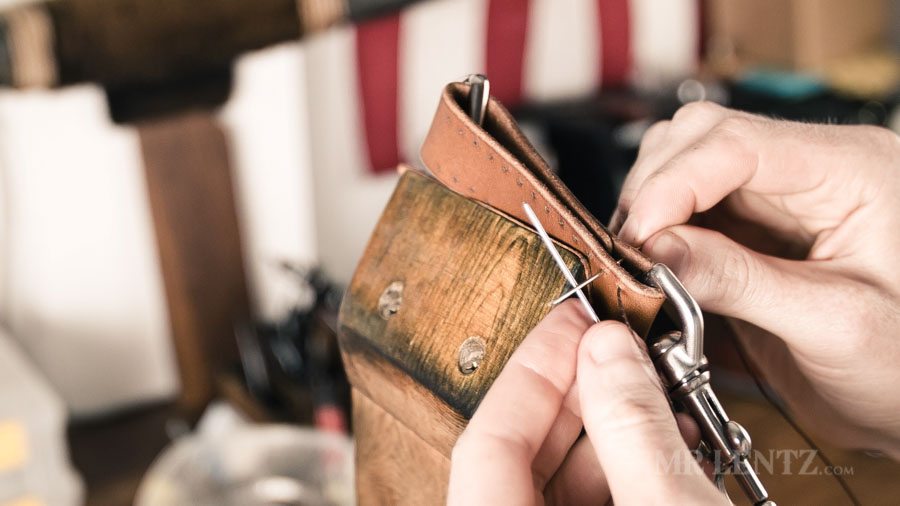
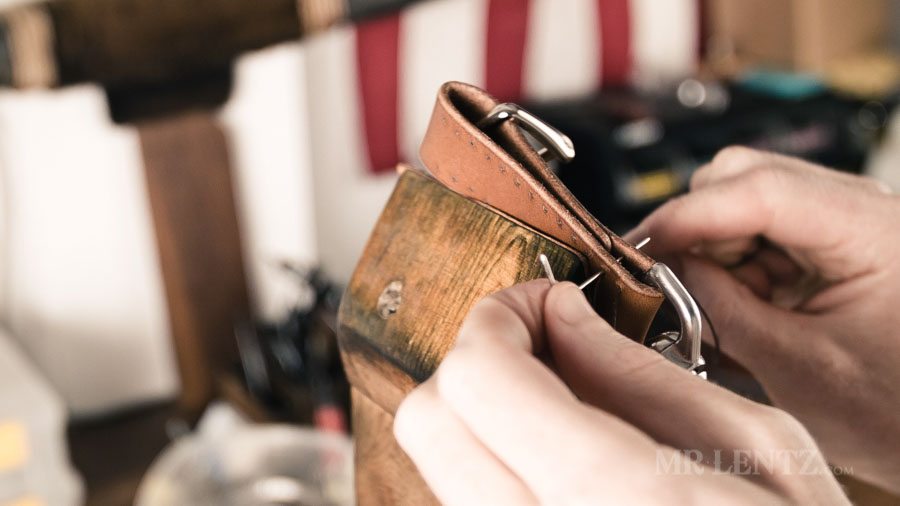
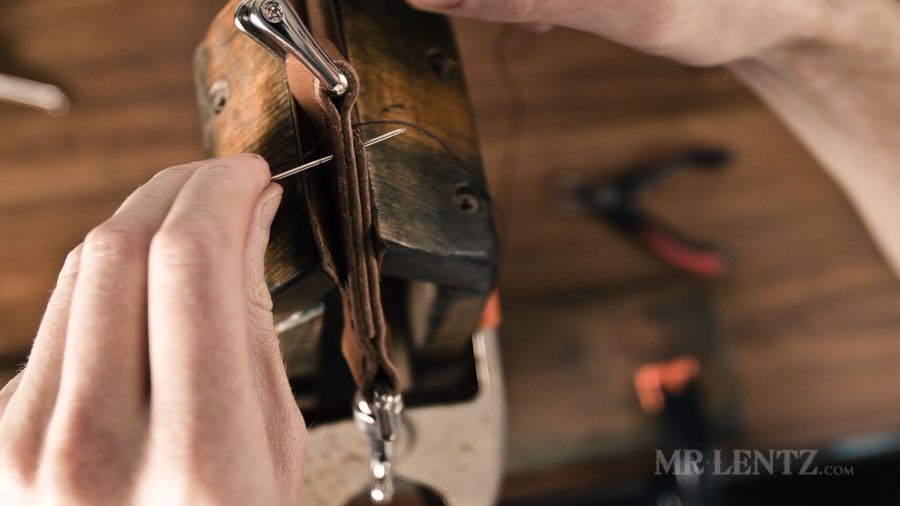
 For stitching, I always start the stitch on the right side of the piece. Here I push the needle through the first holes.
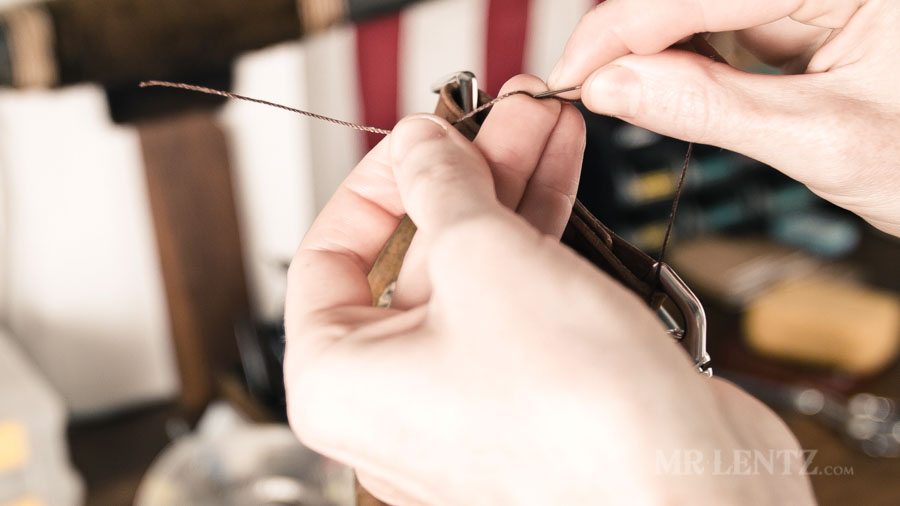
 Pull the thread all the way through so that on each side of the leather keychain you have equal amounts of thread to begin with.
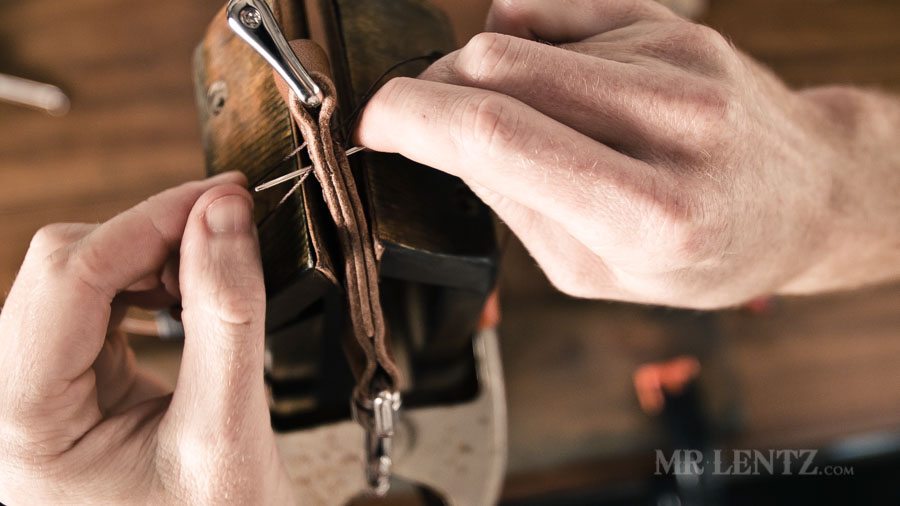
 Next I again pass the needle through the right side, the needle on the left should be underneath the needle passing through. At this point I highly recommend watching the video as it can be hard to put these actions into words.
 Pull the thread partly through.
 Grip the thread on both sides and pull at an angle downward.
 Pass the second needle through the hole while the thread is angled. This helps prevent you from piercing the thread in the hole, which will freeze up your stitching.

 As the second needle is partially through, wrap the thread on the right over the top of it.
 The pull both threads outward to tighten the stitch. Repeat this over and over until you get to the end of the first side. Make sure to watch the video as it will make more sense.
 Once at the end, you then will want to make 2 or three stitches in reverse. This can be hard for the beginner, so just try to breathe, then imagine every motion as the opposite. Starting with the needle on the left for the first backward stitch. Reverse Stitches @ 20:09
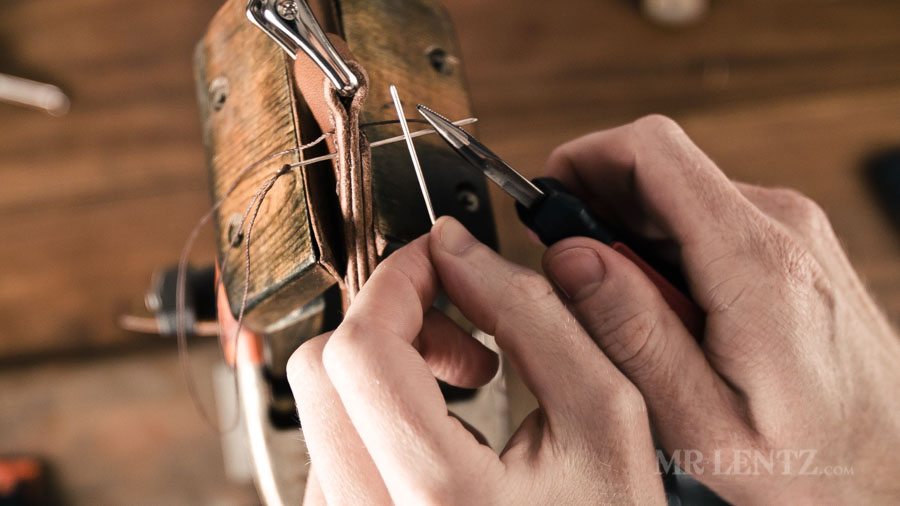 The needle on the right would go on top of the needle passing through (see backwards). I also had to use a small pair of pliers to help the needle make it through the holes since things were getting tight.
 Here I am angling the thread upwards.
 And I pass the other needle through the same hole, making sure to wrap the thread over the top of the needle.
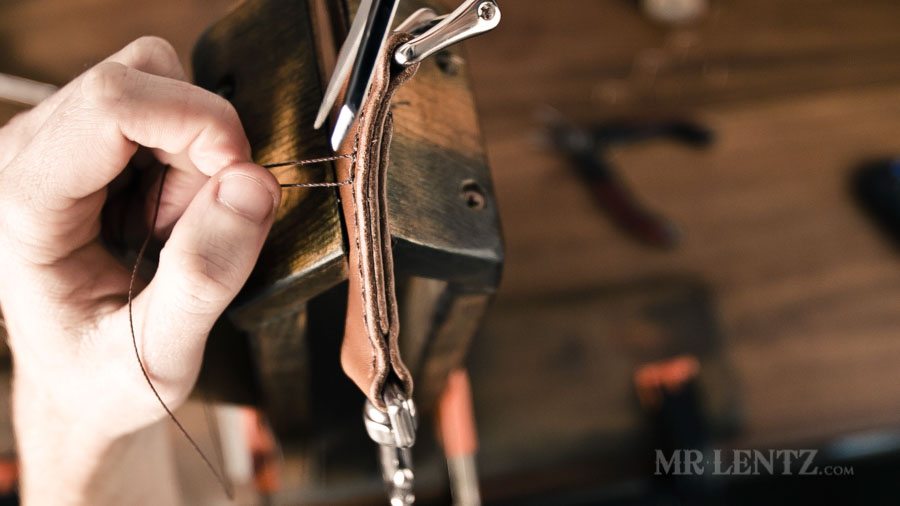 After a few of these I pass the needle on the right hand side of the leather back through the next hole. I do this so that my thread ends are on the same side of the leather when I finish. In this case they are both on the back side. I then tied a small knot around one of the stitches to help hold the thread in place. I then cut the thread with the scissors with about 1/4 inch left sticking out.
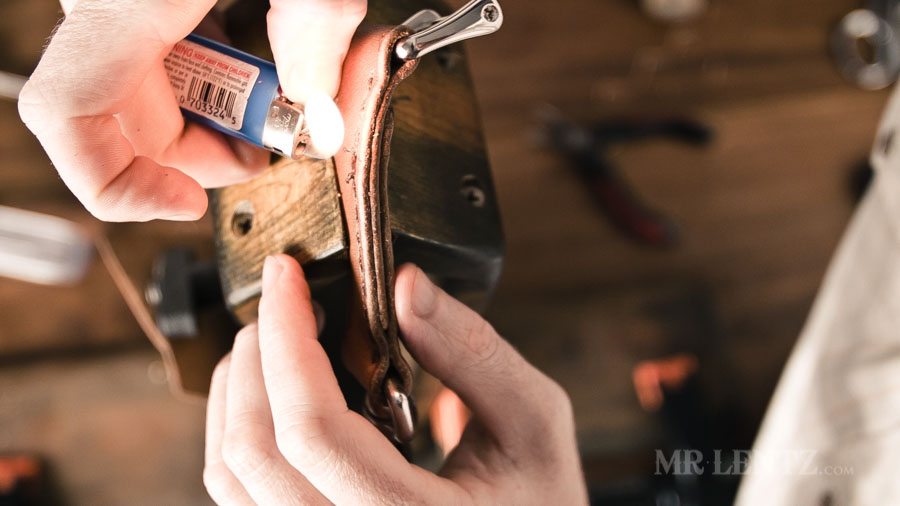 Taking a lighter I am careful to only let the heat melt the ends of the thread and push the melted tips back down.
 That completes one side of stitching, just repeat on the other side, piece of cake right? It really is, once you get the hang of the saddle stitch. My fingers basically do it by muscle memory at this point and I can stitch up the side of this keychain in a minute or two. I have another tutorial on the blog about how to make a leather wallet, in that DIY I show the details of how to saddle stitch – so check it out if you have time!
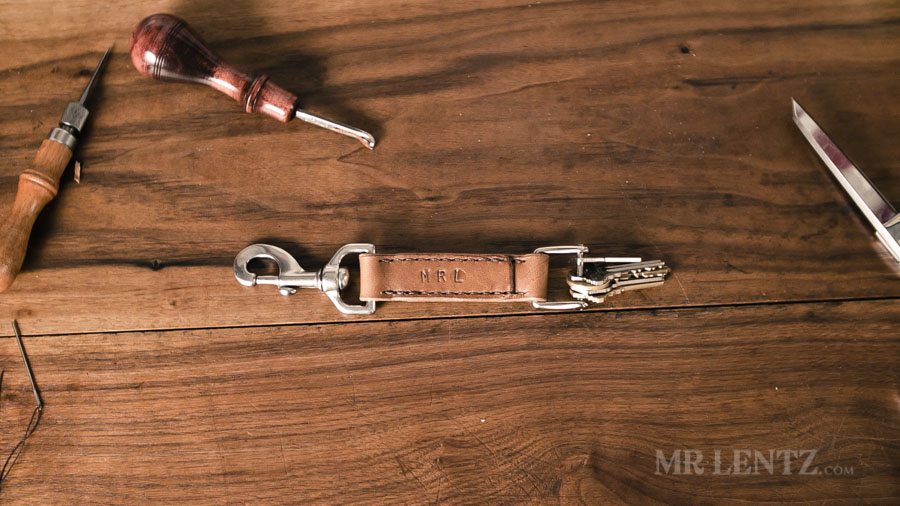
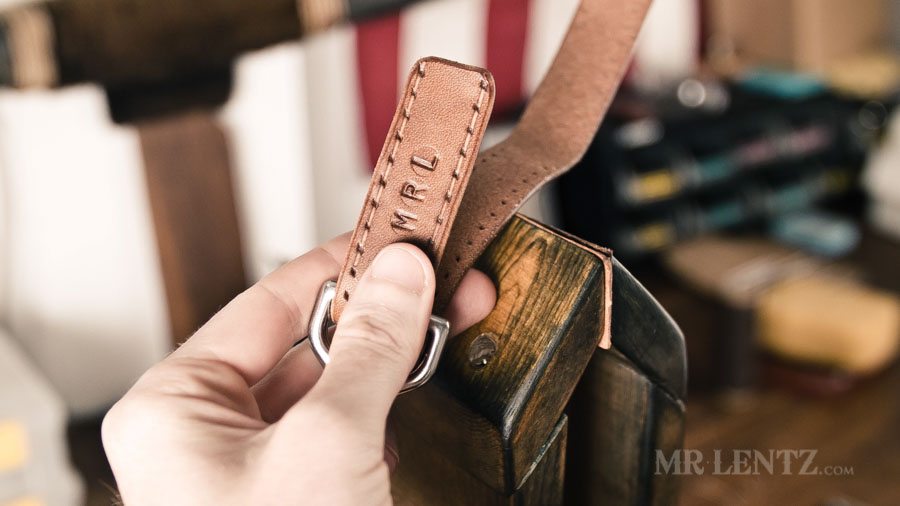
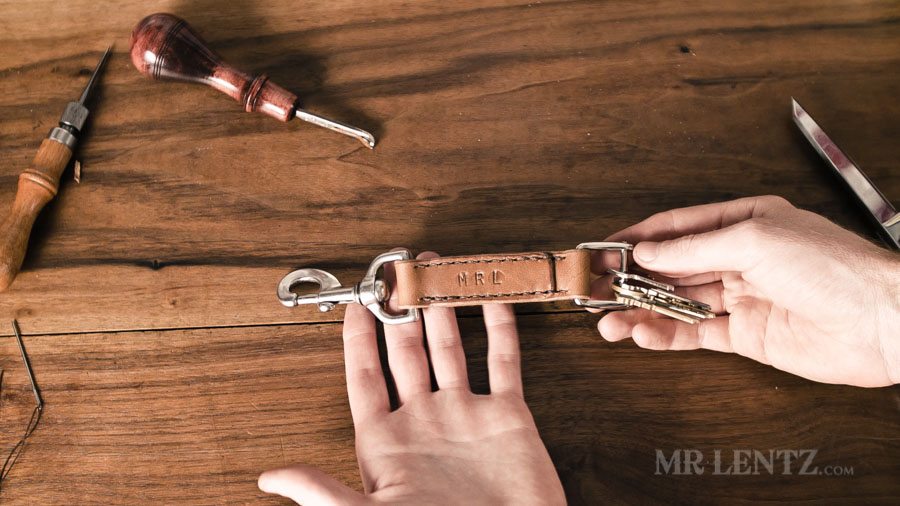 Well, there you have it, a fully stitched leather keychain. This would make a great gift for your loved ones and I highly encourage making the gifts that you give people if you have the time. It’s actually what I do with my girlfriend each year, here’s a how to on making a wood cutting board. That gift went over pretty well and we still use it today! Also – if you read through this tutorial, but don’t quite have the tools or time, I am happy to make a similar leather keychain for you. Well, I hope y’all have a happy holiday and a wonderful new year! I am looking forward to making quite a few new tutorials over the next few months, so stick around!
If you have any questions about how to make this leather keychain, please leave your comment below and I will get back to you as soon as possible.
READER'S FAVORITESVIEW ALL


Always love your video’s because of the detail you provide. The camera angle directly over the stitching pony showing the exact view that the maker sees while sewing is GREAT! I don’t think I have ever seen a stitching demo from that angle before. I’m sure it was difficult for you to film it that way, but it was extremely helpful, and I appreciate the extra effort so much. Thank you.
Thanks Shirley! You know – that’s what always annoyed me about other sewing videos, an odd angle that is hard to interpret! That’s exactly why I set my camera up where I would normally stand…of course it sure did involve an interesting game of Twister to work around it.
Nice tutorial, the camera angle from the worker’s viewpoint is great.
Do you have any links for that hardware I cannot find them at all in the UK
Thanks Ed – all kinds of snap hooks and keychain loops can be found at many online retailers. It’s more subjective of a choice. Cheers!
Hey Mr. Lentz, thanks for the detailed tutorial 🙂
I am an amateur in making leather product, having only simple tools. I was thinking, is there any other way to get around burnishing without having the drill press and cocobolo wood?
Hi Vivian, yes – you can use any type of hand burnisher available from leather craft shops. It takes a bit more time and sweat, but it will work. The hand burnishers are made of many types of wood. You can use that first, then use a tough pair of jean material or canvas to help slick it even further.